Knowledge Base
Importing Articles
You may be migrating to Acquire from another Knowledge Base. Acquire provides a way to import articles no matter which platform you’re coming from. Simply paste your information, use the web scraping tool, or upload a CSV and have your Knowledge Base up and running in a matter of minutes.
In this article:
- Importing Articles Via Integrations
- Uploading a CSV
Importing Articles Via Integrations
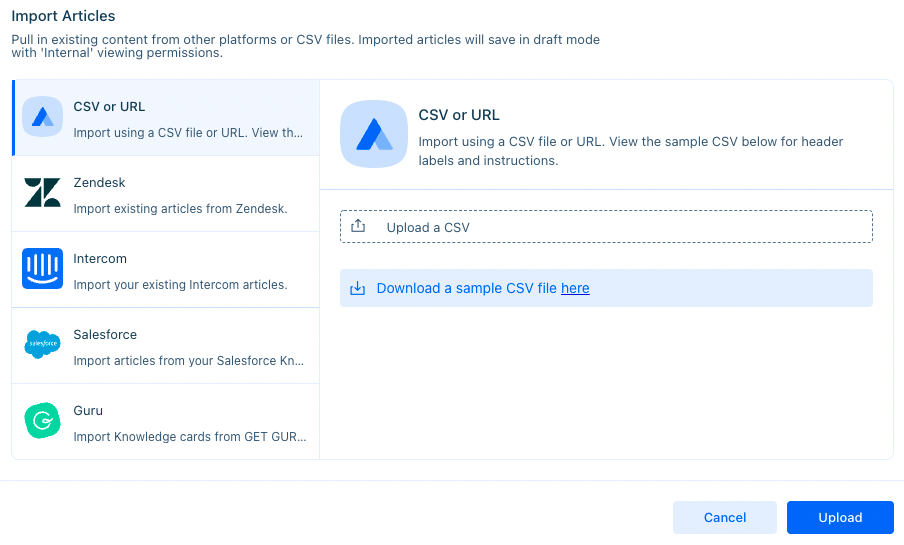
Acquire integrates with a variety of other Knowledge Base platforms. To begin integrating the articles, go to Acquire's Knowledge Base and click on the drop-down menu on the ‘Add Article’ button to open the upload menu. You may need to confirm integrations via the App Store before importing the third-party articles.

Click on an integration to learn more:
Salesforce After integration, you may click on ‘Fetch Article’ to import public articles from your Salesforce account.
Please note that importing articles from Intercom requires support from our team, as well as an Intercom ‘Account UID’ and ‘Help URL’. Submit your requests to support@acquire.io.
All uploaded articles will be set to ‘Draft’ mode. To quickly publish all of them, click on the ‘action’ (lighting bolt) button and select ‘Publish All’. Please note that this action will publish all of the articles, including any previous ones set to draft mode. You may publish selected articles by selecting them individually and using the ‘action’ button to ‘Publish Selected’.
Uploading a CSV
Even if you’re using a Knowledge Base not currently supported by other import methods, you can always upload a CSV file to import your articles.
Use the following headers in your CSV file:
- Title: The title of the article(s). Required.
- Description: The description of the article(s).
- Content: The article content. Formatting should be in HTML format.
- Category: The category for the article. If not yet in the Knowledge Base, it will be added as a new category.
- Tags: The tags for the article, separated by commas.
- Access: Set the access level to internal, public, or protected.
Authorship will be attributed to the uploader.
To upload, go to the Knowledge Base and open the upload menu by clicking on the ‘Add Article’ drop-down button and selecting ‘Import Articles’.
Click on ‘Upload CSV’ to upload the articles.
All uploaded articles will be set to ‘Draft’ mode. To quickly publish all of them, click on the ‘action’ (lighting bolt) button and select ‘Publish All’. Please note that this action will publish all of the articles, including any previous ones set to draft mode. You may publish selected articles by selecting them and using the ‘action’ button to ‘Publish Selected’.
Your Knowledge Base is now ready!
Learn more about writing and publishing in our Knowledge Base.
Was this article helpful?


