Integrations
Zendesk
We're taking a deeper look at some of our integrations, including this one. In the meantime, some of the functionality described here may not work as expected. Thank you for your patience.
Create, manage, and update contacts and tickets in Zendesk right from your Acquire dashboard. Once installed, you’ll be able to create and sync contacts from Acquire and send tickets to Zendesk.
In this article:
- Connecting Your Zendesk Instance to Acquire
- Syncing Contacts & Tickets
- Editing and Uninstalling Zendesk
What you’ll need:
- A Zendesk account with Administrator privileges
Connecting Your Zendesk Instance to Acquire
Navigate to the App Store > CRM and click 'Install App' under Zendesk. In the popup, click 'Install'. On the following screen, read the permissions and click 'Authorize Access'.
You will need:
- Your Zendesk Subdomain - This is the segment that appears before zendesk.com. http://{{yoursubdomain}}.zendesk.com
- Zendesk Email - The administrator’s email address.
- Zendesk API Key - Create a new key in Admin > Channels > API.
- Zendesk Ticket Subject - Optional. Name the Zendesk tickets.
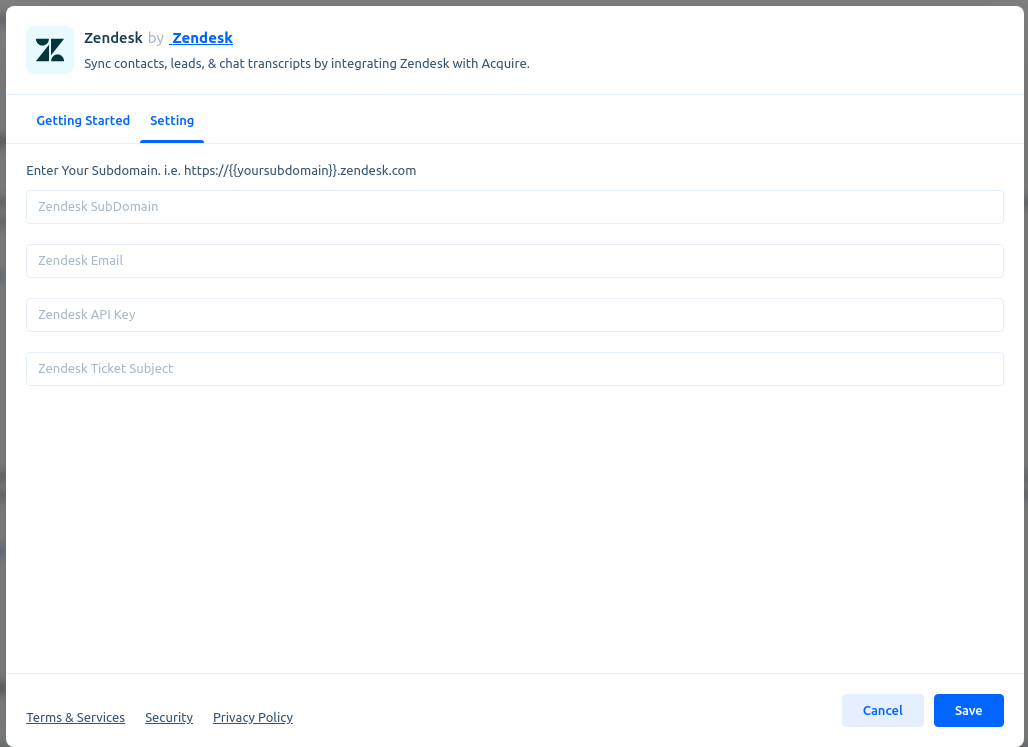
Input your credentials and press ‘Save’.
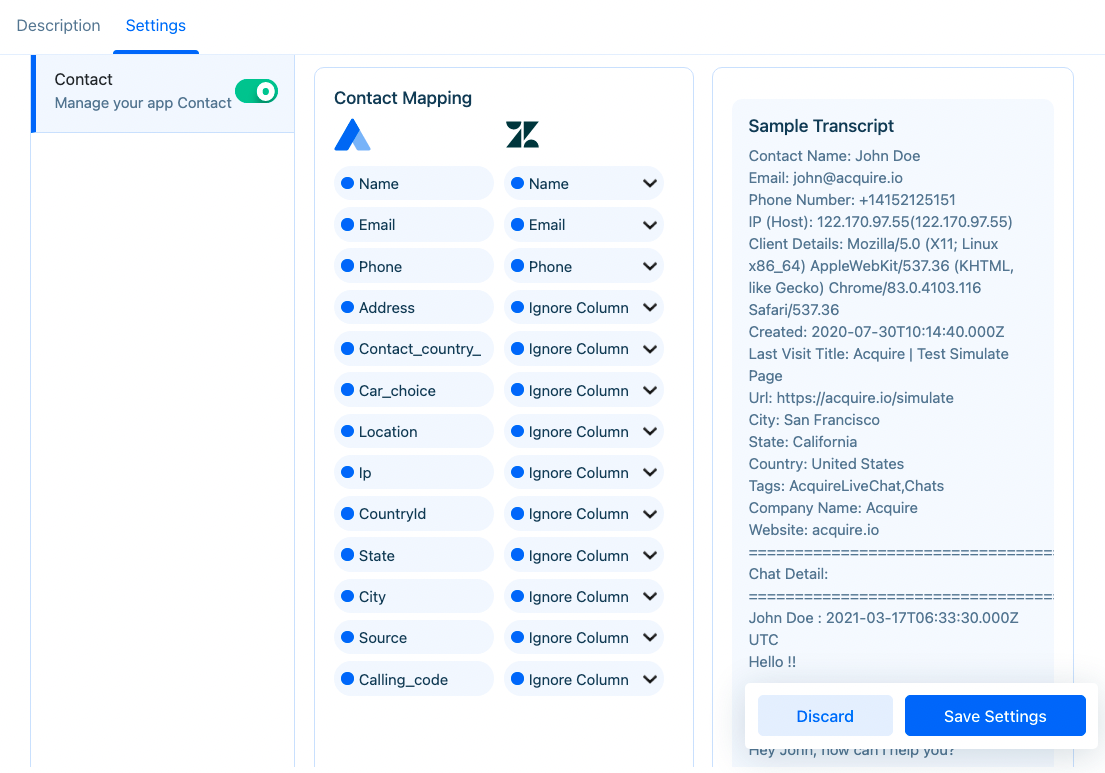
Map fields within Acquire and Zendesk. Name, email, and phone should already be mapped.
Save the settings. The Zendesk tile should now have an ‘Already Installed’ label on it. If the installation was unsuccessful, try uninstalling and reinstalling again.
Syncing Contacts & Tickets
On the Dashboard, you’ll see the Zendesk icon appear in the contact profile pane. Click on the tab to be brought to the Zendesk sync form.
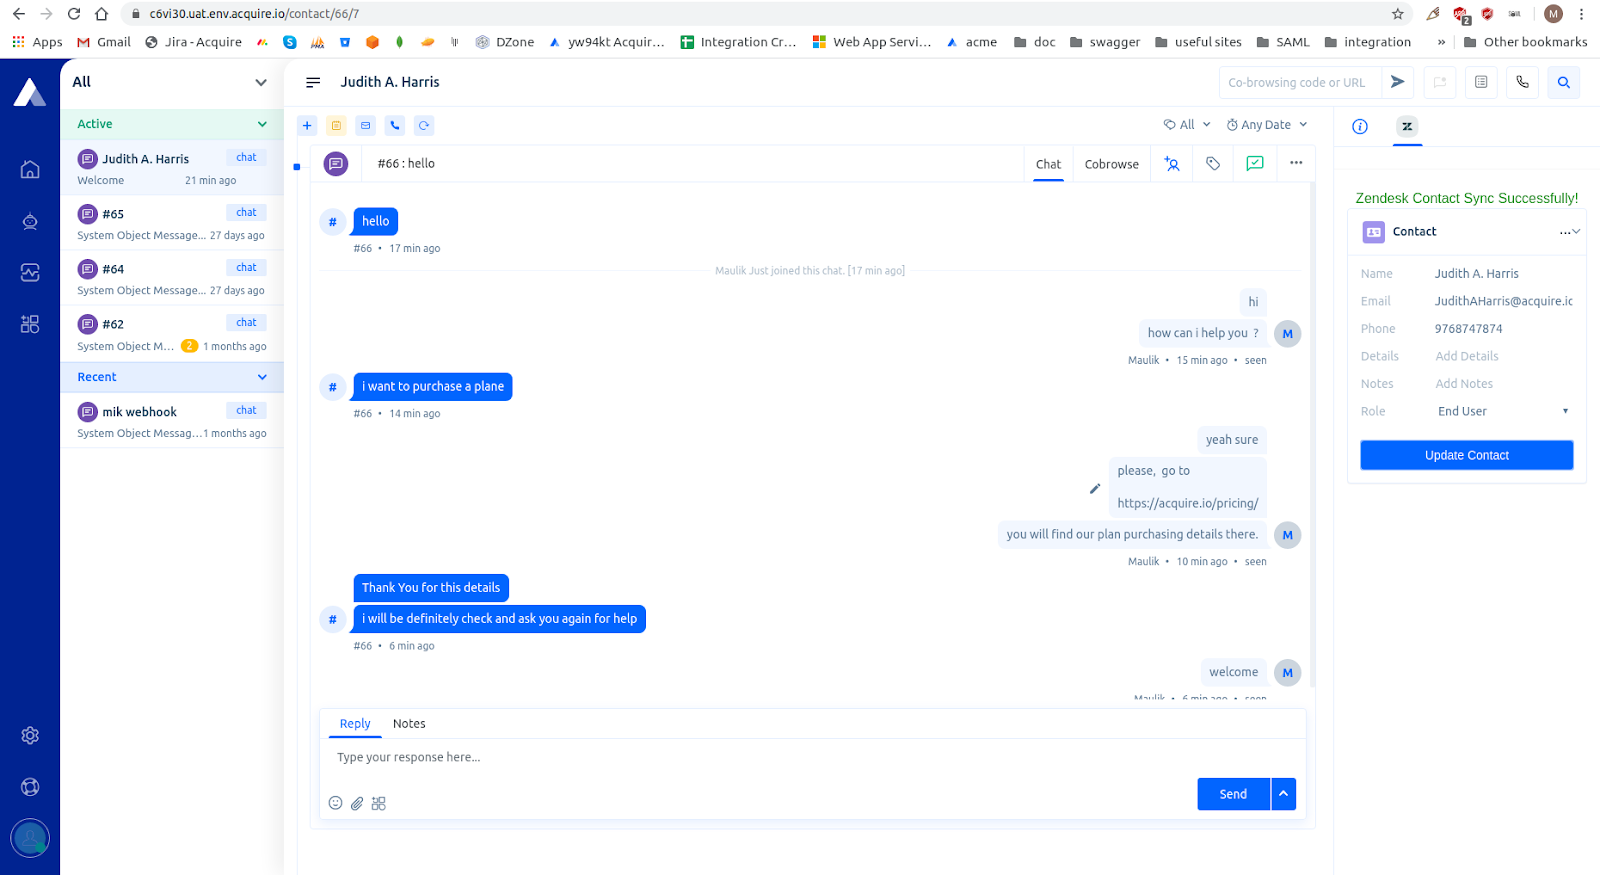
In this form, you may add details about the contact. Once you’ve added the details (name and email are required) press ‘Create Contact’ to sync the contact into Zendesk.
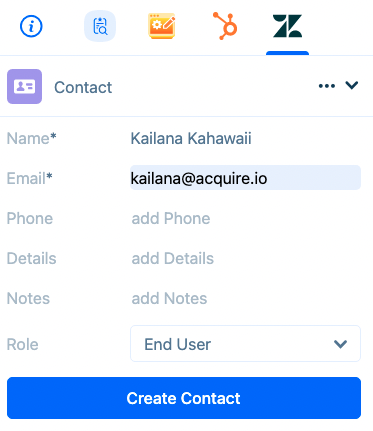
You may also assign the visitor's role, such as ‘End User’, ‘Agent’, or ‘Administrator’.
Once the contact is synced to Zendesk, you may create tickets.
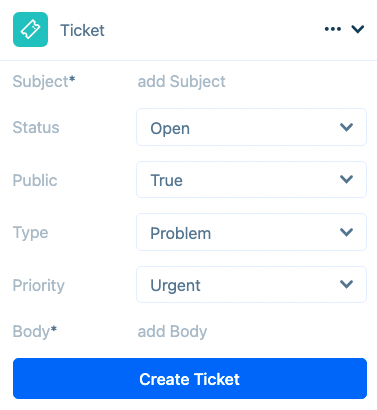
Once you press ‘Create Ticket’, you’ll be able to see the ticket within Zendesk. You may need to refresh the ticket to see it.
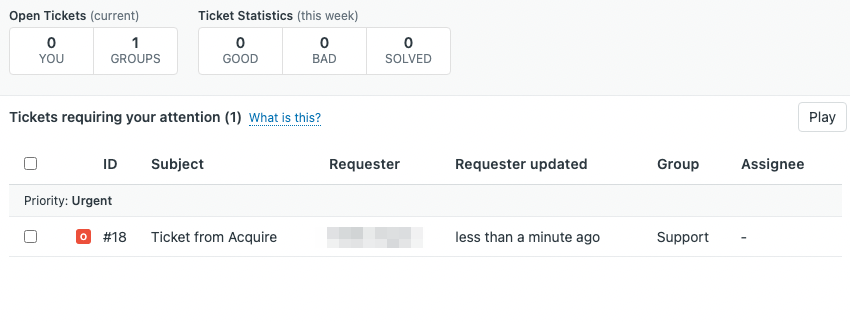
You’ll be able to view the ticket in Zendesk. The Requester will be the administrator who set up the integration.
Data is also synced when an interaction in Acquire is closed.
Verify your integration is working correctly by adding a contact through Acquire and then searching for that contact in Zendesk. If the information appears in the right fields, your integration was successful.
Editing and Uninstalling Zendesk
Need to make changes to the block text? Go to the App Store and click on the three dots (‘...’) on the Zendesk tile and select ‘Edit’. You’ll be able to make changes to your field mapping.
Need to uninstall? Go to the App Store and click on the three dots (‘...’) on the Zendesk tile and select ‘Uninstall’. The application will be Zendesk.
Was this article helpful?


