Knowledge Base
Writing, Editing, & Publishing Knowledge Base Articles
Learn how to create articles for your Knowledge Base, format them so they’re easy to read, and publish them live on your domain.
In this article:
- Adding New Articles
- Publishing Articles
- Reviewing and Editing Articles
Adding New Articles
Head to the Knowledge Base you’ll be adding a new article to and click the ‘Add New Article’ button to open the editor.
Enter the title and a short description. In some themes, the short description will not appear. Edit your theme to hide or show the text.
Next, enter your article text. You can apply formatting, upload images, and include code snippets like any typical text editor. You can find all the formatting options in the toolbar:
Once your article is formatted the way you’d like, it’s time to publish.
Publishing Articles
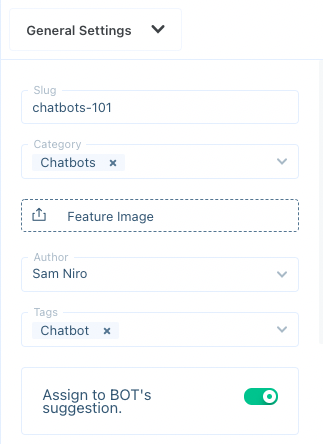
General Settings
Before you click ‘Publish’, you’ll want to fill out the 'General Settings'. Add a category, assign an author, and upload an optional feature image.

If you want your Conversational Bot to suggest articles from your Knowledge Base, tag the article and switch 'Assign to BOT's suggestion' to active(green) in Chatbot > Configurations. Learn more about Conversational Bot Settings in Setting Actions and Phrases in Chatbot Configurations→

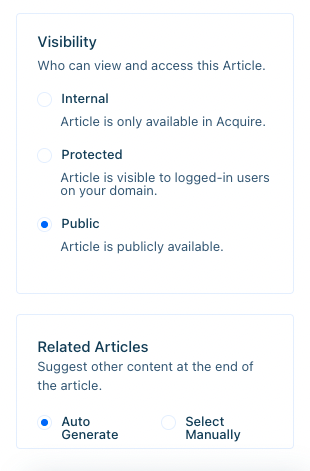
In Visibility, select who sees the articles:
- Internal means only other team members can view the article
- Protected requires your users to be logged in to view the article
- Public means the article is readily available on the internet
In Related Articles, choose whether related articles are automatically or manually generated. If you select manual, use the drop down to choose the articles to show.
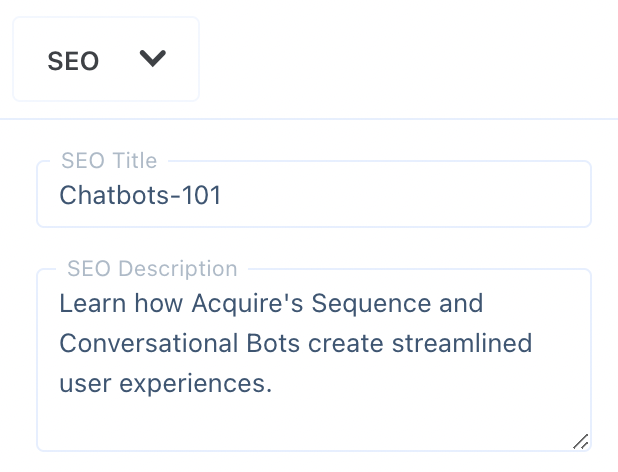
SEO
To edit an SEO title and description, click on the the dropdown menu and select 'SEO'.

Now you’re ready to click ‘Publish’. Once you’ve published the article, it will appear live on the Knowledge Base.
Reviewing and Editing Articles
It’s always helpful to have another set of eyes review an article before publishing. Simply ‘Save as Draft’ instead of clicking ‘Publish’ if you need to have an article reviewed. The reviewer can then click the three dots (‘...’) and click ‘Edit Article’ or double click the article title to open the editor.
They can then make any changes necessary and publish the article.

Note: Only the article creator and admins can delete articles. You will not be able to delete an article by another user.
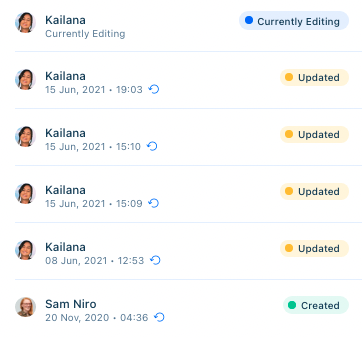
Articles often need reviewing later down the road or require updating. To see when the last update was made, open the article editor and click on ‘Activity Logs’. In 'Activity Logs', press the reload button and you'll be able to revert back to previous versions of the article.
Was this article helpful?


1 Comments
Julien Leroy
Date :
I need more detailed information on "Visibility".