Knowledge Base
Getting Started with the Knowledge Base
Make self-service support easy with Acquire Knowledge Base. Write, organize, and host articles in the same platform where you interact with visitors. Create a custom domain, link it to your Chat Widget, and make it easy for operators to send helpful resources to visitors.
In this article:
- Knowledge Base Basics
- Setting Up a Knowledge Base
- Importing Articles
Knowledge Base Basics
Before you get started building your Knowledge Base, here are some need-to-knows:
Structure

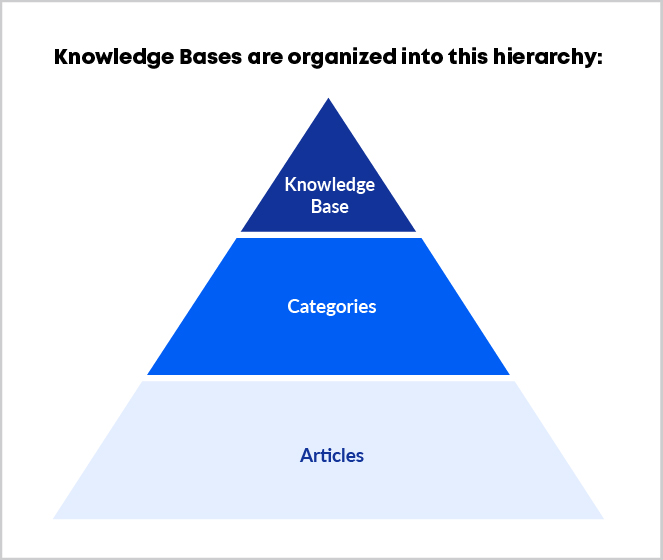
Knowledge Bases live on separate domains and can help you support different languages, regions, audiences, products, and more.
Categories are the sections within Knowledge Bases where you’ll organize articles. For an article to show up when published, it has to be assigned a category. Examples of categories include “Getting Started”, “FAQs”, “Order Information”, and “Integrations”.
Articles are the content containing setup and installation information, technical notes, or help topics.
Appearance
Customize the look and feel of your Knowledge Base using themes. All accounts come with a default theme that can be modified using the visual editor and/or custom CSS.
The visual editor makes it easy to swap, add, remove, and style text and images.
User Permissions
Decide which Acquire users will be able to contribute to your Knowledge Base by setting permissions for their user role. By default, users cannot delete any article they did not write unless they are an Administrator. You may also limit who can create categories. This way you can keep things organized the way you see fit.
Accessing Articles
Control the access level of each article using the Status. Published makes articles public to everyone. Internal means only Acquire users can view the article.
Additionally, there are multiple ways to access a Knowledge Base article. They include:
- By visiting the Knowledge Base URL directly
- Using the Article Search Widget App (Visitors)
- Using the Article Inserter Widget App (Users)
- Programming an article into a Chatbot response
- Navigating in Acquire to Knowledge Base
Setting Up a Knowledge Base
In Acquire, click on the Knowledge Base icon
in the left navigation. Next, click ‘Add Knowledge Base’. Name your knowledge base, select the default language, and add your custom domain.
Custom Domains
Acquire will provide a default URL for your knowledge base. It will look something like this: https://[yourcompanyname].acquire.io/kb/[kb-name]
You can change this using a Custom Domain URL to assure your visitors that they’re in the right place. Be sure to create the subdomain on your web host before adding it to Acquire.
Click ‘Save and Next’ to create the knowledge base. On the next screen, you’ll edit the appearance.
Add & Customize a Theme
Select a theme for your knowledge base. Themes can be added in Settings > Installation and Setup > Knowledge Base Setup.
Hover over a theme and click ‘Edit’ to open the visual editor. Here you can make changes to the font size and styling, background, category cards, and more. For advanced editing, use custom CSS.
Importing Articles
Have an existing knowledge base you want to import into Acquire? All it takes is a few clicks.
In the group you’d like to add articles to, use the dropdown caret next to ‘Add New Article’ to open and select ‘Import Articles’.
Next, choose where you’ll import articles from. We currently support CSV, Zendesk, Intercom, Guru, and Salesforce. Here are the next steps for each option:
CSV: Format your columns to Title | Description | Content, then upload to Acquire.
Zendesk: Add the account subdomain e.g. acme.zendesk.com, the account admin email address, and the API key generated in Zendesk. Select the language and click ‘Import’ to pull in the articles.
Intercom: Submit a request through Acquire by emailing support@acquire.io. Include your Intercom account UID and Help URL. This process will be completed within a few business days.
Guru: Enter your account email and User API Token, then click 'Import Article'.
Salesforce: The standard Salesforce and Acquire integration needs to be completed before you can import articles. When that is complete, in Import Articles > Salesforce click the ‘Fetch’ button to grab articles.
Once imported, review each article to check for formatting, then publish them live.
Note: All imported articles will come into Acquire in Draft mode.
Was this article helpful?


