Installation and Setup
Adding and Managing Users, Roles, and Skills
Creating exceptional customer experiences starts with your people. Set them up for success by adding them to Acquire and providing them with the correct permissions to succeed in their roles.
In this article:
- Adding New Users
- Adding Skills
- Choosing Roles and Permissions
- Adding Users to Departments
Adding New Users
Here’s how to invite your teammates to Acquire:
Adding a Single New User
Head to Settings > Account Settings > Users, Roles, and Skills, then click the ‘Create User’ button.
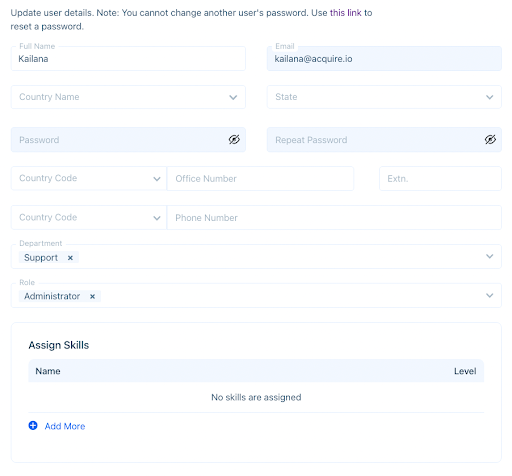
You’ll need enter a few required fields:
- Full Name — This name will appear on the platform and to visitors.
- Email — Acquire will send the sign up email to this address.
- Password — Create a temporary password. The new user may change this later by clicking on the link at the top.
- Role — Indicate the role that the user will have.
Additionally, you may add these fields:
- Country
- State
- Department
- Office Number
- Phone Number
- Skills
Note: Great temporary password practices include using a unique password for every user, and using a mix of uppercase, lowercase, numbers, and special characters.
Click ‘Add User’ and voila! Their account is ready to go.
Adding Multiple New Users
Chances are, you have employee information stored somewhere. To quickly add users, use the Import Users option. You'll need to convert the file to a CSV and input the required fields (see CSV example below).
To add multiple users from a CSV file, click on the 'Create User' drop-down.

Then, select 'Import Users'.
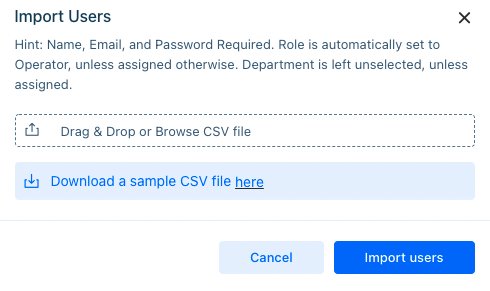
Upload the CSV file and press 'Import users'. Please note that 'name', 'email', and 'password' are required fields. You may also add 'role' (Administrator or Operator) and 'department'. If left blank, roles will be set to 'Operator'. Department will be left blank if not indicated.

Editing a User
At times, employee information changes. To edit a user's information, click on the three dots ('...') under the 'Action' heading. You'll be able to change everything about a user except their password. To change your password, go to Settings > Account Settings > Profiles and press the 'Change Password' button.
Performing Bulk Actions
You may also perform bulk actions using the lightning bolt (action) button. Select the users you'd like the action to be applied to. Then click on it to lightning bolt to:
- Delete Selected: Permanently deletes the users.
- Activate Selected: Sets the user's status to active. They will be notified of incoming conversations.
- Deactivate Selected: Sets the user's status to deactivated. They won't be notified of incoming conversations.

Be sure to take advantage of these productivity tools when managing many users.
Filtering Users
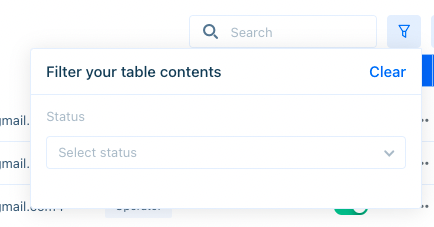
You may filter by active and inactive users. To do so, press the funnel icon and select a category. Only users that belong to that category will appear in the list. 'Clear' the category to return to the regular list.
Adding Skills
Do your agents excel at a certain skill? Group your agents by tags such as ‘Cobrowse Expert’, ‘Video Specialist’, and more.
To create a new skill, navigate to Settings > Account Settings > Users, Roles, and Skills and click on the ‘Manage Skills’ tab. Then, press the ‘Create Skill’ button.
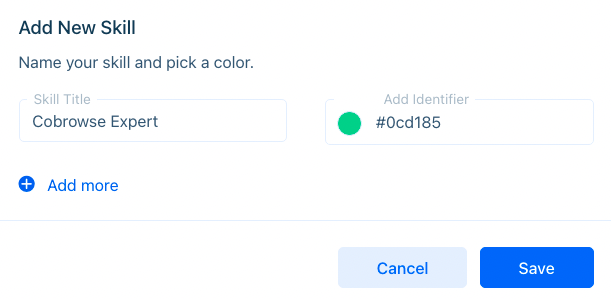
Name your skill and add an identifying color. Then press ‘Save’.
Adding a Skill to a User
To add a skill to a user, go to Settings > Users, Roles, and Skills and click on the user’s name.
In the Assign Skills section, click on ‘Add More’ and select the skill from the dropdown menu. Finally, rate the agent’s proficiency with that skill in the Level column.
Managing Skills
Need to edit or delete a skill? Go to Settings > Account Settings > Settings > Users, Roles, and Skills and click on the Skills tab. Then click on the three dots (‘...’) beneath the ‘Action’ heading and choose ‘Edit’ or ‘Delete’.
Roles & Permissions
Note: Out-of-the-box, Acquire provides two roles: Operator and Administrator. Operators have restricted access to Acquire while Administrators have access to the entire platform.
Creating New Roles
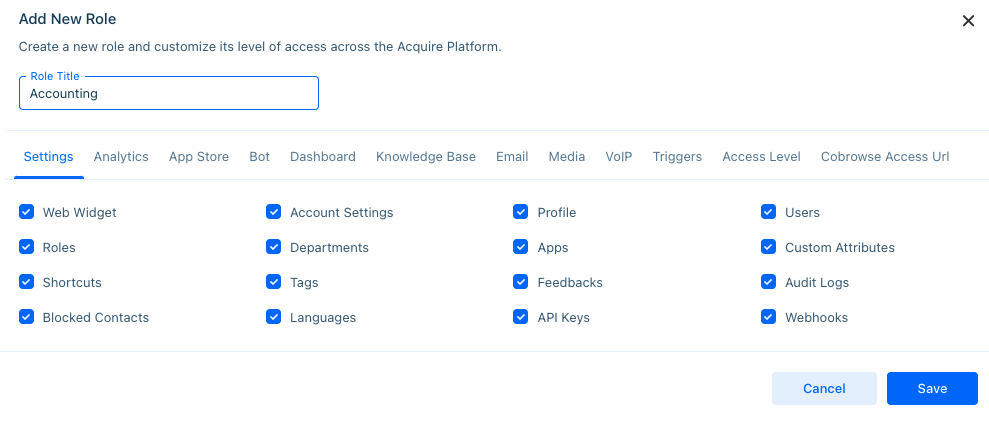
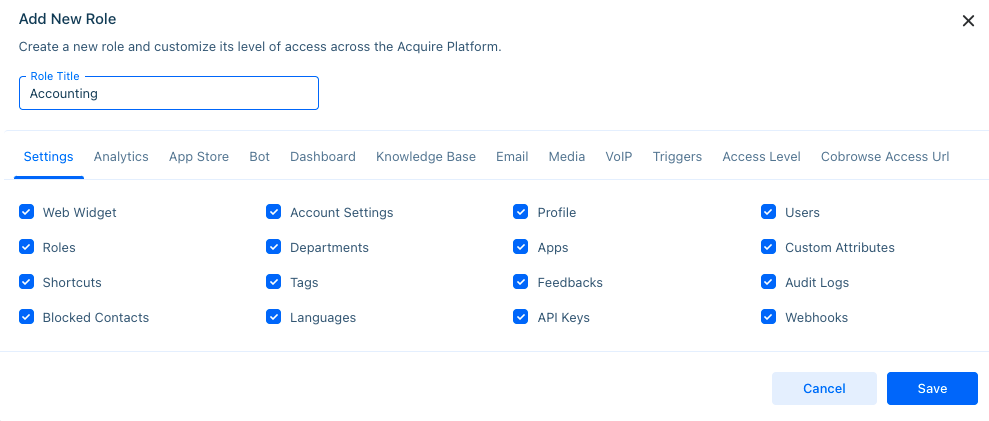
To create a new role, go to Settings > Account Settings > Manage Roles and click on ‘Add Role’.
Select the features you want users to manipulate. Press save when you’ve completed your changes.
Editing Roles
When you're just getting started, you'll likely want to customize Operator settings. Click the three dots ('...') to edit Operator permissions, access-level, and department.
Give the role a title like ‘Supervisor’ or ‘Trainer’. Then go through the different sections to allow (or not allow) them to:
- Change any settings globally on the account
- View analytics
- Build and modify chatbots
- Modify dashboard views
- Add, edit, and manage Knowledge Bases
- Configure and edit Shared Inboxes
- Edit VoIP settings
- Create and edit Business Rules
- Use different Web Widget features like video, voice, cobrowse and screen sharing
- Apply an access level (individual, department, account)
Performing Bulk Actions
Filtering Roles
You may filter by active and inactive roles by clicking on the filter button and selecting the status.
Adding Users to Departments
Users may be added to departments by going to Settings > Account Settings > Users, Roles, and Skills. Select a user and add the department by clicking on the dropdown ‘Department’ menu.
Learn more about creating departments in Managing Departments→
Do you have a unique use case that isn’t mentioned in this article? Reach out to us at support@acquire.io.
Was this article helpful?


