Dashboard
Navigating the Conversation Window & Timeline
Review a visitor or contact’s interaction and conversation history in the timeline. Once a visitor has a contact profile, their interactions will appear in a single timeline view.
In this article:
- Welcome to the Agent Home
- Opening a Contact’s Conversation Timeline
- Using the Timeline Toolbar
- Using the Conversation Toolbar
- Replying to Conversations
- Contact Profiles and Integration Tabs
- Searching and Filtering the Conversation List
- Viewing Live Analytics
Welcome to Agent Home
When you first open Acquire, you’ll see the Live Dashboard.
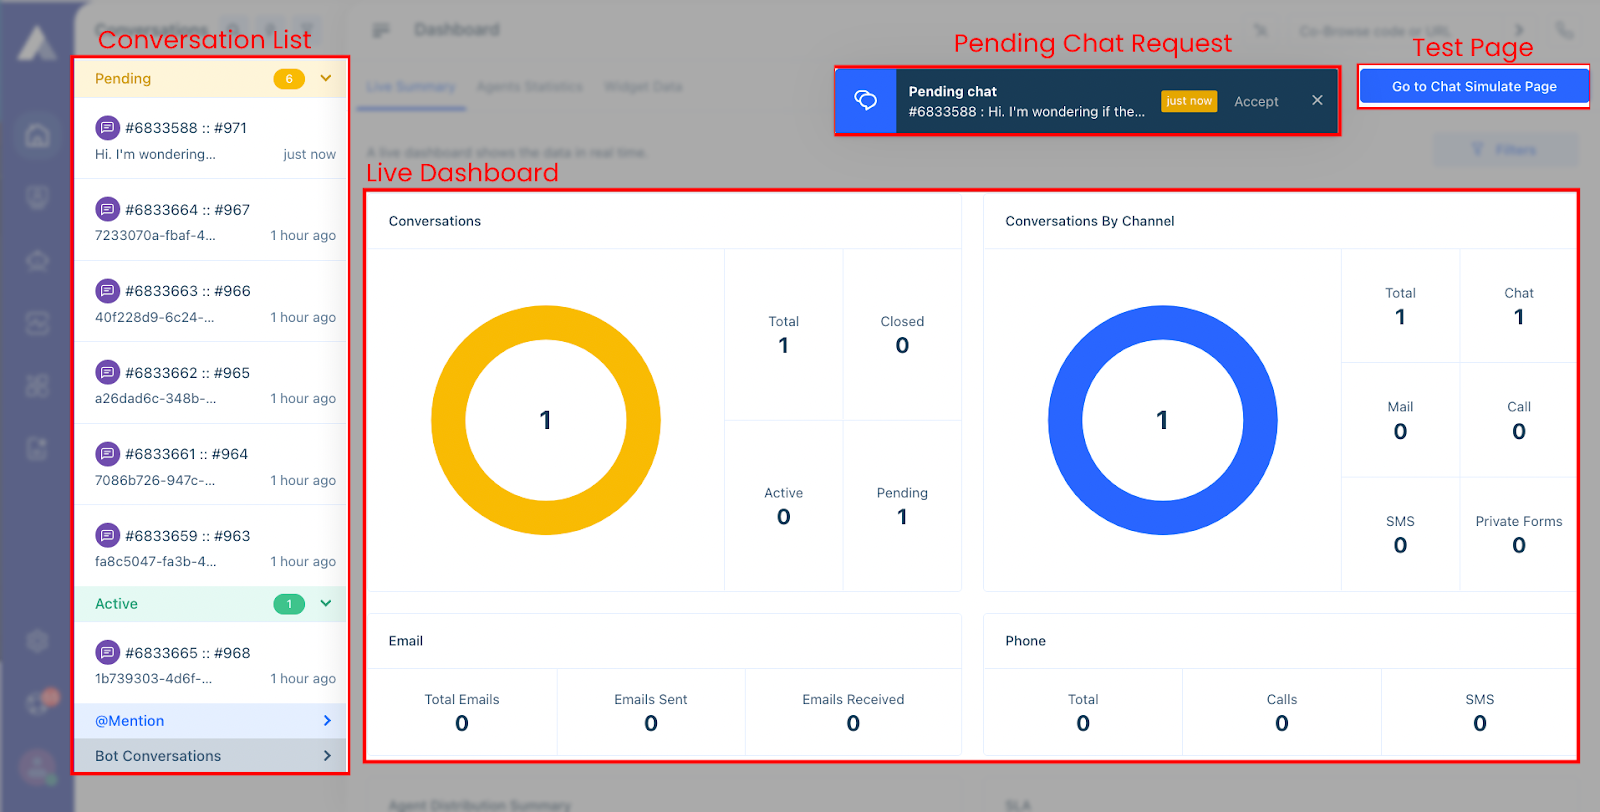
Let’s familiarize ourselves with this page.
- Conversation List - To the left, you’ll see the Conversation List with Pending, Active, and @mentions. Admins and those with the right permissions will also be able to see Bot Conversations. If a filter has been applied, agents will see New Conversations come in. Once the filter is removed, the items in New Conversations will move the Pending list.
- Live Dashboard - Your conversation analytics for the day.
- Pending Chat Request - When you have a conversation come in, you’ll see a notification appear.
- Test Page - Click this button to go to your test (simulate) page. Test widget functionality such as bots, Business Rules, and more.
Opening a Contact’s Conversation Timeline
Click on a case in the Conversation list to see the contact’s conversation timeline.
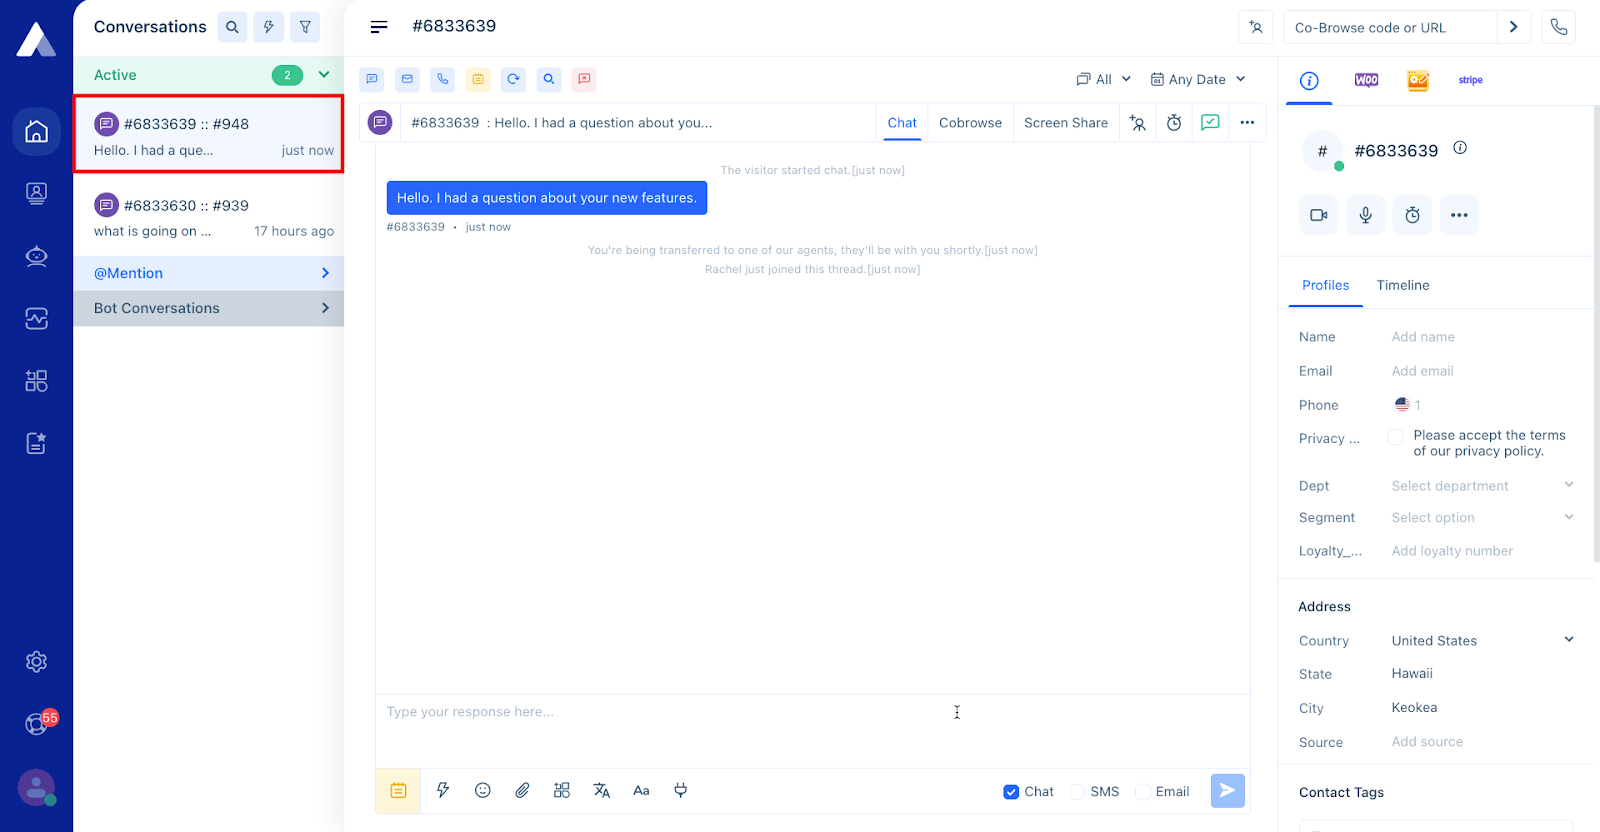
If this is a contact you've spoken to before, you'll be able to scroll down and view other conversations you and your team have had with them.
Using the Contact and Button Shortcut Section
The uppermost section of the Acquire Dashboard at the top of the screen contains information about the contact and useful buttons. To the left of the screen, you'll find the contact's name (if no name is listed, you'll find their I.D. instead).
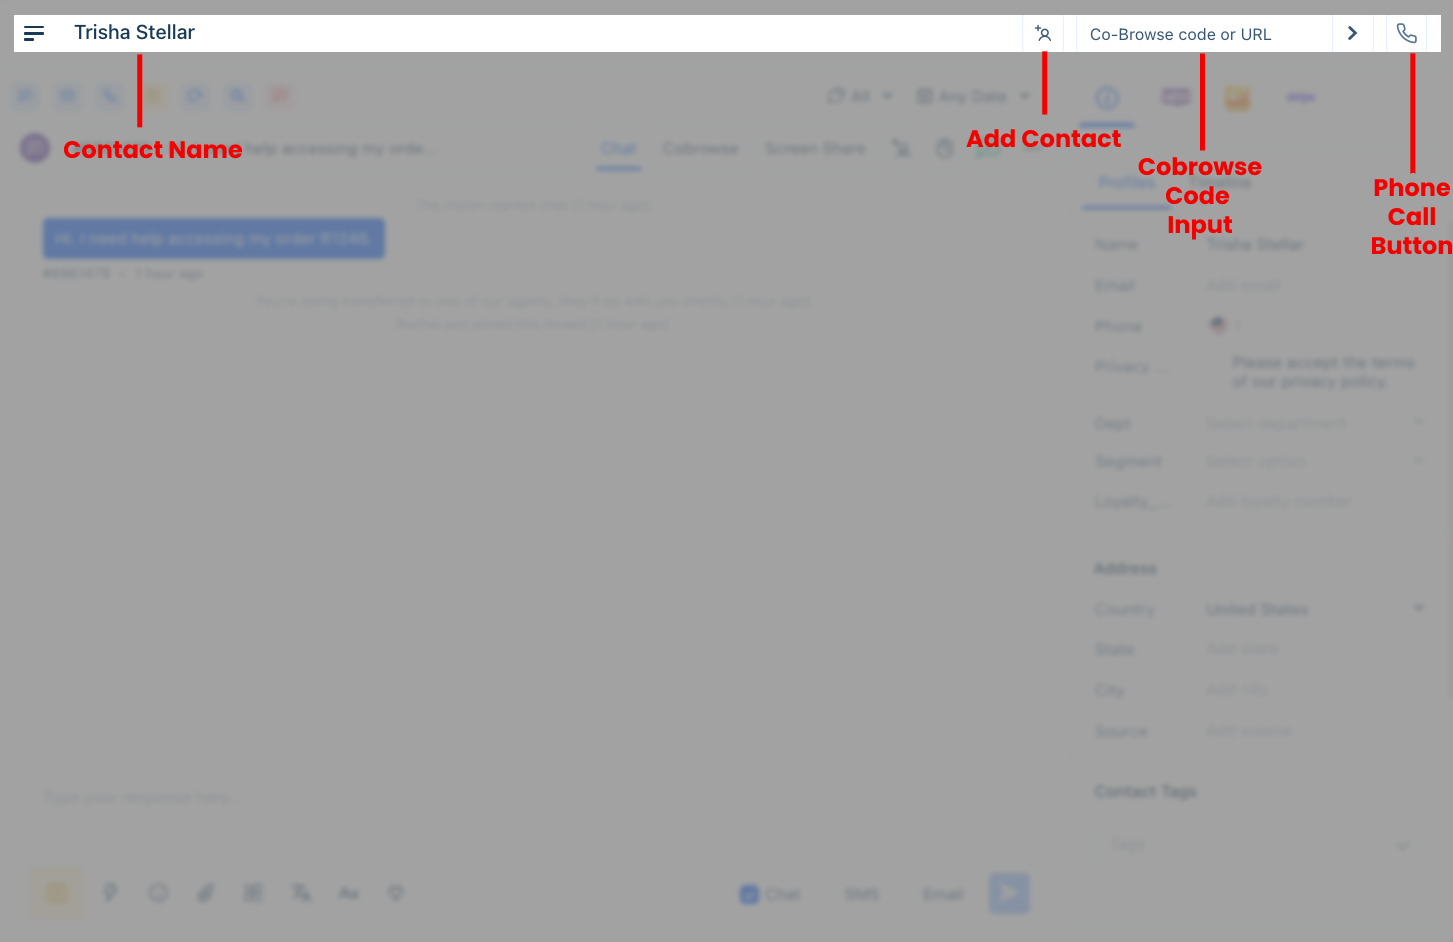
In this section, you'll find:
- the 'Contact Name' - displays a contact's name or their ID.
- the 'Add Contact' button - use this form to add a contact. New contacts will appear in your Contact List section.
- the cobrowse code input field - when a visitor shares a cobrowse code with you, paste the code into the field and then press the arrow button to start a cobrowsing session.
- the phone button - to conduct an audio call, view the call history, or see the queue. A phone number must be integrated in Acquire to use this feature.
Using the Timeline Toolbar
Once you’ve opened a contact’s conversation timeline, you’ll see their most recent conversation and their interaction history. The timeline toolbar at the top allows you to manage all conversations and take quick actions.
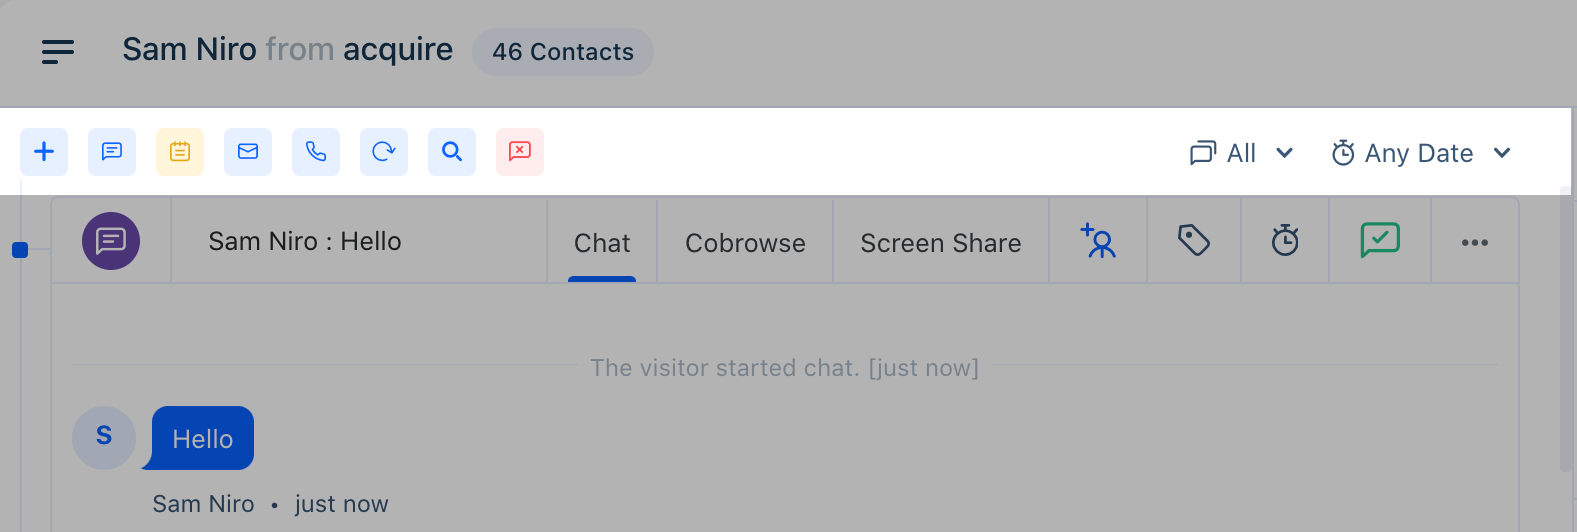
The toolbar (from left to right) contains:
- Create a new conversation -This allows you to add a new record to their timeline, whether that’s a new conversation, note, or ticket.
- Create a new note - Leave details for your teammates using notes. These are only visible in Acquire and will not be available to the contact.
- Send email - Opens a new email thread with the contact.
- Call - One-click dialing to the phone number associated with their profile.
- Reload timeline - Refreshes the conversation timeline.
- Search timeline - Find specific words, phrases, and interactions within the timeline.
- Close chats - Change all open and pending conversations to ‘Closed’ status.
- Sort by interaction type
- Sort by time periods
Using the Conversation Toolbar
This toolbar allows you to take certain actions depending on the channel and manage additional functions like tagging and snoozing.
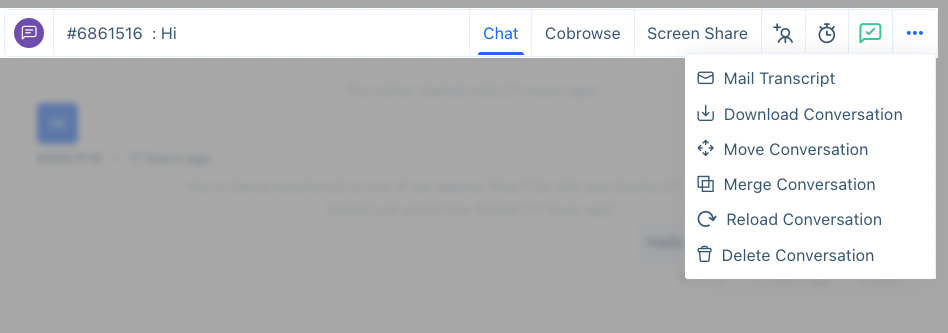
The chat-specific buttons are
- Chat - Open the chat panel
- Cobrowse - Open the Cobrowse panel
- Screen Share - Open the Screen Share panel
And then to the right of this is:
- Invite Agents - Invite a team member or transfer to a department
- Snooze - Snooze the conversation
- Status - Change the conversation's status
Click on the ‘More’ (‘...’) menu to open additional functionality:
- Mail transcript
- Download conversation
- Move conversation (within the timeline)
- Merge conversation
- Reload conversation
- Delete conversation (only available to administrators)
Replying to Conversations
During an active conversation, the reply window provides a number of different functions to help you better communicate with visitors. To send a message, click on the blue, arrow button at the bottom right.

Use the buttons in the lower left corner to quickly access:
- Add notes
- Use shortcuts for autofill responses,
- Add emojis
- Upload and share attachments
- Insert an app
- Translate your response into the visitor’s language (note: you’ll still see the conversation in the original language)
- Change the text formatting or add an embedded link or image link
- Use a webhook or custom attribute
From here, you are also able to pick the channel you want to send the reply through. By default, the conversation’s original channel will be selected, but in some cases you may wish to change it, for instance if the contact is offline, you may want to send an email instead.
Contact Profiles and Integration Tabs
On the right side of the conversation window is the Contact Profile and installed integration tabs.
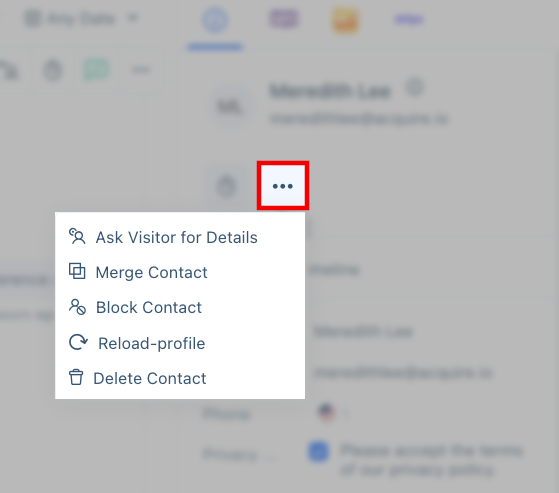
Each profile will show the contact’s name, status (online: green dot or offline: grey dot), and provides one-click buttons for starting video or voice calls and snoozing the contact. Use the three dots ‘...’ to open additional actions including:
- ask visitor for details - during a chat, you may request visitor details. Please note this will not work with third-party integrations such as WhatsApp, Facebook, Instagram, and others.
- merge contact - merge the current contact with an existing contact.
- block contact - blocks the contact from submitting messages in the widget.
- reload profile - refreshes the profile pane.
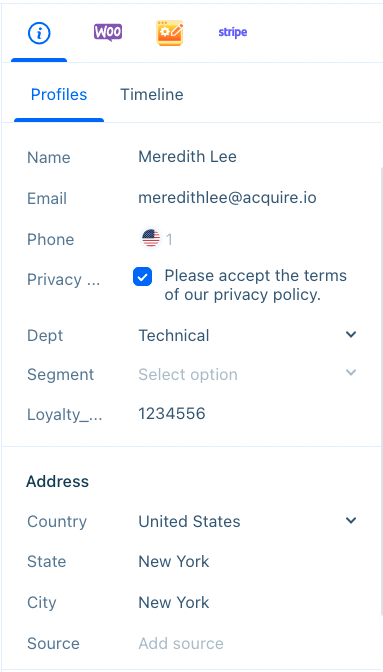
Beneath these buttons are the profile details. These include contact information and any custom attributes that have been added, case fields, tags, and an account overview.
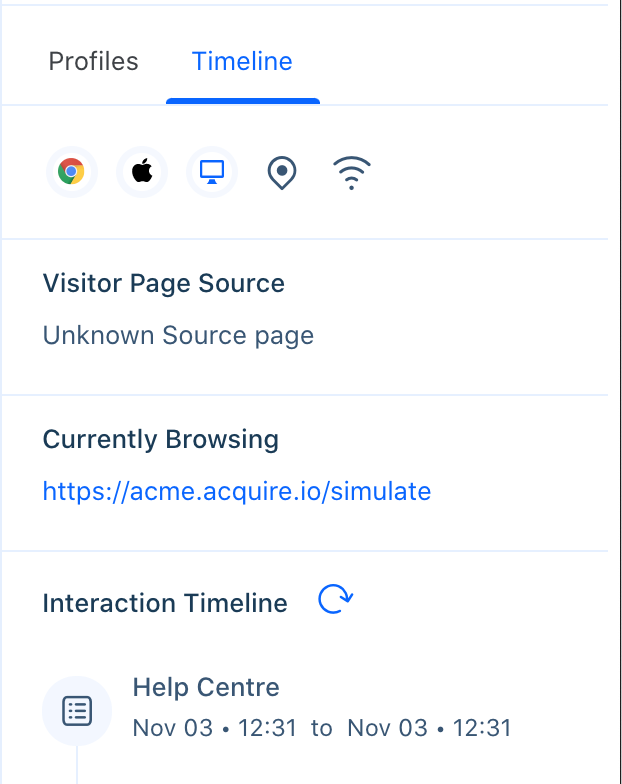
You can also toggle to the Timeline to view additional information like browser and operating system, which page they’re currently browsing, and a history of all interactions with your website and widget.
Integration tabs are listed along the top of this panel. Here you’ll be able to access apps to sync data between platforms, look up order history and information, search for knowledge base articles, and more. Learn more about our Integrations & App Store →
Searching, Managing, and Filtering the Conversation List
Useful tools for searching, managing, and filtering the Conversation list may be found in the top right corner next to the word ‘Conversations’.
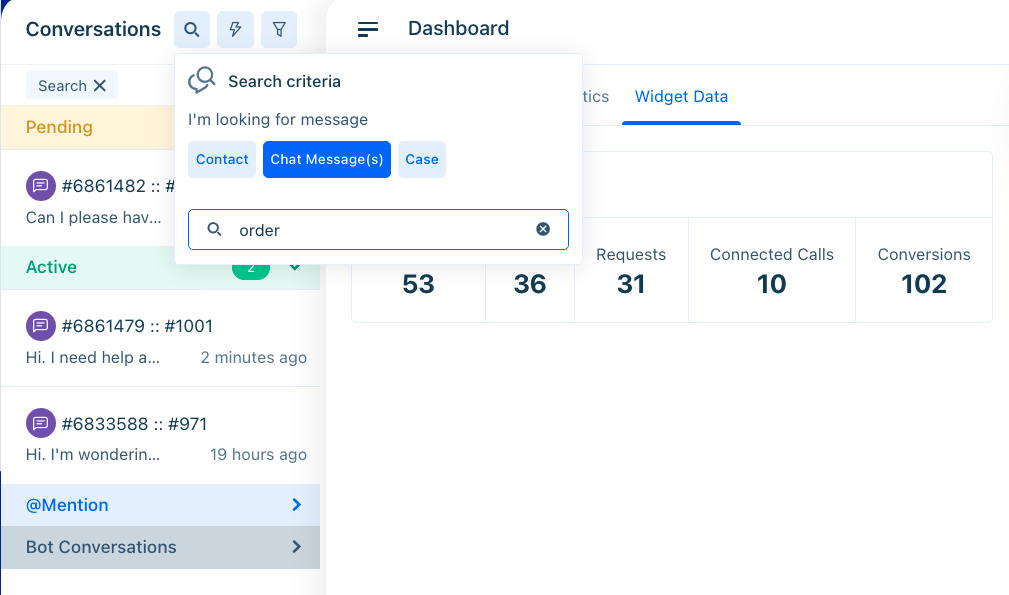
Search
To search, click on the magnifying glass.
You may search via:
- contact - Enter a contact’s name or I.D.
- chat message - Enter a keyword used in a text-based conversation.
- case - Search a cases’ fields (text-based Custom Attributes), channel (chat, email, SMS, etc.), or title.
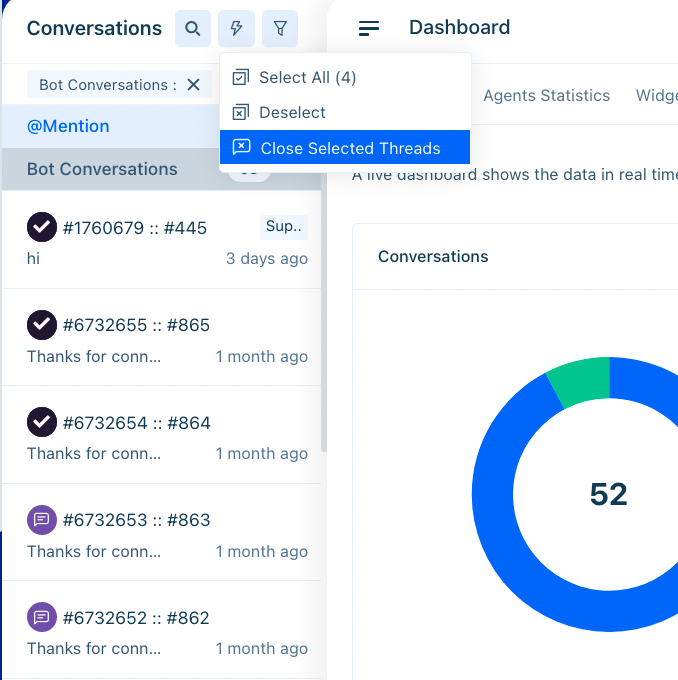
Manage
Bulk manage your conversations by clicking on the action (lightning bolt) button.
You may use this button to select and close conversations.
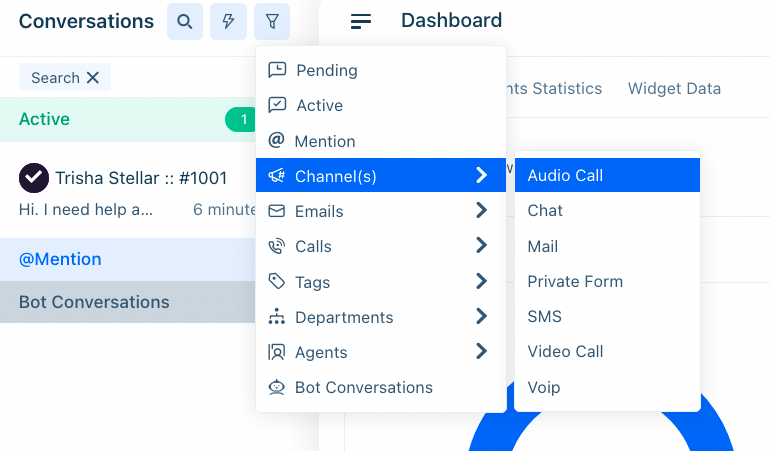
Filter
Use the filter button to filter through your list of conversations. You may apply the following criteria:
- Pending conversations - conversations assigned to an agent or their department.
- Active conversations - conversations an agent is currently engaged in.
- @mentions - a conversation the agent or their department has been mentioned in.
- New Conversation - if a chat comes into the queue while a filter is applied, that conversation will show up in New Conversations. Once the filter is removed, the conversation will show up in Pending.
- Channels - Audio calls, chat, mail, private forms, SMS, video call, VoIP
- Emails - Specify a specific inbox
- Calls - Specific a specific number
- Tags - Specify a tag
- Department - Specify a department
- Agents - Specify an agent
- Bot Conversation - A list of bot conversations
Viewing Live Analytics
See agent activity when you click on the Dashboard.
The Live Dashboard Summary shows you an overview of conversations, including those active, pending, and closed, broken down by channel.
You’ll also be able to see the total number of conversations for the day, as well as how many agents are on or offline.
In the Agents tab, view an agent's availability by communication channel, the number of active conversations they’re part of, live tracking information (the duration of their active chats), their online/offline status, and time away.
Click on the conversations in 'Live Tracking' to be brought to that conversation thread.
Having trouble? Reach out to us at support@acquire.io.
Was this article helpful?


