For Administrators
Creating & Mapping Custom Attributes in Acquire
No two businesses are exactly alike. This means everyone builds out custom fields and attributes in their tech stack eventually. Map those datapoints into Acquire using Custom Attributes.
In this article:
- Types of Attributes
- Adding Attributes
- Capturing the Data
- Using Custom Attributes
Types of Attributes
Custom attributes can be applied to a contact or case. There are different types of attributes you can use and pass into Acquire. They include:
- Textbox: A standard text field.
- Date: A date field in mm/dd/yyyy formate.
- Label: Viewable data that cannot be edited. E.g. a URL or ID.
- Textarea: A text field used for longer text.
- Radio: A selection using a radio button.
- Checkbox: Represents a true or false value.
- Dropdown: Allows a single value to be chosen from a defined list.
- Department: Which department a chat was initiated in.
Adding Attributes
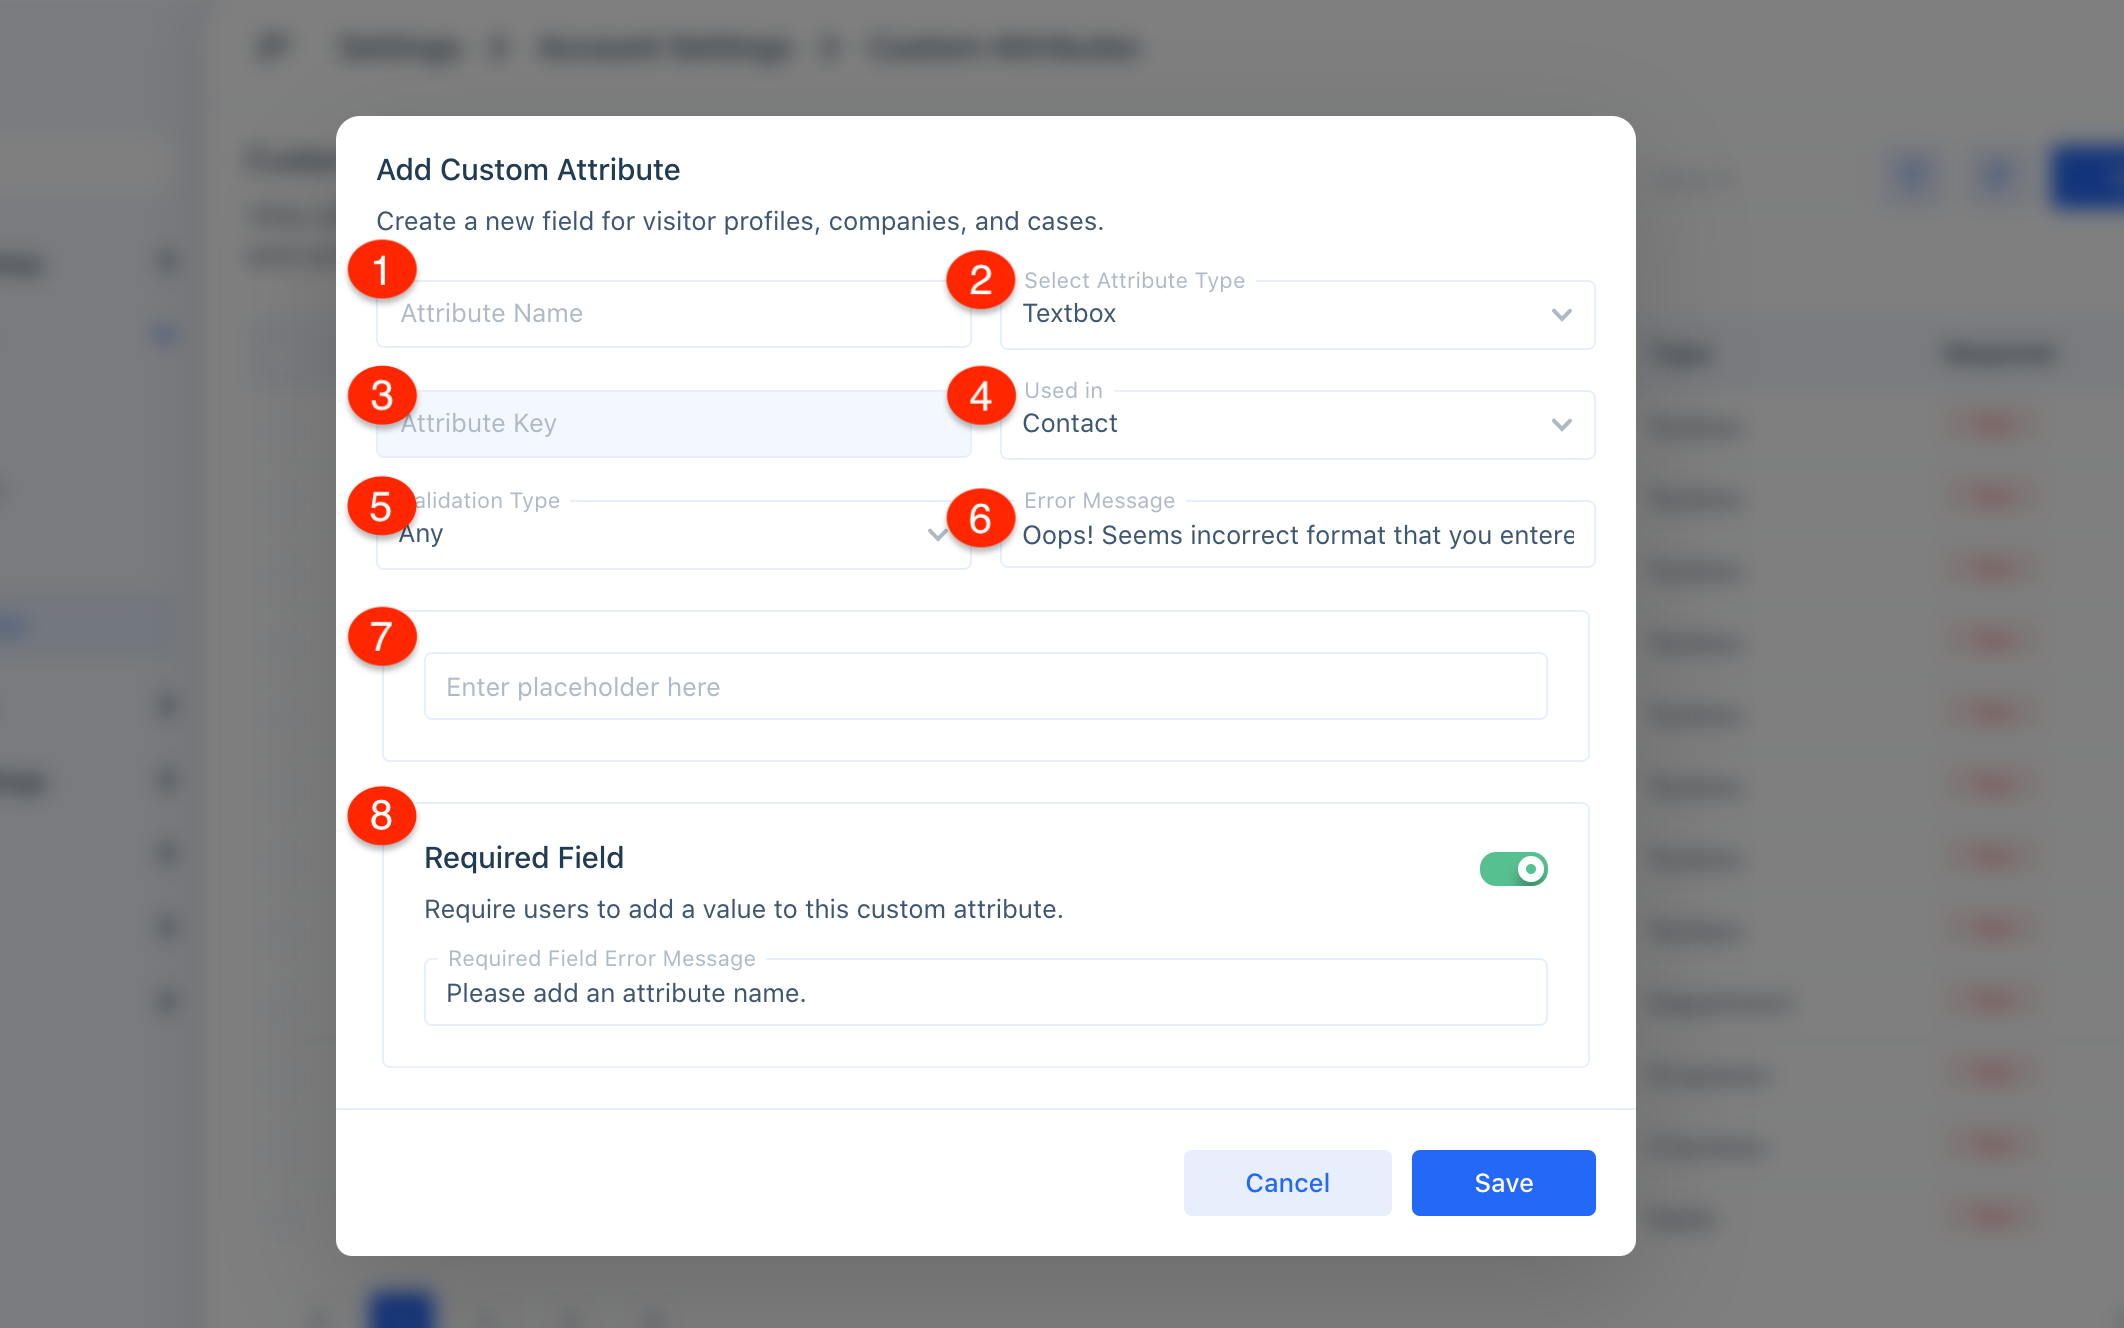
Navigate to Settings > Account Settings > Custom Attribute. Click on ‘Create Attribute’.
Input the information in the following fields:

1. Attribute Name: Name the Custom Attribute. Must be unique.
2. Attribute Type: Select what kind of information you want to capture. See the types of attributes list above.
3. Attribute Key: Automatically generates based on the attribute name. You may use this as a variable in places such as chatbots.
4. Used in: Custom Attributes may be used in Contacts, Companies, or Cases.
5. Validation Type: Sometimes you need information in a specific format (such as phone numbers). Use email, phone, url, or RegEx to validate.
6. Error Message: Create a fallback message for invalid entries.
7. Placeholder: Enter placeholder text to give users a hint about what sort of information to add.
8. Required Field: If you don't want a visitor to skip the field in a form, select this option. Include an error message to let your visitor know how to answer it. Required fields will also prompt agents to enter information before closing a conversation.
Note: When a Custom Attribute is added to your account, it will be inserted into your ‘Capture User Details’ code. To automatically pass the information into your portal, be sure to update this code on your website.
Capturing the Data
There are a few methods for capturing data for Custom Attributes:
- Use the Capture User Details code, which passes attributes about your users into Acquire when they are logged in.
- Manually input information in the Contact Profile.
- Ask visitors for the information via a chat form, Sequence Bot, or during a conversation.
- Pull the information from website form fills.
Need assistance with custom attributes? Use our live chat or email support@acquire.io and we’ll help you out.
Was this article helpful?


