Chatbots
How to Build & Deploy a Sequence Bot
Acquire Sequence Bots collect visitor information by asking a series of questions and then routing conversations to the appropriate action: live chatting with an operator, completing an order form, viewing a specific webpage, visiting the knowledge base, and much more.
In this article:
- Sequence Bot Basics
- Sequence Types
- Building a Sequence
Sequence Bot Basics
Sequence Bots are highly customizable and can serve a number of purposes including capturing sales leads and answering basic support questions. Here is the full list of interactions you can program into a Sequence Bot:
- Send automated messages
- Collect visitor details like name, phone number, email, or any other Custom Attribute
- Pull in a widget app such as Calendly
- Add bubbled actions to determine the right steps for a visitor’s needs
- Redirect to a specific webpage
- Post a lead to your CRM
- Send a lead to a distribution list
- Start a live chat with an operator or department
- Invite a Conversational Bot
- Assign a tag to the contact
- Assign a tag to the case
- Close the conversation
Whew! That’s a lot of actions and the possibilities are nearly endless.
Sequence Types
There are three Sequence Types available: Blank, Sales, and Out of Office.
As the name implies, Blank is a sandbox sequence where you start from absolute scratch.
The Sales Sequence has prebuilt steps to help you capture leads, route support inquiries, and drive browsing visitors into your sales funnel.
The Out of Office Sequence will capture messages while your operators are offline and allow you to provide specific follow up to existing customers and new leads.
Building a Sequence
Create a Sequence Bot by navigating to Chatbots > Sequence Bot. Click on ‘Create New Sequence’ and choose a sequence type to begin.
Rename your sequence by double clicking on the name next to the ‘Go Back’ button.
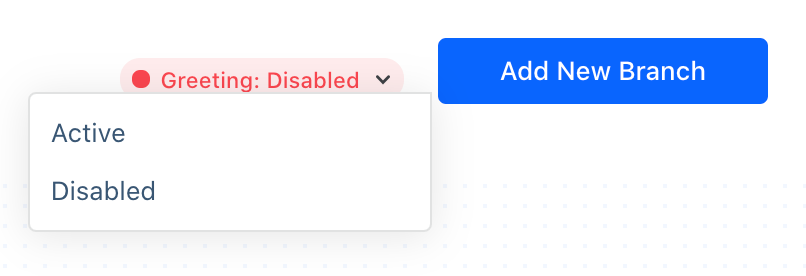
Next, set the Greeting to ‘Active’ or ‘Disabled’ to control whether or not the Bot’s default message will appear.

Now, onto the branches. Click on the Welcome Branch > Edit (pencil) icon or double-click to open the Branch wizard. Give the branch a title and description.
Here is where things get fun. In ‘Branch Conversation’, we’ll start laying out the steps we want the bot to take. By default, a message from the bot will appear. Click in the chat bubble to edit the text, or delete it by clicking the Trashcan icon.
Click ‘Add another interaction’ to choose a new step from the list.
Interaction Setup
Each interaction requires different information to set up. We’ve outlined each below:
Add Bot Reply
Type in what you would like the bot to say. This message will automatically appear when the previous step is complete.
Note: Add a bot reply to almost every step in a Sequence Bot to give context to the visitor.
Add Visitor Attribute
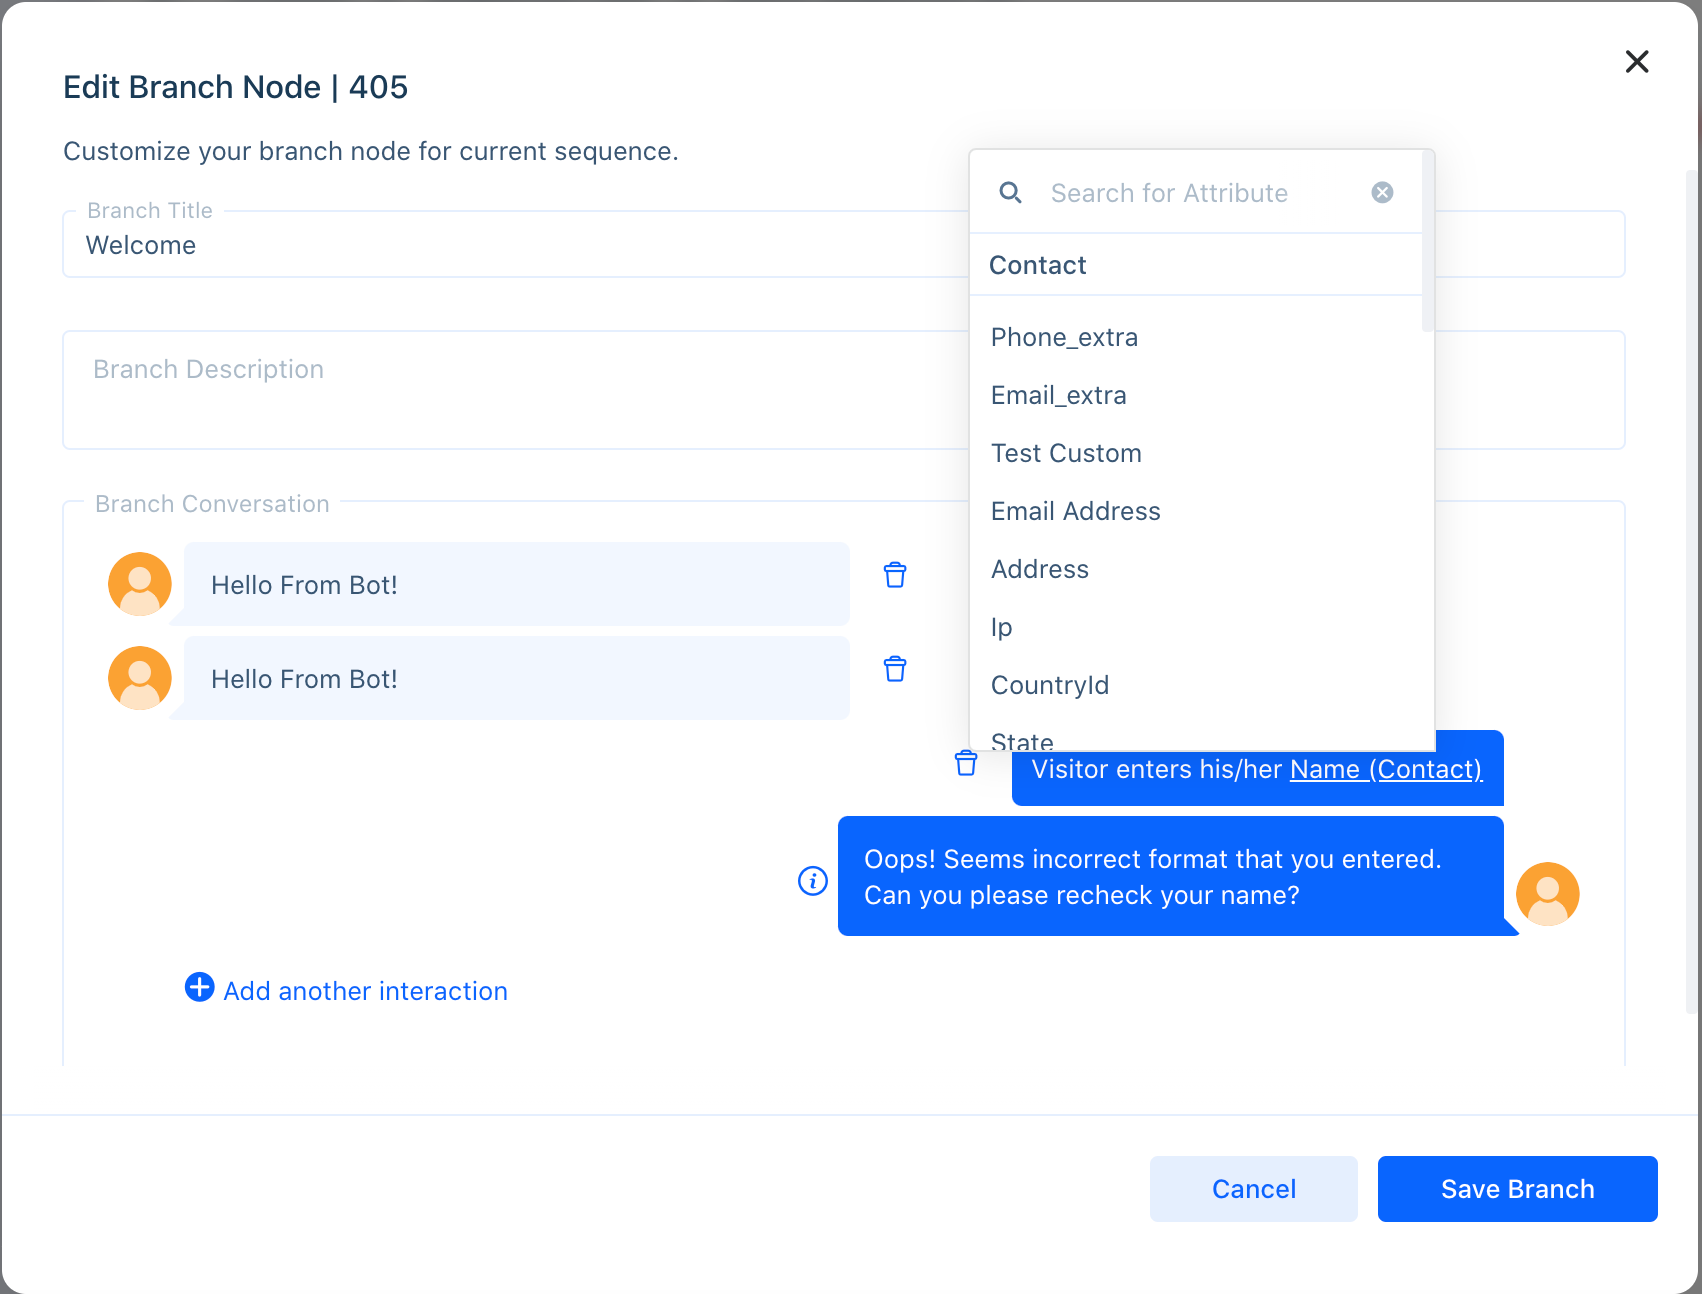
Ask the visitor for information like their name, phone number, or any other custom attribute you’ve added to the platform. Below, you’ll need to enter a custom error message.

Note: For a good visitor experience, you’ll want to add a prompt in the form of a bot reply before displaying the attribute form
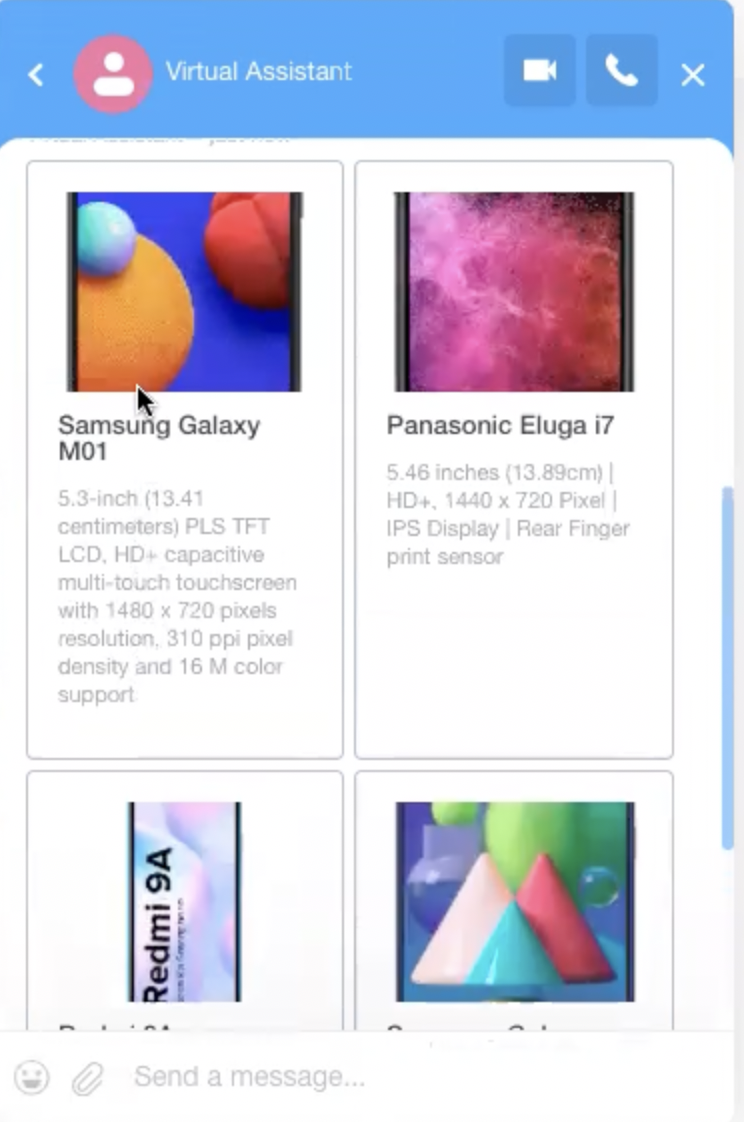
Add Card Response
Add actions to images and or links. When a visitor clicks on an option, the bot may redirect the visitor, display more information, or perform an action via a webhook. Choose from:
- Response - the bot responds with a short message based on the visitor's choice
- Link - Clicking on a card redirects the visitor to another page

Learn more about the different types of response in our card response article.
Add Chat Widget
Choose a Widget App you’d like the bot to add to the conversation.
Add Bubbled Actions
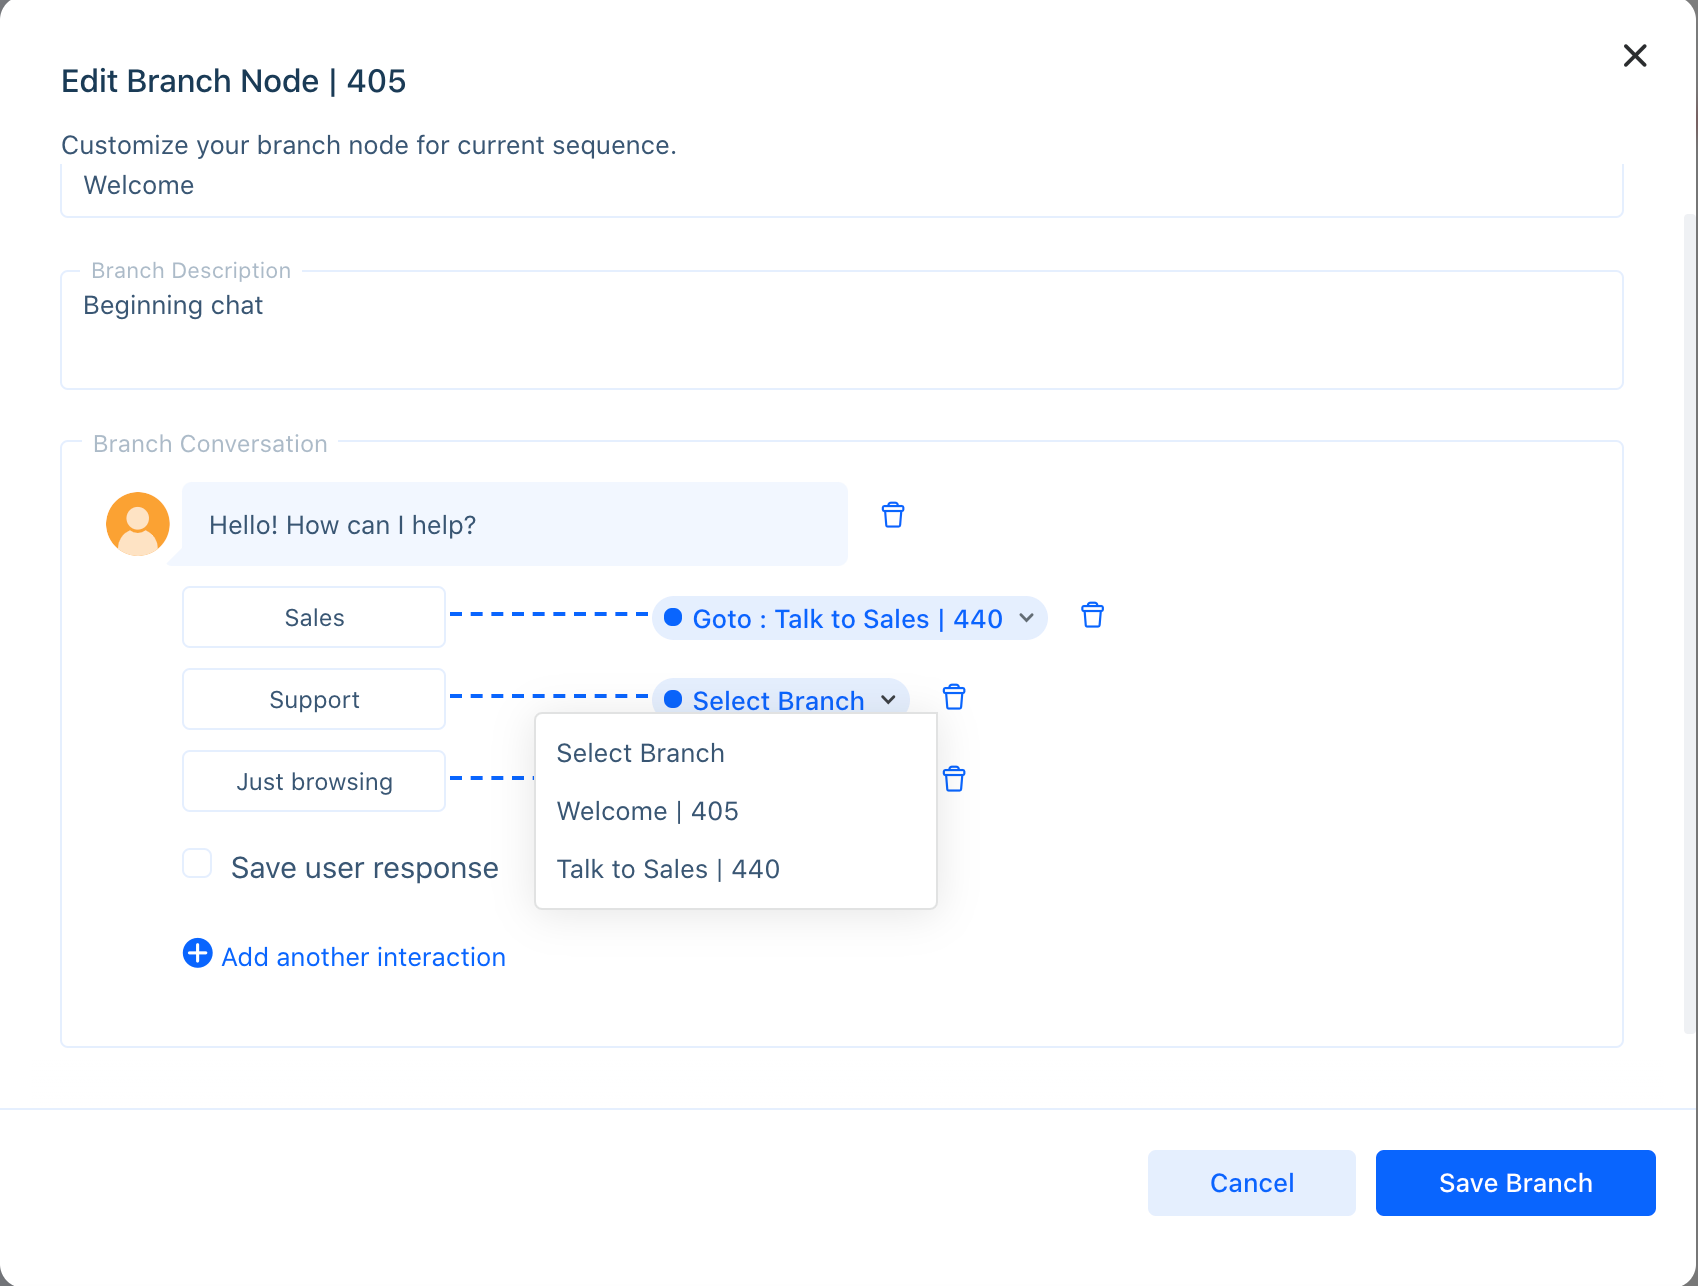
Present users with a choice. Type in a phrase like "Sales" or "Talk to Sales" and point the bubble to a different branch. Check ‘Save user response’ if you’d like this data to be saved in the conversation timeline. This interaction is helpful for segmenting visitors into the right path.
Add Auto Actions
These interactions are commands that instantly fire on the backend when a step is completed. Here are the steps to set each Auto Action up:
- Goto: Enter the branch to direct the conversation into.
- Redirect to: Enter the web address to bring the visitor to your CRM.
- Post lead: Enter a webhook URL to send lead information to.
- Send lead: Type in the email address you want to send the lead information to.
- Add a Note: Add a note to a case or contact.
- Sync to CRM: Add contact or case to an integrated app.
- Chat with Agent: Choose an operator from the dropdown menu.
- Chat with Department: Choose a department from the dropdown menu.
- Invite Conversational Bot: Have a Conversational Bot take over the sequence.
- Assign Tag to Contact: Use the dropdown menu to select a tag.
- Assign Tag to Case: Use the dropdown menu to select a tag.
- Close Conversation: No additional setup necessary.
Once you are satisfied with the branch, click ‘Save Branch’.
For Sequence Bots that only require 1 branch, proceed to setting up the bot Business Rules.
Otherwise, click ‘Add New Branch’ and build out the next interaction in the sequence following the same steps outlined above.

When you’re ready to connect the branches, open the source branch and set the ‘Goto’ command to the new branch you created. Click ‘Save Branch’ and you will now see they are connected.
When you’re finished building the bot, it’s time to set up the Business Rule that controls when the bot will activate in the Web Widget.
Was this article helpful?


