Chatbots
FAQ: How do I display products in a Sequence Bot?
Card responses are a great way to show products in the widget. Cards may have images, text, and links, and redirect capabilities. In addition, customers’ responses are tied to Custom Attributes, so agents can easily look up a customer’s selection. You’ll also be able to track these answers in Custom Reports by selecting Custom Attributes for conversations.
In this article:
- Card Response Examples
- Creating a Card Response
- External Link
- Response
- Resetting a Choice
- Creating a Custom Report to Track Card Responses
Card Response Examples
External Link Cards redirect visitors to another webpage:
Visitor View (External Link)
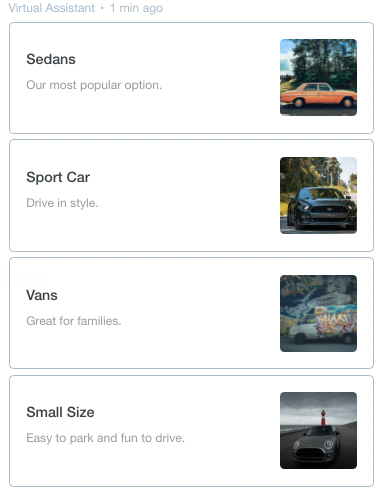
When a visitor clicks on an external link card, they’ll be redirected to the URL provided.
Visitor View (Response)
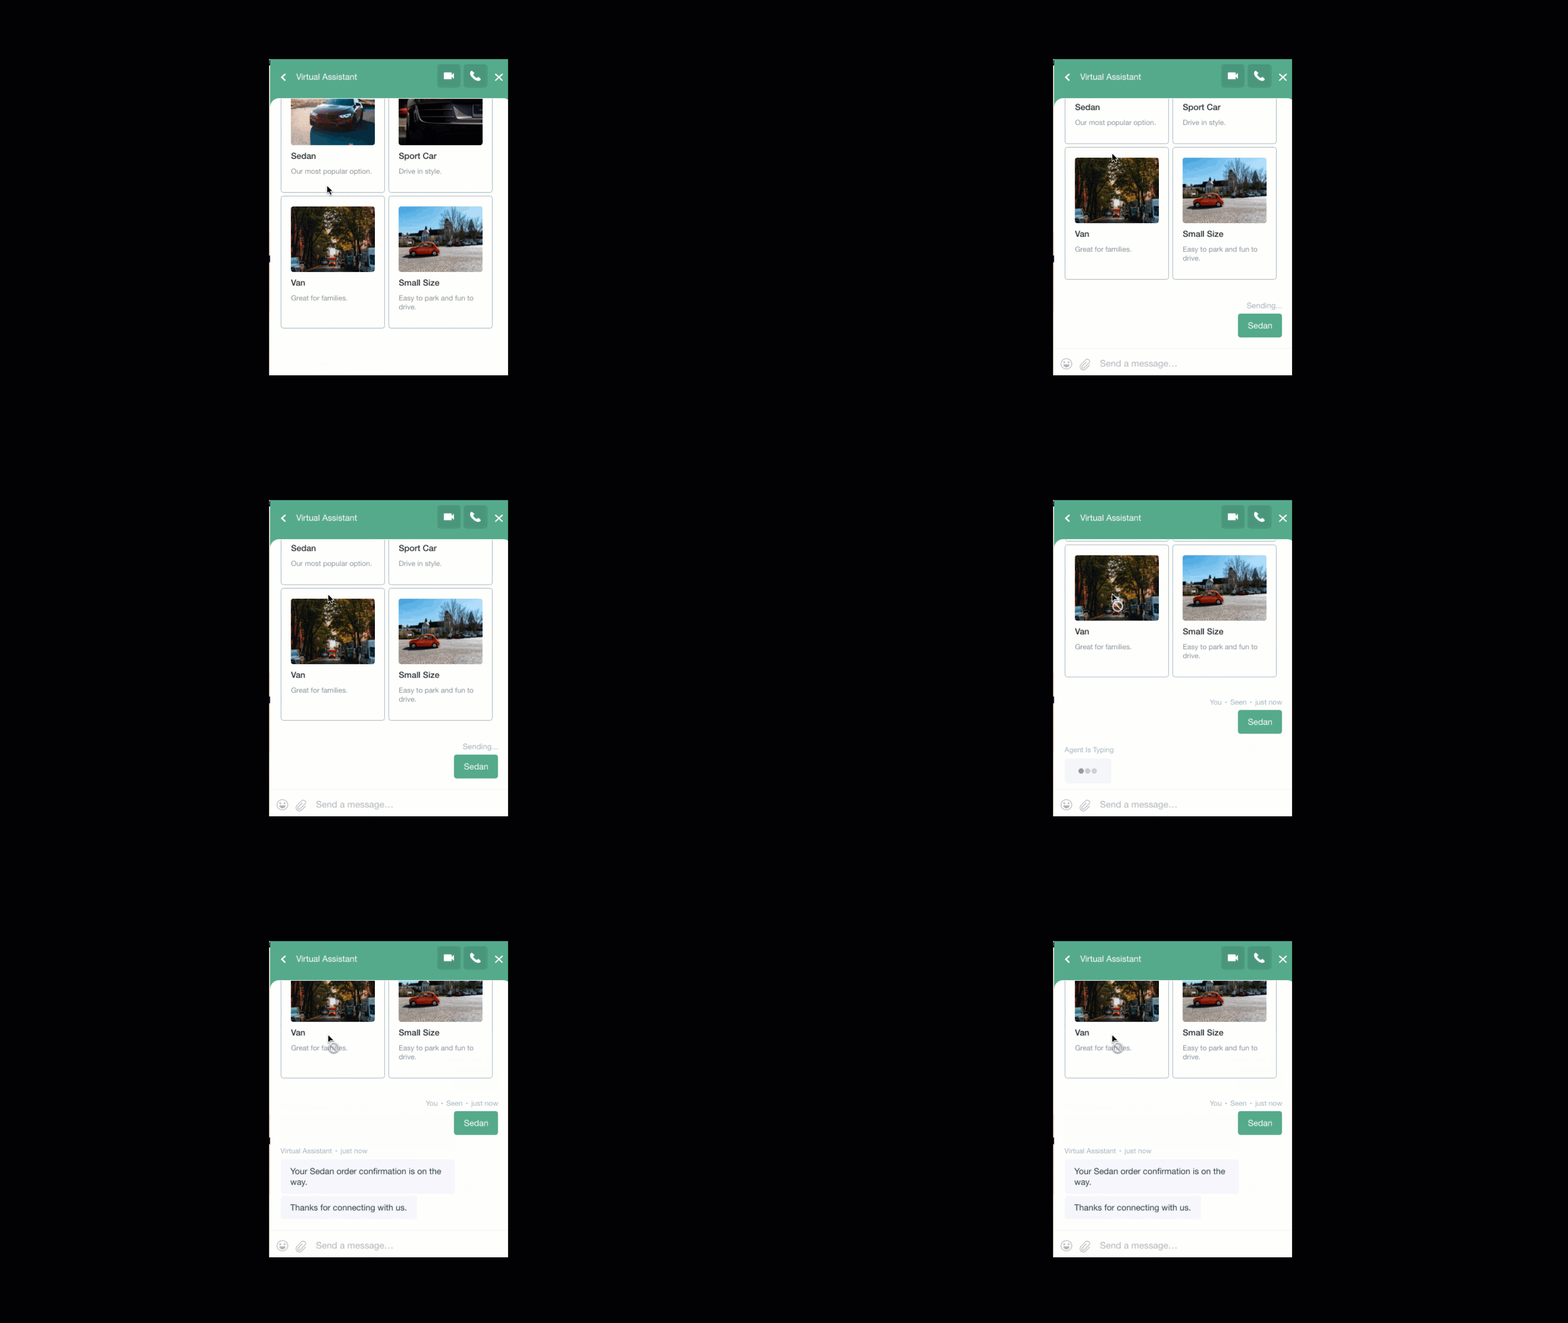
When a visitor selects an option, their choice is recorded in their profile.
Creating a Card Response
To create a card response, go to Chatbot > Sequence Bot, add a new branch and click on ‘Add another interaction’. Then select ‘Add Card Response’.
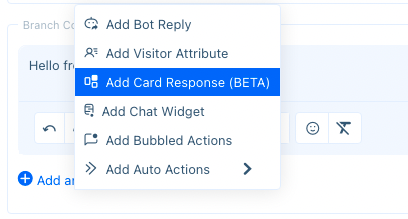
Once you select Card Response, you’ll have two options:
Select ‘External Link’ to create cards that guide customers to a new page.
Select ‘Response’ to create cards that, when clicked on, keep customers in the sequence and record their selection.

For External Link Cards:
External link cards are meant to redirect visitors once they click on a card. For this reason, external link cards should be at the end of a sequence, as the visitor could navigate away from the current page.
Provide the following information:
- ‘Image Link’ — paste an image link. Images will automatically be resized.
- ‘Title’ — provide a short title of the product or service.
- ‘Description’ — enter a short description for the product or service.
- ‘Redirect Link’ — paste the webpage you’d like the visitor to be directed to when they click.
To add more cards, click on ‘Add More’.
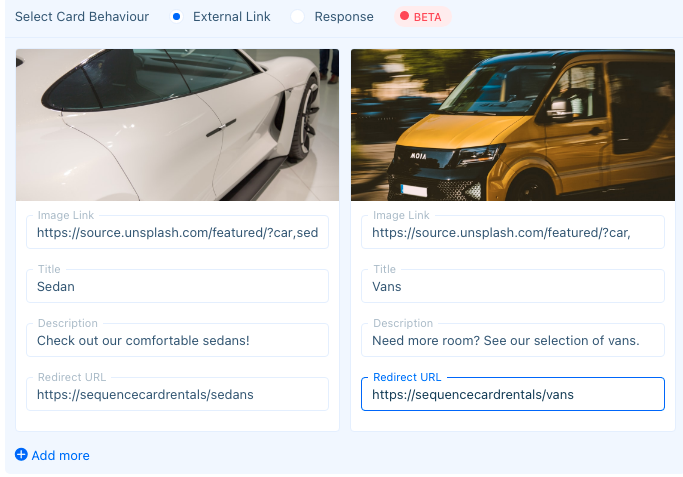
Images are displayed in the preview.
For Response Cards:
Response cards are meant to save information when a visitor makes a selection. To save a visitor’s choice, you should create a new Custom Attribute before creating a response card.
Step 1 Creating a Custom Attribute
To create a new Custom Attribute, go to Settings > Account Settings > Custom Attributes and click on ‘Create Attribute’.
Name the attribute and select an attribute type. Note that some types will not work with the Sequence Bot, such as drop-down and radio.
Tie the attribute to a contact or case, and then set a validation type and input any placeholder or error handling text.Then, click on ‘Save’ to save the attribute.
Step 2 Creating a Response Card
Go to Chatbots > Sequence Bot and create a new sequence by clicking on 'Create New Sequence'. Underneath the 'Welcome' branch, create a new branch by clicking on the plus sign ('+'). Select ‘Add Another Interaction’ and choose ‘Add Card Response’.
Input the following information:
- ‘Image Link’ — paste an image link. Images will automatically be resized.
- ‘Title’ — provide a short title of the product or service.
- ‘Description’ — enter a short description for the product or service.
- ‘Response Text’ — type the name of the choice the customer selected. The Custom Attribute will be tied to this response.
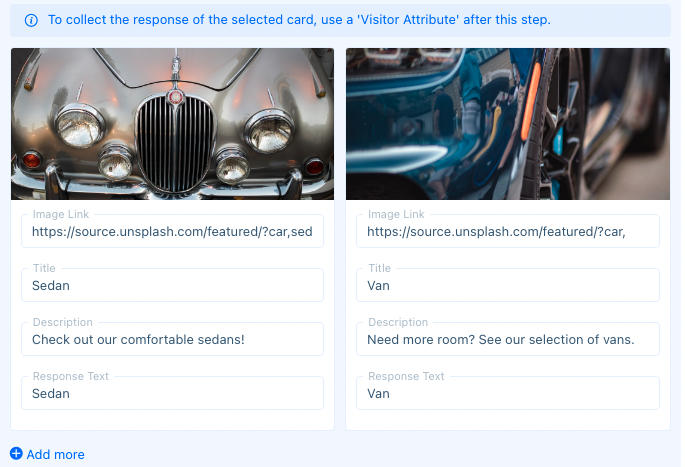
Step 3 Creating a Custom Response
You may write additional text confirming the customer’s response. To do so, while in the same node as the Response Card, click on ‘Add Another Interaction’ and choose ‘Add Visitor Response’. Write a confirmation message and add the Custom Attribute with the webhook button.
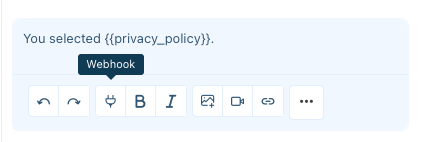
The Webhook button (also known as the Custom Attribute button).
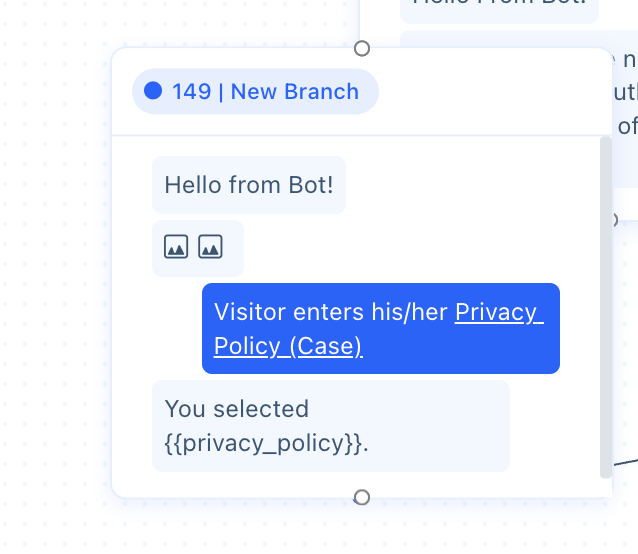
The branch should look something like this.
Now, when a visitor connects with an agent to finalize their choice, their option will show up in their profile.
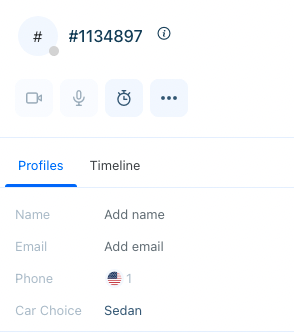
A visitor’s response shows up in their profile. Agents may change this information at any time.
Resetting a Choice
It’s usually a good idea to allow a visitor to change their mind before proceeding with an order. To do this, you may need to change bot configurations and determine the best place to reset the choice.
To change your Sequence Bot's configurations, go to Chatbots > Configurations, and disable 'Skip Flow for Existing Details'. This will allow the visitor's Custom Attribute to be changed. Disabling this feature will also cause your Sequence Bots to ask information every time the visitor engages in a conversation with them.
You may choose to allow your visitor to change their choice before the final step of the process, or after each choice.
In this example, the visitor is given an option to reset their choice after selecting an option.
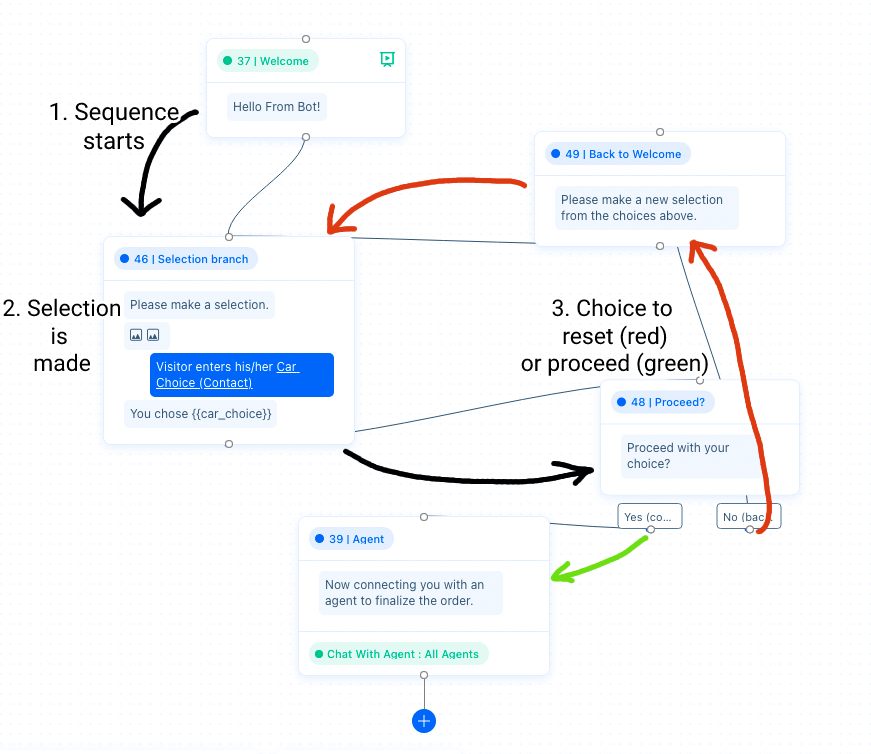
In this sequence, a visitor selects a car. After the selection, they're given a choice to make a new choice or proceed. If they choose to proceed, they connect with an agent. If they reset their choice, they are directed to the 'Selection' branch to make a new choice.
The ‘go to’ action is used to direct the visitor back to the ‘Selection’ node.
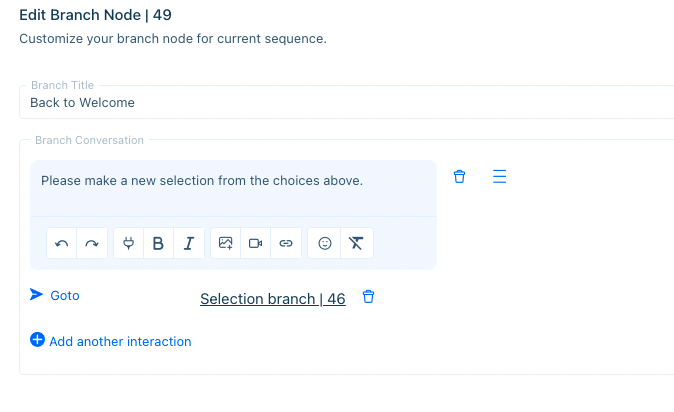
Please note that a visitor’s Custom Attributes will not be reset until after they’ve made a new selection.
Creating a Custom Report to Track Card Responses
Curious what the most popular responses are? You can track this data in Custom Analytics.
To create a Card Response report, go to Analytics > Custom Reports and click on ‘Create New’.
Name your report and select ‘Conversations’ as your report type.
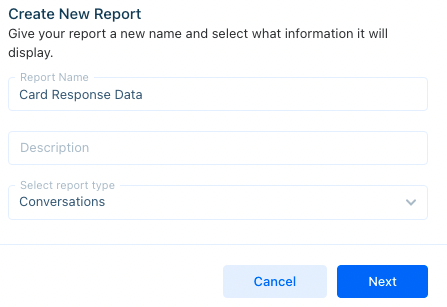
In the next menu, choose the data points you’d like to track, in addition to the Custom Attribute tied to the visitor’s response.

A preview of the data will display in the right panel. In this example, the Custom Attribute and conversation IDs were selected.
Once you’ve selected the data points, click on ‘Save’. Your report is now ready.
Having trouble with the flow of your Sequence Bot? If you find you need advanced routing capabilities, check out our Webhooks for Chatbots article and reach out to support@acquire.io.
Was this article helpful?


