Workflows
Business Rule Basics
As your organization grows, you find yourself having to complete a substantial amount of repetitive tasks. Not only does this take time away from admins and agents, but it also translates into poor customer experiences. With Business Rules, no matter how a customer contacts you, you can rest assured that they’ll be serviced by a live agent, chatbot, or another follow-up action.
In this article:
- What are Business Rules?
- Building Business Rule
- Entry Points
- Nodes and Branches
- Actions
- Conditions
- Saving a Business Rule as a Draft
- Publishing and Editing a Business Rule
What are Business Rules?
Business Rules are routing procedures that help automate your business tasks. Whether you want to assign a chatbot to a certain page, capture visitor information from a form, or assign an agent to incoming emails, there’s probably a Business Rule for your use case. To create a Business Rule, select a communication channel and build out the experience you’d like your visitor to have.
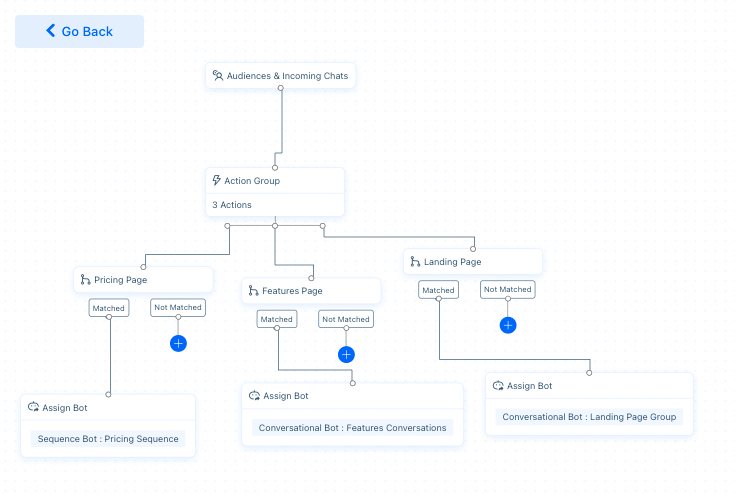
Want different bots to engage with your visitors? Use a Business Rule to assign bots to specific pages like the example below.
Creating a Business Rule
To create a Business Rule, head to Settings > Workflows > Business Rules and select ‘New Rule’. A menu will appear asking you to name and describe the rule and select an entry point.
Entry Points
Entry points are places where your visitors initiate conversations or otherwise interact with your site. You may build Business Rules from these entry point channels:
- SMS - Text messages sent to your Acquire integrated VoIP number
- Email - The email address(es) you’ve set up in Acquire
- Chat - Any conversations in your chat widget
- Private Form - A form displayed on your site
- Phone - The VoIP numbers you've integrated in Acquire.
Once you choose your entry point, press ‘Create’.
Nodes and Branches
Once you select your entry point, you’ll be redirected to the workflow page. The entry point box, also called a node, will appear. From there, you can start adding branches (the connections between two nodes) by clicking on the plus sign (‘+’) at the bottom of each node.
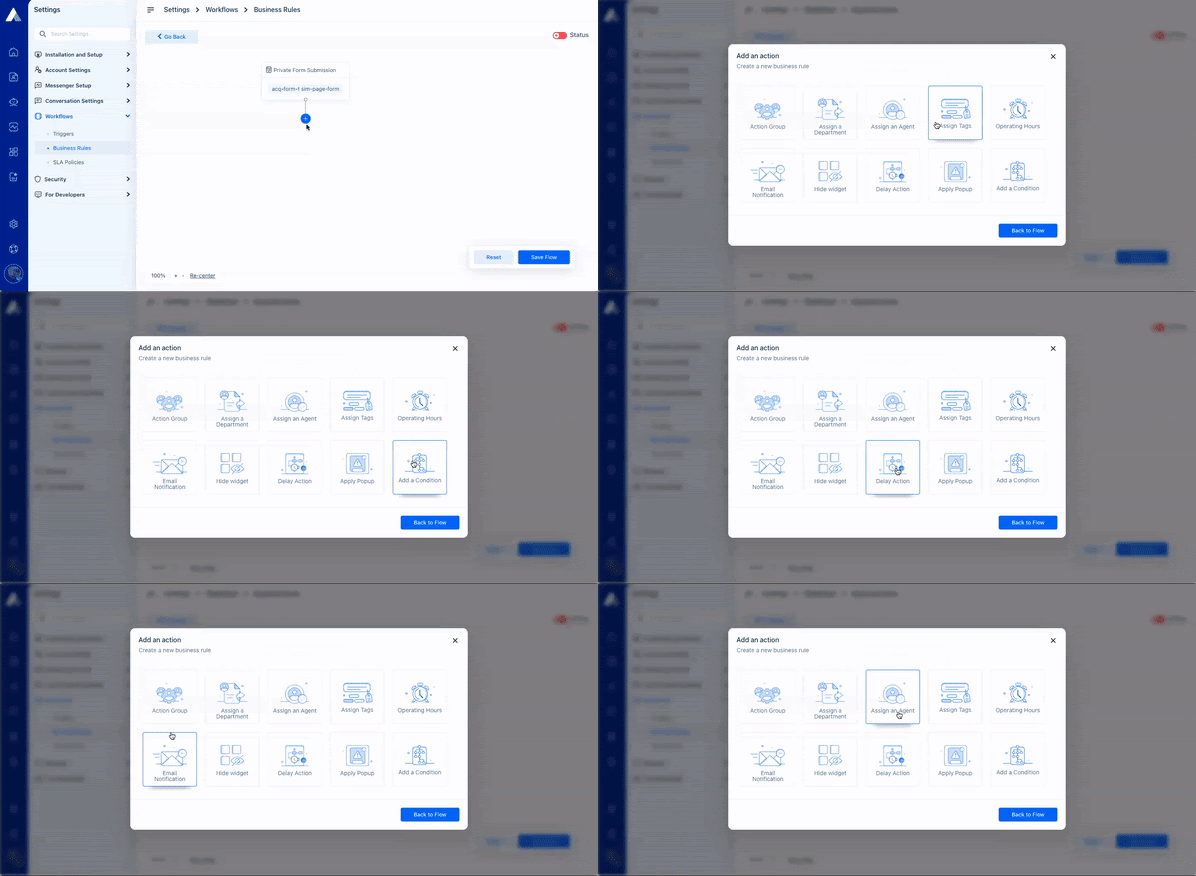
After pressing the plus sign, you’ll be able to choose from a range of actions.
Actions
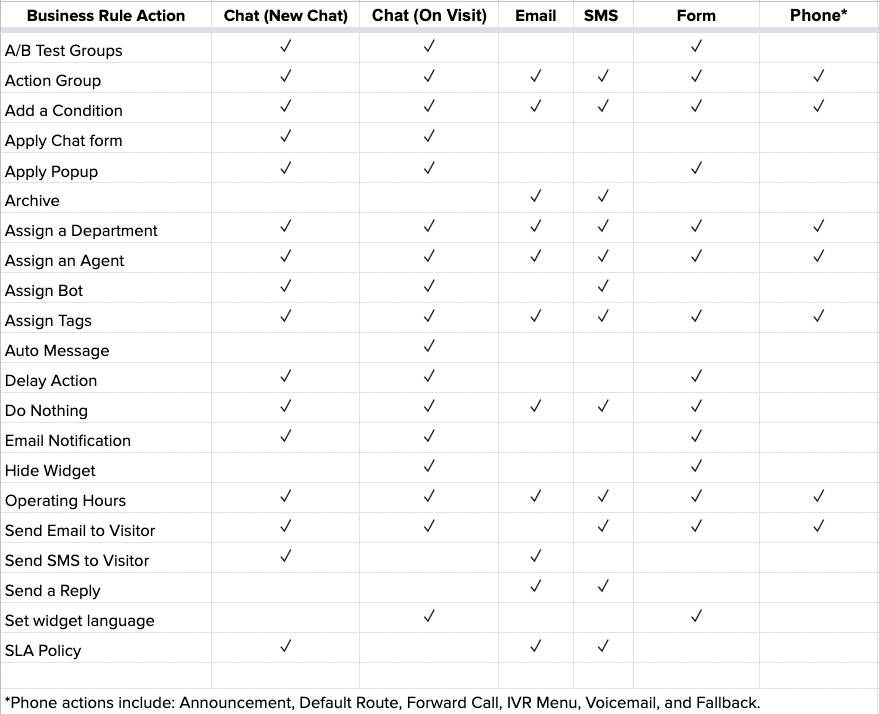
You’ll be able to respond to visitors, assign agents, and perform other tasks with Actions. Actions differ by entry point and their previous Action.
There are two special actions:
- Action Group - Create up to 10 actions. The leftmost action fires first, followed by the next action(s). Action Groups are usually paired with conditions to control a workflow.
- Add Condition - Add a condition to match visitor or page information.
Additional Actions include:
- A/B Test Groups - Test the efficacy of a chatbot or other messages.
- Apply Chat form - Select an offline or online chatform if you’d rather trigger your forms manually.
- Apply Popup - Apply a popup on the page. You may create anything from a simple notification to a confirmation message with redirect links.
- Archive - Archive an Email or SMS message when a visitor completes a sequence.
- Assign a Department - Choose the department that will respond to visitor inquiries.
- Assign Agent - Choose an agent to respond to visitor inquiries.
- Assign Bot - Use a Sequence Bot or Conversational Bot to respond to FAQs. Chatbots must be set to active.
- Assign Tags - Quickly organize the kinds of communication you receive and allow your agents to follow-up later.
- Auto-Message - Display a text, image, video, or webhook message.
- Delay Action - Delay a follow-up action, such as an email, by hours, minutes, or seconds.
- Email Notification - Send a templated email to a specified inbox.
- Hide Widget - Hide the widget for specific pages or events.
- Operating Hours - Check if a message was received or a form was filled out during operating hours.
- Send Reply - Send a templated email or SMS reply.
- Send Email/SMS to Visitor - Send an email or SMS to the visitor. The visitor's email address or number must be in the system for this action to work.
- Set widget language - Adjust language preferences for visitors.
- SLA Policy - Provide consistent follow-up actions when agents respond to or resolve cases.
The chart below provides an overview of available actions for each entry point:
Conditions
Conditions are special actions that match the information provided by the visitor, or other information. You can determine the follow-up action when a match is or isn’t found.
Check for any or all of the following:
- Agent is Offline - Check if agents are offline.
- Agent is Online - Check if agents are online.
- App Build Version - Check the version of their app build.
- App Version - Check the version of the app.
- Browser Name - Check if the visitor is using an optimized browser.
- Browser Version - Check what browser version the visitor has and display an update notification if needed.
- Caller - Check if a caller is new.
- Case - Apply a case attribute, such as a tag.
- Contact - Apply a contact attribute, such as a tag.
- Day of Week - Check what day of the week this is (day of the week is determined by your operating hours).
- Device Type - Check if your visitor is using your site on desktop or mobile device.
- First Time Visitor - Check if it’s your visitor’s first time visiting and create a curated experience.
- OS Name - Check your visitor’s operating system.
- OS Version - Check your visitor’s operating system version.
- Pages Viewed - Check how many pages your visitor has viewed on your site.
- Revisits in Days - Check how many times the visitor was on your site and offer them a special promotion.
- SDK Version - Check the version of their SDK.
- Source Type - Check if the source type is web, client, or SDK.
- Source Website - Check which website the visitor was on before coming to this page.
- Visitor Country - Check a visitor’s country.
- Visitor Page Title - Check the page title the visitor is currently on.
- Visitor Page URL - Check the page URL the visitor is currently on.
- Visitor State - Check which state the visitor is in. Useful for retail.
- Group - Nest conditions
Select 'Case' to choose from a list of your case tags.
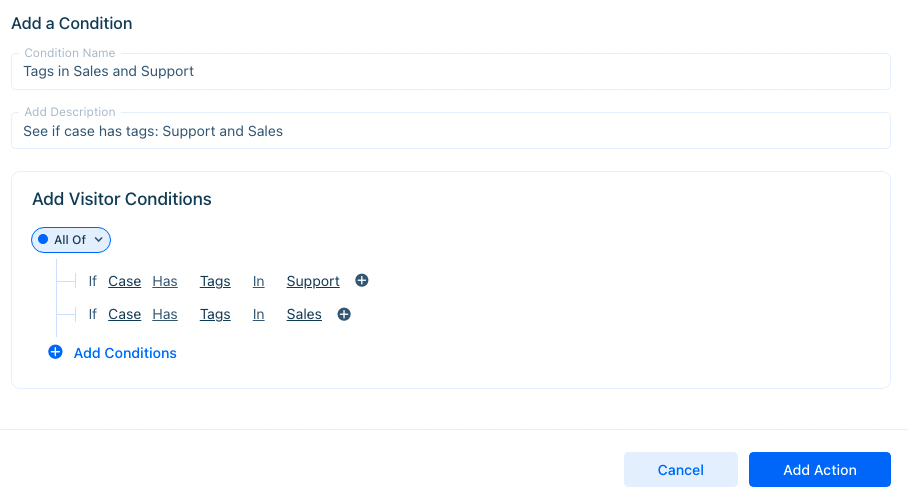
Some actions and entry points may have unique conditions.
Saving a Business Rule as a Draft
Unfinished Business Rules may be saved as drafts. To save an unfinished Business Rule, click 'Save Flow'. The flow will be saved as a draft. You will not be able to publish the rule until all actions are finished.
Publishing and Editing a Business Rule
Use entry points, actions, and conditions to build out your Business Rule. To create additional branches and nodes, press the plus sign (‘+’). Once you’ve completed a Business Rule, be sure to hit ‘Save Flow’ and set its status to active with the toggle button (right, green).
Note: You will only be able to save Business Rules with completed actions.
If you need to delete, copy, or edit a node (an action box), click on it and a submenu will appear. Click on the 'delete' or 'edit' button.

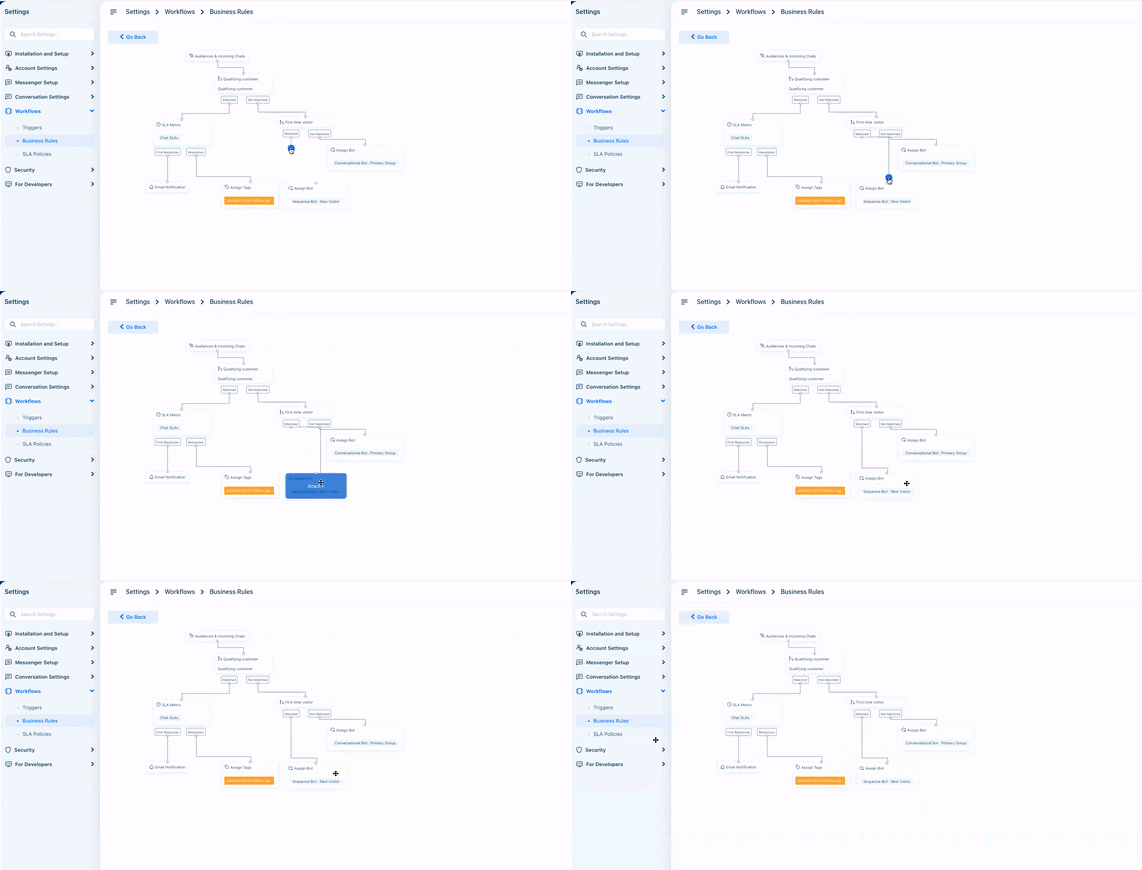
You may also drag nodes to branches to connect them.
If you need to change the Business Rule’s name or description, go back to the Business Rules list, click on the three dots (‘...’) under the actions heading,
and select ‘Edit Rule’.
To edit a Business Rule’s nodes and branches, select ‘Edit Flow’ from the same menu.
Have trouble with your Business Rules? Reach out to support@acquire.io.
Was this article helpful?


