Widget
FAQ: How do I customize the widget with CSS?
Customize the widget and create an on-brand experience for your entire website. Acquire has a nifty guide for easily changing the widget’s appearance using our customizing tools. And, if you’d like to make advanced changes, you may also alter the widget’s elements using CSS. Don’t know CSS? That’s okay. In this guide, we’ll cover common adjustments our customers have made using simple CSS code.
In this article:
- How to Change the Widget’s CSS Elements
- Removing powered by acquire.io
- Removing the Ability to Attach Files
- Removing the Ability to Add Emojis
- Changing the Bubble Action Colors
- Best Practices for Customizing the Widget
How to Change the Widget’s CSS Elements
In this guide, we’ll share the CSS code to change, add, and remove elements in your widget. All you’ll need to do is copy and paste the CSS code into Settings > Messenger Setup > Advanced Settings > Custom CSS.
If you’d like to paste more than one code block, paste the blocks on separate lines.
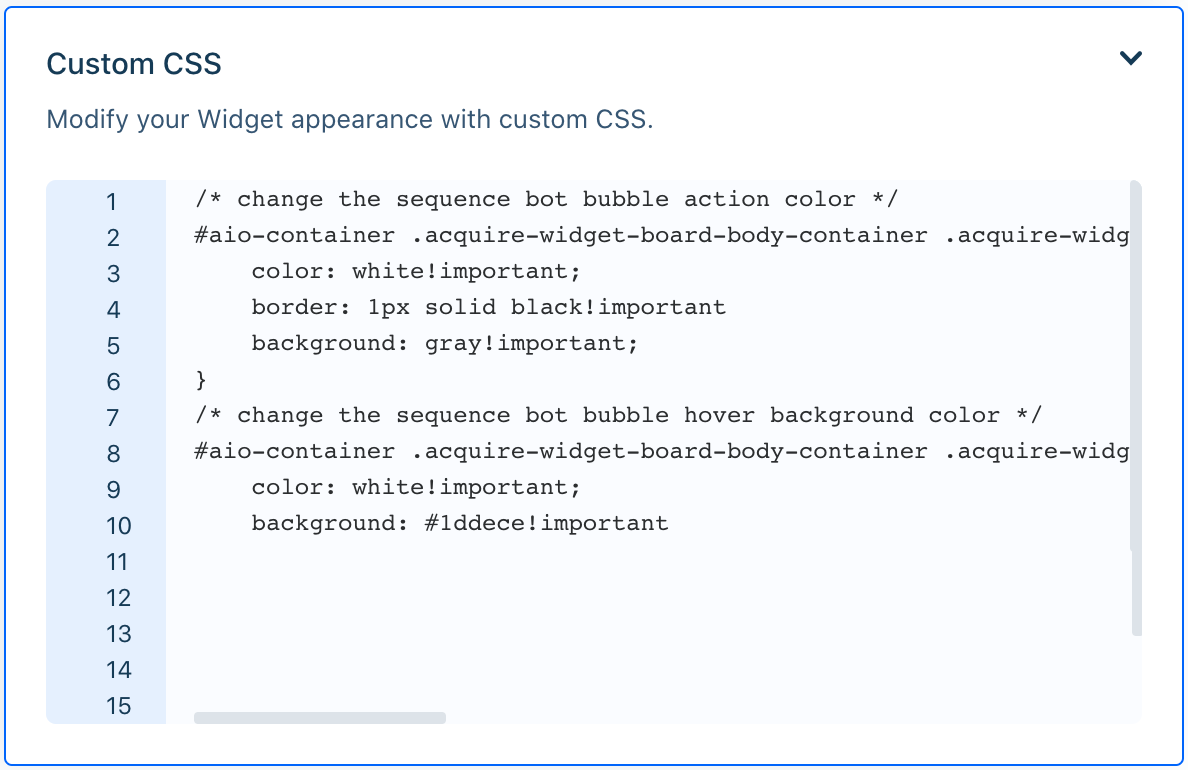
In this example, the code is pasted on different lines. CSS comments (the lines between the * and /, tell us what each block is doing.
Before getting started, it’s important to note that changes you make to the CSS will affect every instance of the widget. We recommend communicating with your team before making any major changes.
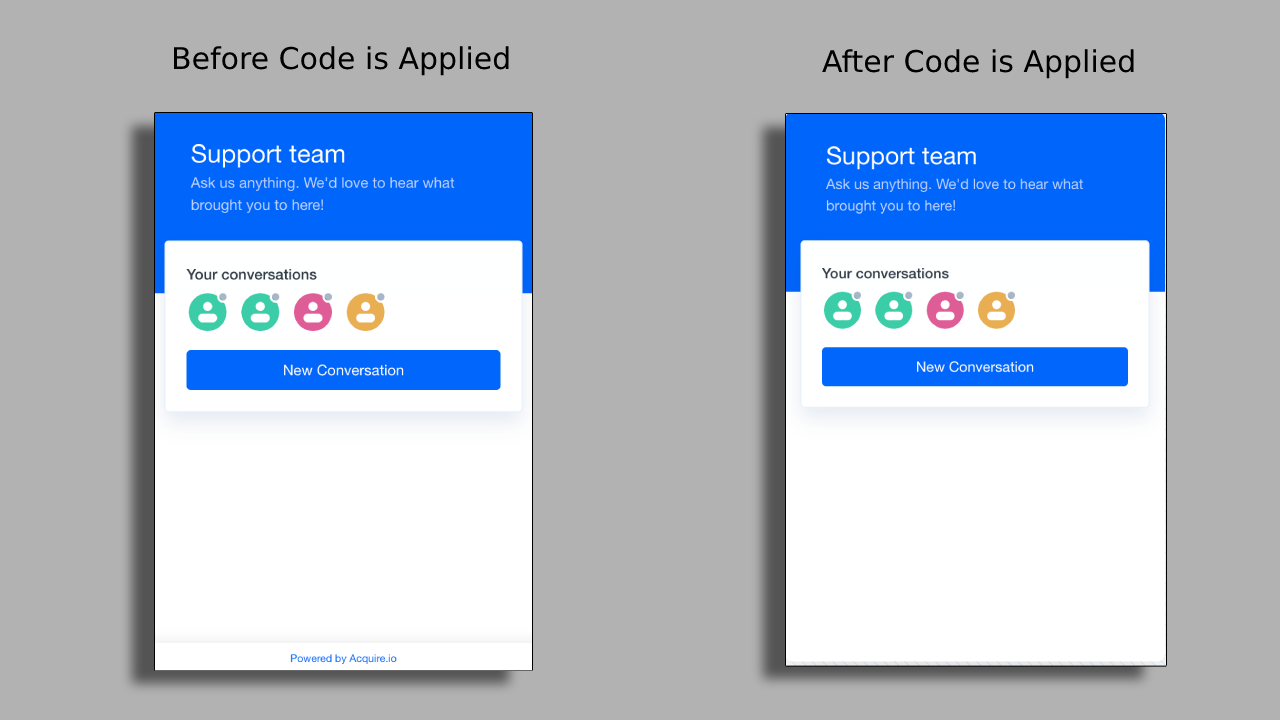
Removing powered by acquire.io
One of our most popular requests is removing the powered by acquire.io text at the bottom of the widget. Although we'd be ecstatic if you kept it, we understand if it’s not your brand’s style.
To remove powered by acquire.io, paste the following code into the Custom CSS field:
/* This removes powered by acquire.io */
#aio-container .aio-powered-link-container{
display: none;
}
Removing the Ability to Attach Files
You may want to consider removing the ability for visitors to attach files, especially if this isn’t standard practice in your organization. However, keep in mind that these changes all agents, so it’s a good idea to communicate with your team beforehand before you make any changes.
To remove the ability for visitors to attach files, paste the following code into the Custom CSS field:
/* This removes file uploads for visitors */
#aio-container .main-composer-send-button svg, #aio-container .main-composer-upload-button svg{
display: none;
}
#aio-container .main-composer-upload-button{
cursor: pointer;
pointer-events: none;
}
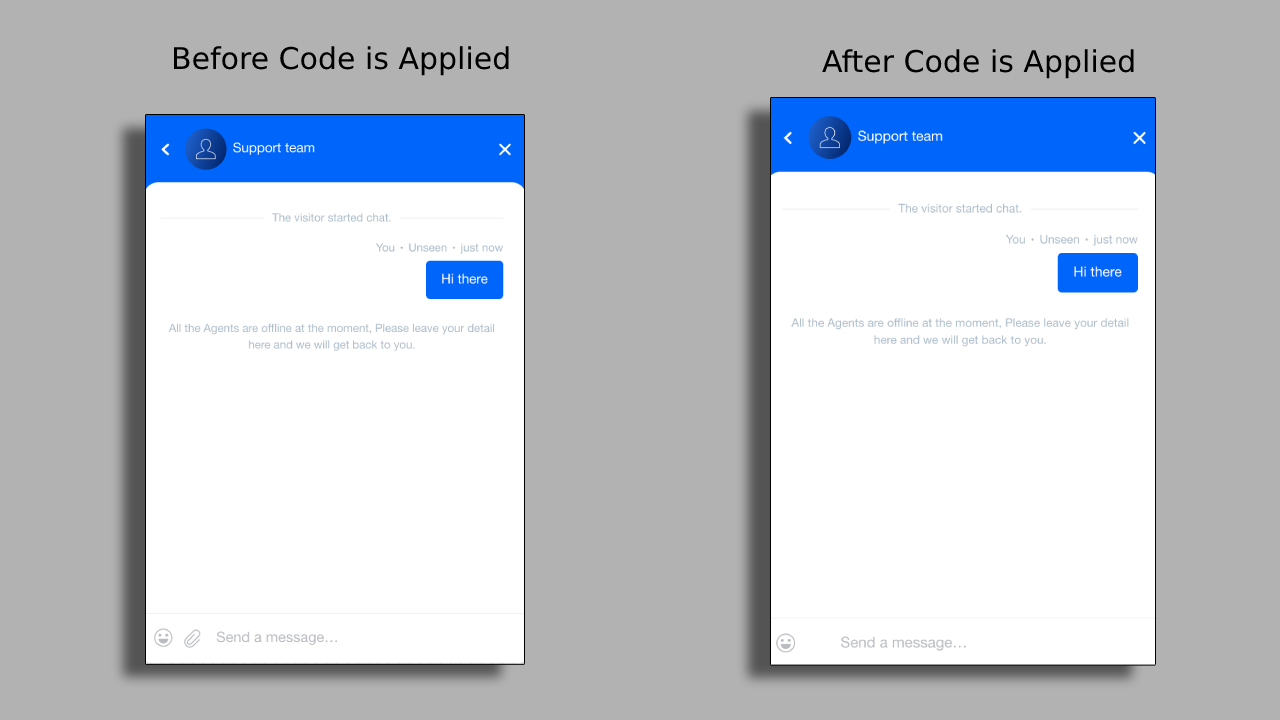
Please note that this code will not prevent agents from sending files via the widget.
Removing the Ability to Add Emojis
Emojis are a fun and flexible way for visitors to communicate, but they’re not always great for setting a serious tone.
To remove the ability for visitors to add emojis, paste the following code into the Custom CSS field:
/* This removes emoji button for visitors */
#aio-container .main-composer-send-button svg, #aio-container .main-composer-emoji-button svg{
display: none;
}
#aio-container .main-composer-emoji-button{
cursor: pointer;
pointer-events: none;
}
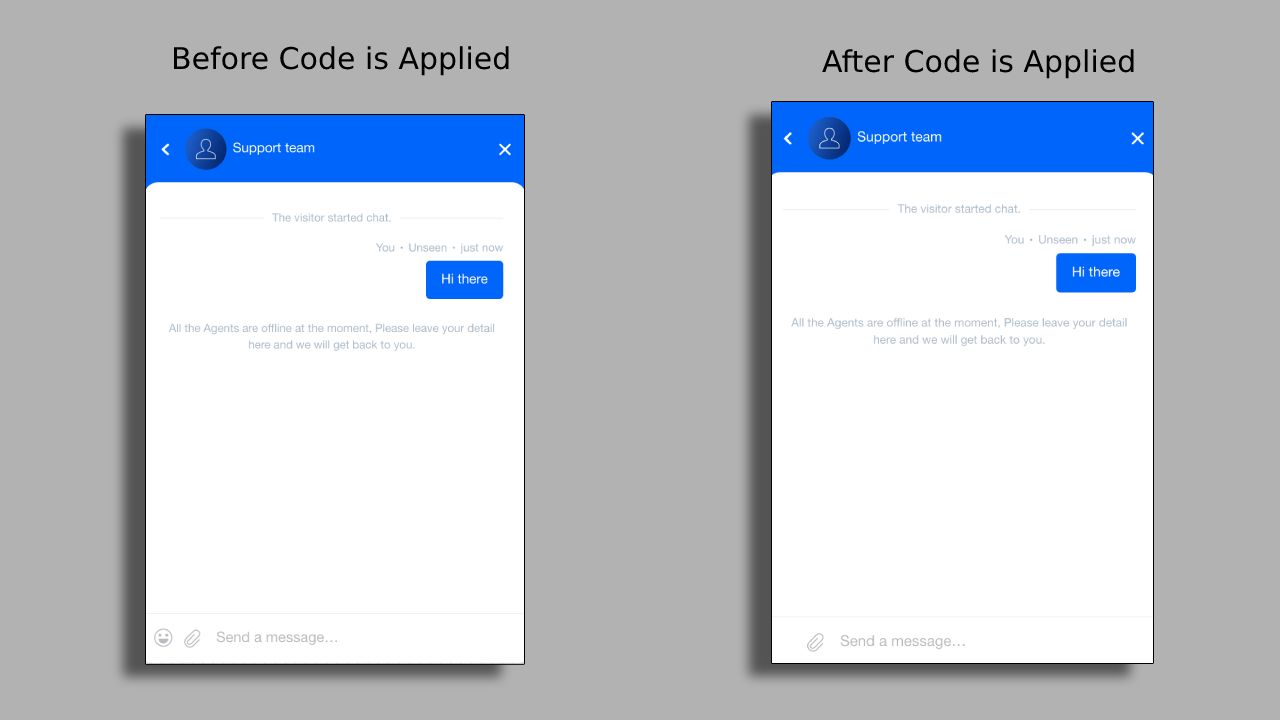
Please note that this code will not prevent agents from sending emojis via the widget.
Changing the Bubble Action Colors
When you use a sequence bot, the bot’s bubble actions adhere to the color scheme you chose in Settings > Messenger Setup > Chat Widget > Appearance. However, you may need to change the bubble action’s color so it stands out on your website.
The code below has two blocks. The first block changes the color of the bubble actions. The second block changes the color when the visitor hovers over a bubble action. While hover effects are optional, they’re an intuitive way to let visitors know which option they’re selecting.
To change the color of Bubble Actions, paste the following code into the Custom CSS field. Replace the color, border, or background color with color names or hex codes: /* change the sequence bot bubble action color */
#aio-container .acquire-widget-board-body-container .acquire-widget-board-body .acquire-widget-board-component.acquire-widget-board-button.acquire-widget-board-button-s .acquire-widget-board-button-outlined.acquire-widget-board-button{
color: white!important;
border: 1px solid black!important;
background: gray!important;
}
/* change the sequence bot bubble hover background color */
#aio-container .acquire-widget-board-body-container .acquire-widget-board-body .acquire-widget-board-component.acquire-widget-board-button.acquire-widget-board-button-s .acquire-widget-board-button-outlined.acquire-widget-board-button:hover{
color: white!important;
background: #1ddece!important;
}
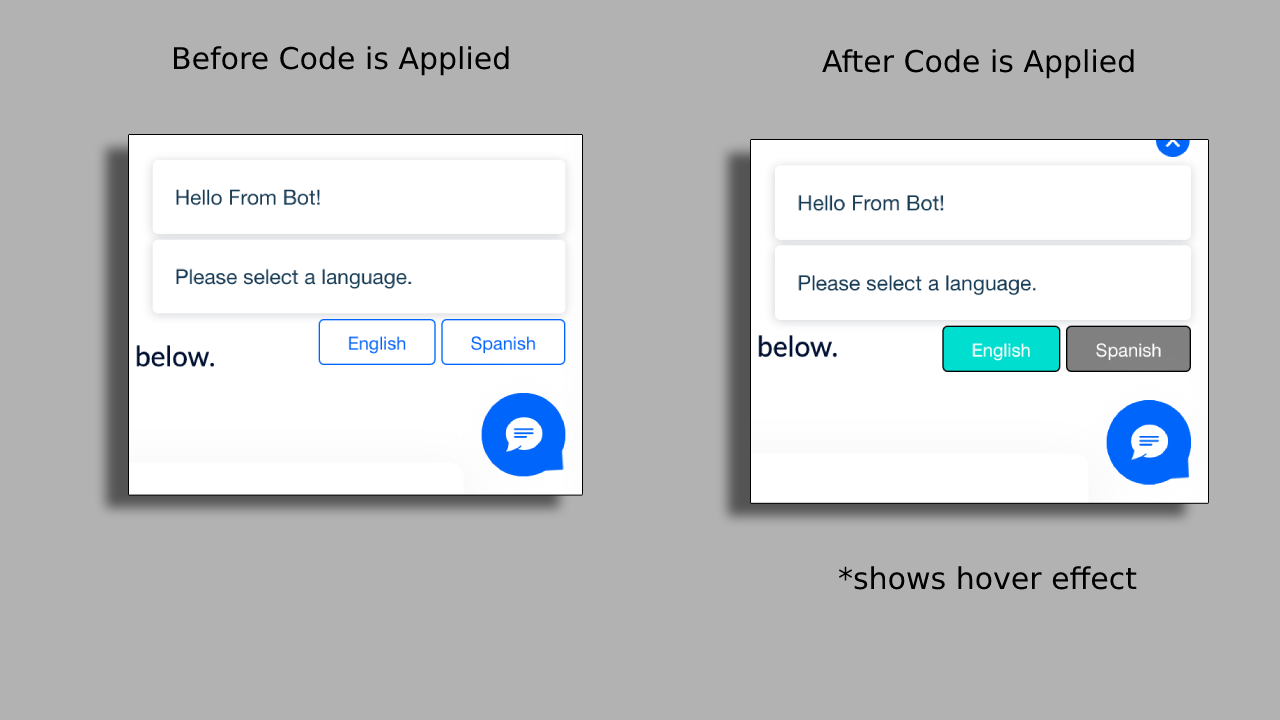
Please note that you’ll need a sequence bot with greetings enabled to see this effect.
Best Practices for Customizing the Widget
Keep these best practices in mind when using CSS and customizing the widget.
Use Comments
Before each code block, it’s a good idea to add a short description about what the code block does. That way, if someone else has to make changes (or if you have to make changes further down the road), everyone will know exactly what to keep and what to delete.
To add a comment, use CSS-style formatting:
/* This is a CSS comment */
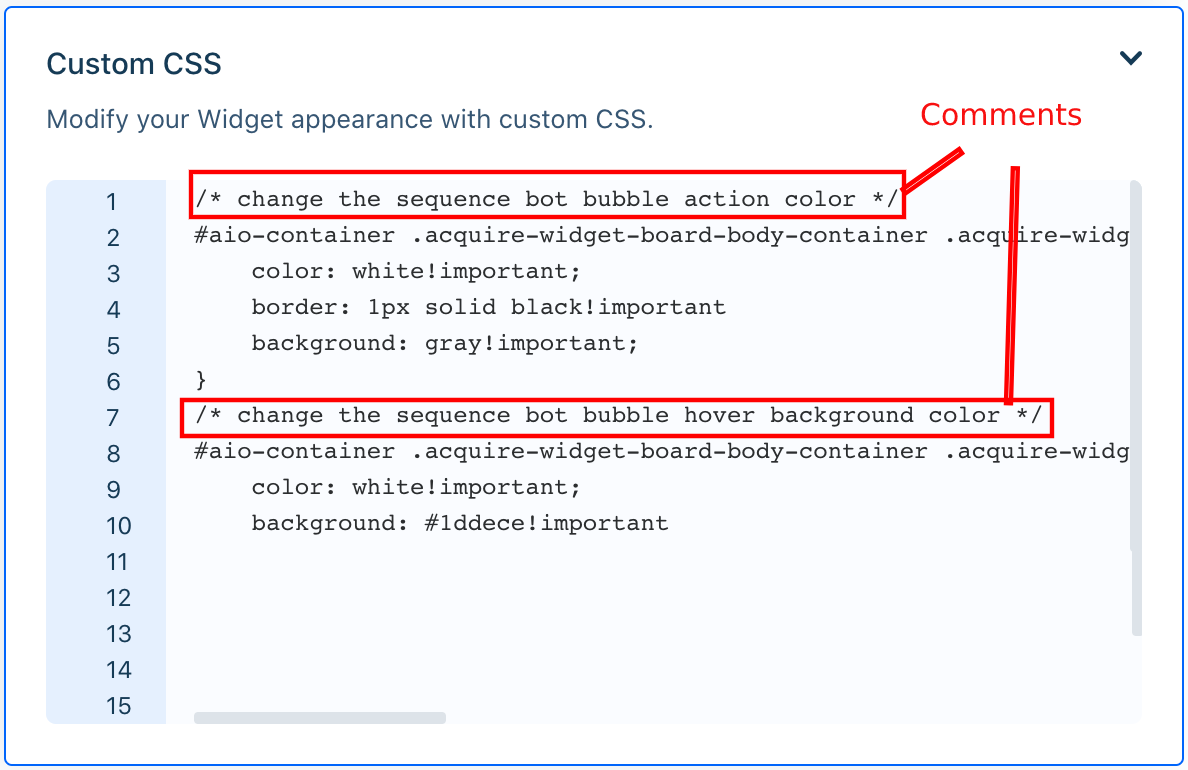
Comments won’t appear in the widget, so don’t worry about customers seeing your descriptions.
Test Out Changes from the Simulate Page and Your Live Site
Test out how the widget behaves from the simulate page and your live site. Using your live site will help you determine if the colors work well with your site’s color scheme. Be sure to view each page your site is on and be sure to hover over the bubble actions if you’re using a hover effect.
Be Sure to Properly End Lines and Close Braces
Sometimes CSS writers run into trouble when the braces ‘{}’ are not closed properly and when the lines don’t end with a semicolon ';'.
When ending a line, be sure to add a semicolon:
color: red;
background: white;
Then be sure that the code is properly enclosed in braces:
#acquire-container{
color: red;
background: white;
}
The system may not show an error message for incorrect formatting, so it’s a good idea to double-check your code before saving your changes.
Having trouble? Reach out to us at support@acquire.io.
Was this article helpful?


