Widget
Adjusting Advanced Widget Settings
You can customize your Chat Widget even further with Advanced Settings. Advanced Settings are broken into three categories: Displaying Pictures, Customizing Visibility, and Configuring Conversations. To get started, go to Messenger Setup > Chat Widget > Advanced.
In this article:
- Displaying Pictures
- Customizing Visibility
- Configuring Conversations
Displaying Pictures
Showing an image of an agent or a logo lets your visitor know they’re connecting with professionals or a brand.
- View a list of online and offline agents with 'Show agent list'
- For customer service tasks, use 'Show agent avatar in chat' to let your visitors know they’re connecting with a real person
- Need your agents to be represented by a unified image? Use 'Show company logo' to display your company’s logo during chats
- Let your visitors know who’s online with 'Show agent picture in launcher'. (Note: only works with Circle Launcher).
Note: If both Show agent picture and Show company logo are selected, only the company logo will appear.
Customizing Visibility
Choose what appears in your widget by customizing links.
- Select 'Show privacy link in widget' to add a link to your Privacy Policy at the bottom of the widget. Select 'Add Link' to insert the link to your Privacy Policy page.
- You can choose to turn off the widget for the mobile version of your site by setting 'Hide widget on mobile devices' to on and copying the provided code inside your site's head tag.
- You may want to embed your widget behind a button instead of the default launcher. Use 'Hide widget on website' and copy the provided code onto that element.
Configuring Conversations
Visitor and company needs are always in flux. Configure conversations to meet the demands of a constantly changing world.
- Set 'Enable single conversation thread' to on to prevent multiple threading.
- Use ‘Enable wait time prediction’ to show visitors how long they may need to wait before connecting with an agent. To show the visitor’s position in line, use ‘Show case queue position’. If you also have ‘Enable wait time prediction’ enabled, only the wait time prediction will show.
- Clean up the widget with 'Clear visitor chat history' when a session ends, a visitor won't see their previous conversations.
- Use a bot to answer your visitor’s questions, even when agents are offline, with 'Show widget when all agents are offline'.
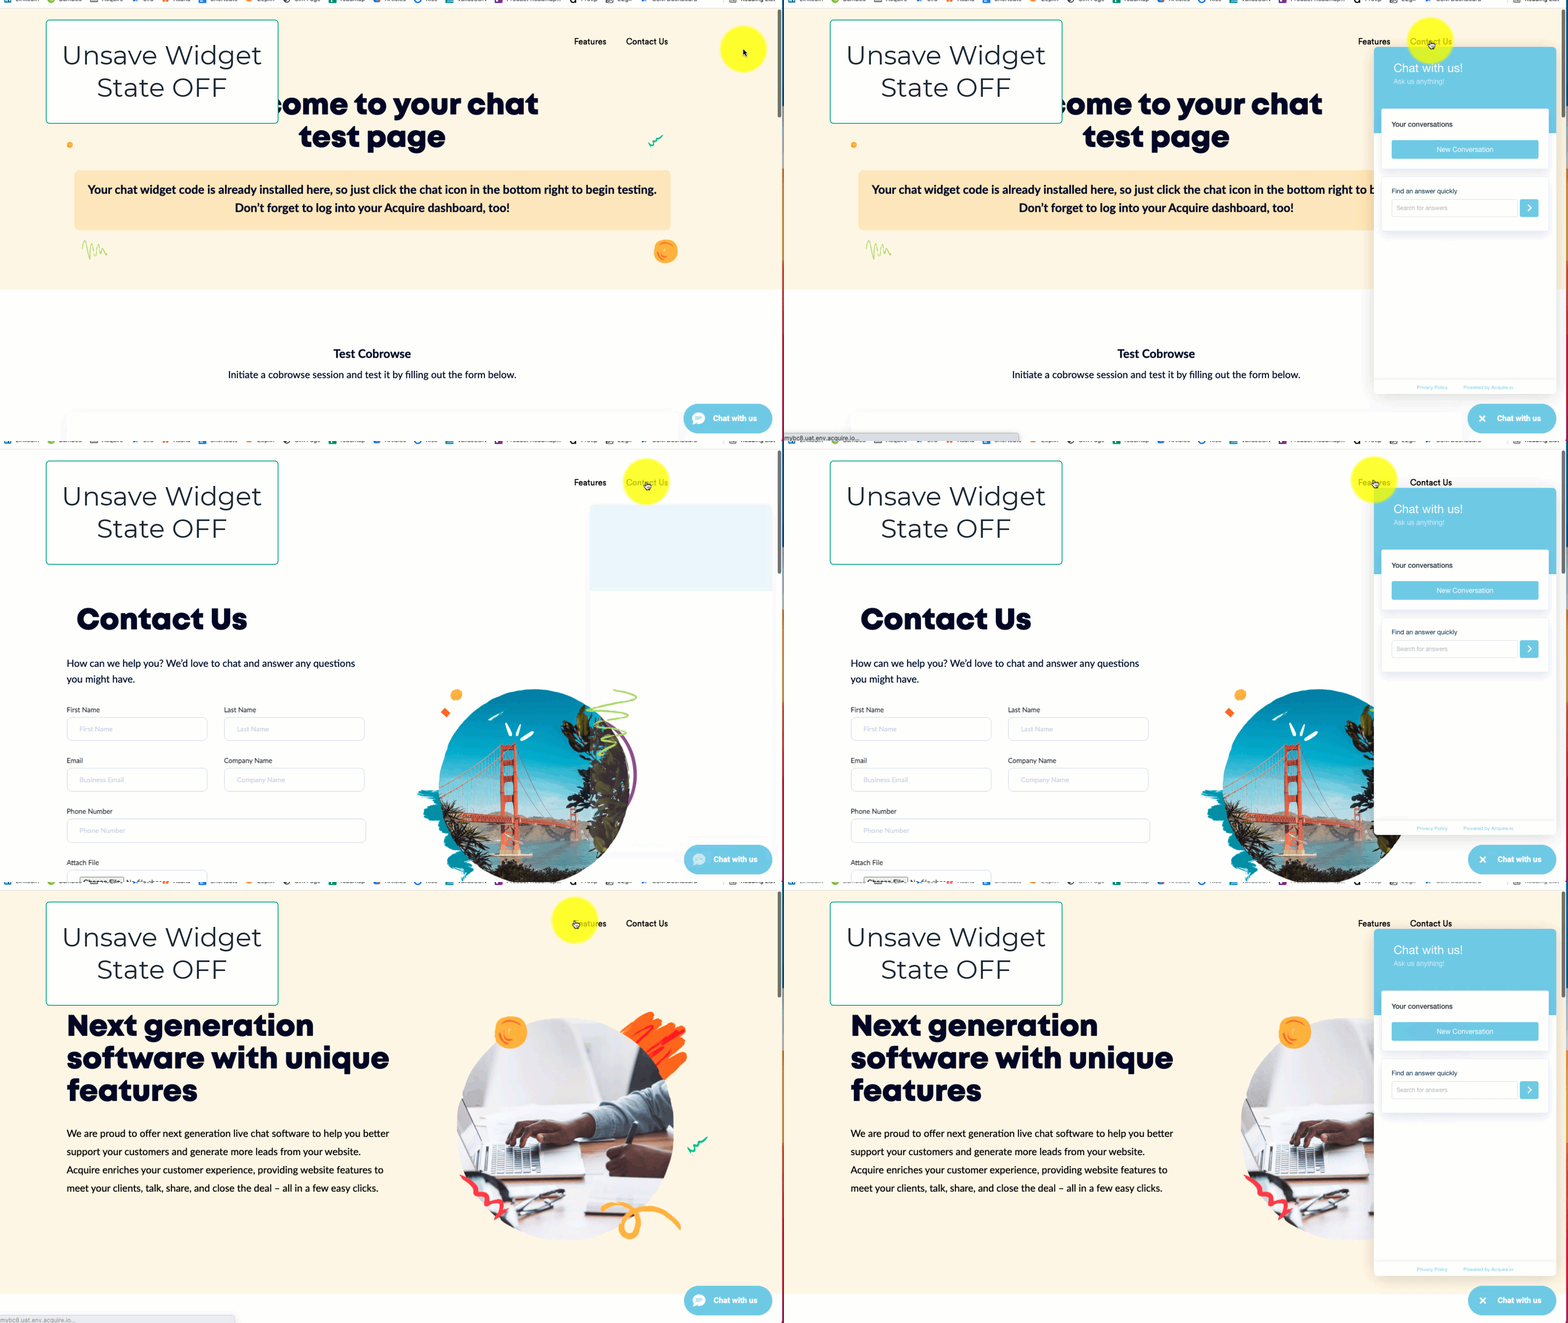
- Turn 'Unsave widget state' off so the widget remembers if it was opened or closed by the visitor when they visit different pages on your site.
- Use 'Offline agent invite mail' to send a summary of all conversations that took place while your agents were offline.
When 'Unsave widget state' is off, the widget "remembers" if it was open or closed by the visitor when they navigate to other pages.

When 'Unsave widget state' is on, the widget will revert back to the opposite state when the visitor navigates to another page.

You’ve just customized your widget to deliver a great user experience. Unsure about something? Have a suggestion? Reach out to support@acquire.io
Was this article helpful?


