For Administrators
Setting & Managing Operating Hours & Holidays
Operating Hours allow you to set the hours the Acquire Web Widget is displayed on your website. This setting will be in effect even if an agent is online. Popular ways to use Operating Hours include:
- Designating your time zone based on the regions you serve
- Collecting inquiries only when a live agent is available
Turning off the Widget on special dates like national or regional holidays
In this article:
- Setting Your Time Zone
- Specifying Operating Hours
- For an Entire Account
- For Departments
- Adding Holidays
- Setting a Timezone on Your Profile
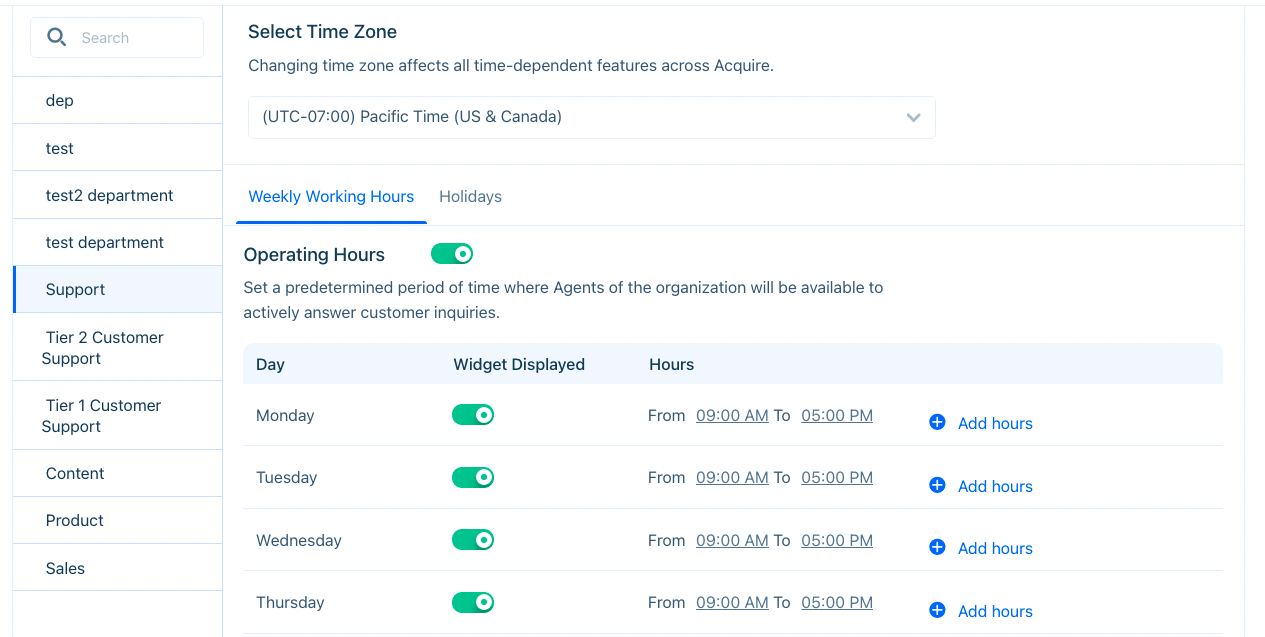
To get started with Operating Hours, navigate to Settings > Conversations Settings > Operating Hours.
Setting Your Time Zone
Operating Hours and all other time-dependent Acquire features, like analytics, are based on the time zone you set in the platform. The default selection is UTC. Determine if you'll be using department timezones or a global, account-level timezone and update it to match your preferences.
To set your time zone, head to Settings > Conversation Settings > Operating Hours > Select Time Zone and use the drop-down menu to find your time zone.
Specifying Operating Hours
Click on the 'Operating Hours' tab and toggle the switch on (green) to enable this feature.
Next, toggle on all the days you want the Widget to appear on your website. Then, choose which hours the Widget will be visible each day. Click ‘Set Hours’ and your hours will be set.
If you want the Widget to be visible when users are offline, use Business Rules.
For an Entire Account
If you want to set Operating Hours for the entire account (all agents), use the Account Level option.
If you choose account level, your entire platform and all your agents will be on the same time zone. Please note that routing through ‘Operating Hours’ in a Business Rule will be affected.
For Departments
Not every team operates in the same time zone, or on the same hours. To get started, go to Account Settings > Choose ‘Department Level’ to account for a distributed team. You will be able to set each department’s time zone, operating hours and holidays separately.
When you select ‘Department Level’, you'll have the option to set operating hours separately.

Set operating hours by departments. It may be helpful to organize agents by timezone by creating new departments.
A Note on Operating Hours and Business Rules
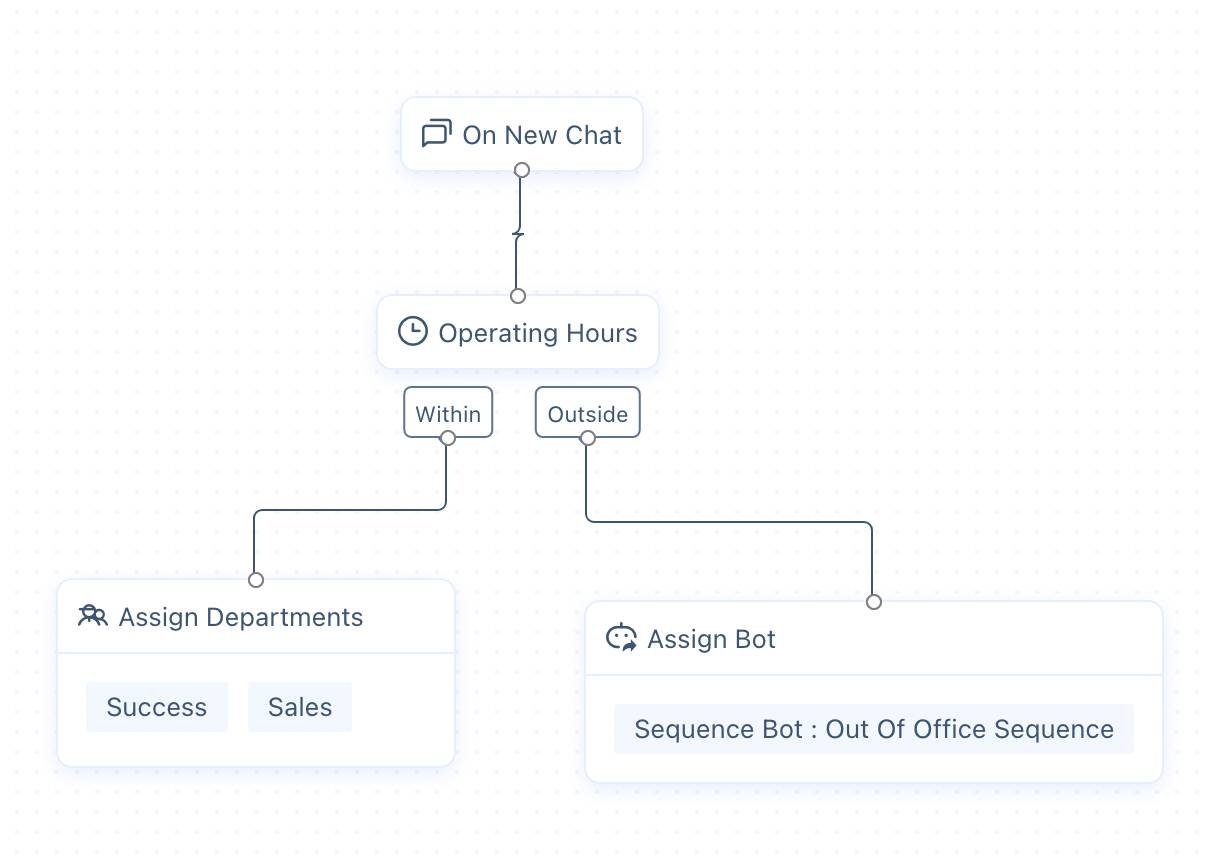
Business Rules are the method of routing incoming conversations to departments and agents. There are conditions to check if a conversation comes in during or outside of operating hours. However, if a conversation comes in during operating hours, and there's no agents to respond to that conversation, the Business Rule will still behave as if there were. We recommend also adding a condition to check if agents are online when implementing Operating Hours within a Business Rule.
Adding Holidays
Add holidays your organization observes from Settings > Conversation Settings > Operating Hours > Holidays. Once added, your agents will appear offline (even if they're online during the holiday). If you have an operating hours condition in a chat Business Rule, the widget will display the outside of operating hours action instead.

In this example, when holidays are enabled and the visitor interacts with the widget, they'll talk to a bot, even if they're interacting within operating hours.
To add Holidays, click on the 'Holidays' tab. Click ‘Create Holiday’ and name your holiday. Then, select the date of the holiday. Finally, choose whether this holiday is all day, or just during a specific time window. To add additional Holidays, click ‘Add more holidays’. Then hit ‘Save’.
To edit a holiday, click on the three dots ('...') and select ‘Edit’.
Way to go! Now your Widget can enjoy the holiday too.
Holidays are created on a year-to-year basis. At the start of a new year, administrators should create new holidays and delete the old ones.
Setting a Timezone on Your Profile
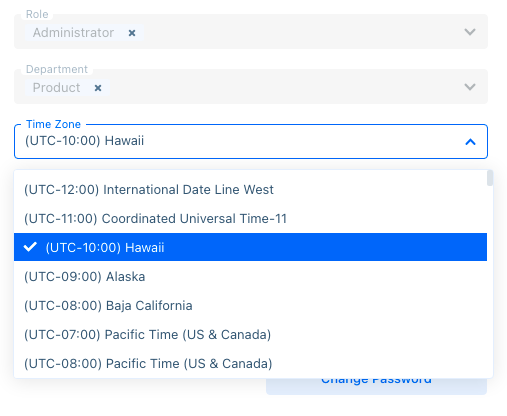
Agents may also set their individual timezones by going to their profile (by clicking on their agent picture) and adjusting the Timezone settings.

Individual timezones may be set from the profile. However, they have no effect on operating procedures.
If the agent works outside of a department's or account's timezone, it's a good idea to set an individual timezone here. Profile timezones do not affect Operating Hours Business Rules or other routing-based procedures. However, setting a profile timezone makes timestamps clearer for the agent. Dashboard timestamps and Analytics reports made by that agent will display in their timezone.
Having trouble? Reach out to us at support@acquire.io.
Was this article helpful?


