For Administrators
Managing and Using Lists
Lists collect contact and conversation information. You’ll be able to view closed conversations in the Conversation List, in addition to viewing contacts, company, and campaign details.
To access these lists, click on List.
In this article:
- Conversation List
- Contact List
- Company List
- Campaigns
Conversation List
All conversations show up in the Conversation List. It’s also the best place to reopen a conversation if it’s previously been closed. To reopen a conversation, click on its Contact Id/ Case Id or Title.
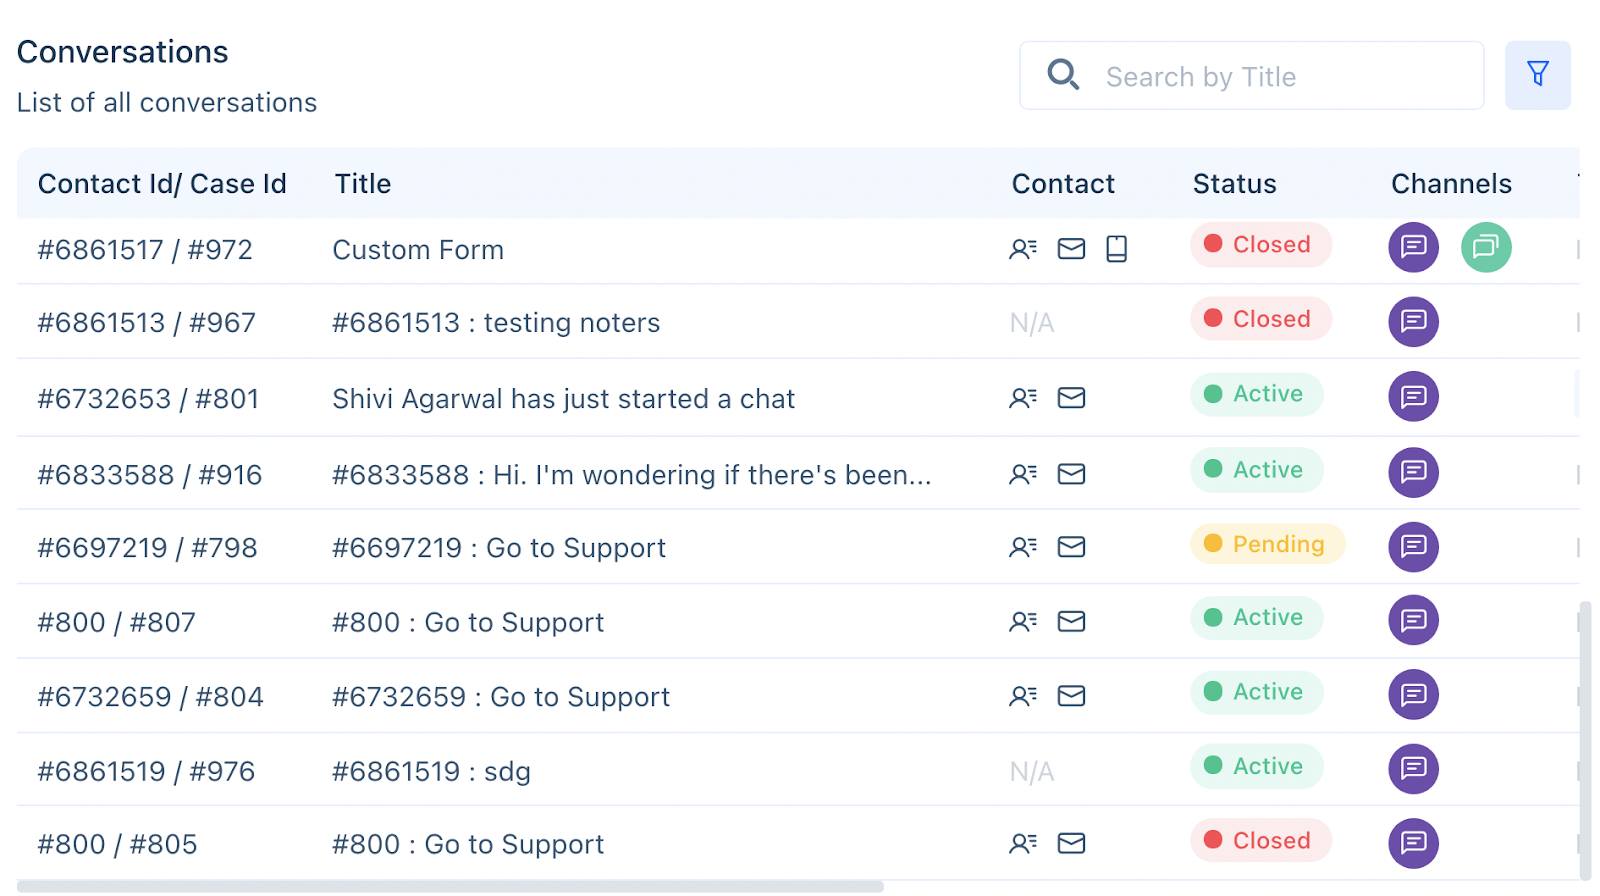
The Conversations List displays:
- Contact Id/ Case Id - The IDs for the contact and case.
- Title - If the conversation has a little, this will be displayed. If not, the Contact ID will be displayed.
- Contact - The icons indicate contact details. The person icon represents the contact’s name, the mail icon represents the contact’s email address, and the phone indicates the contact’s phone number.
- Status - The status of the conversation. Active: an agent is currently engaged with the contact. Pending: no agent has picked up the conversation yet. Closed: The conversation is closed or inactive. Queue: conversations enter this state before they enter the pending status. If you see a queued conversation, it may be a sign of significant lag because of a slow server or suboptimal Business Rule.
- Channels - The types of channels the conversation took place in. Audio call, chat, mail, private form, SMS, Video Call, VoIP.
- Users - The agents who engaged in the conversation.
- Created On - The date the conversation came into Acquire.
- Last Updated - Either the date of the last message sent or when contact details were last updated in the contact profile.
Using search and filters:
- Search by contact name, conversation title, or their IDs.
- Filter by conversation status or conversation channel.
Contact List
The contact list shows information about contacts.
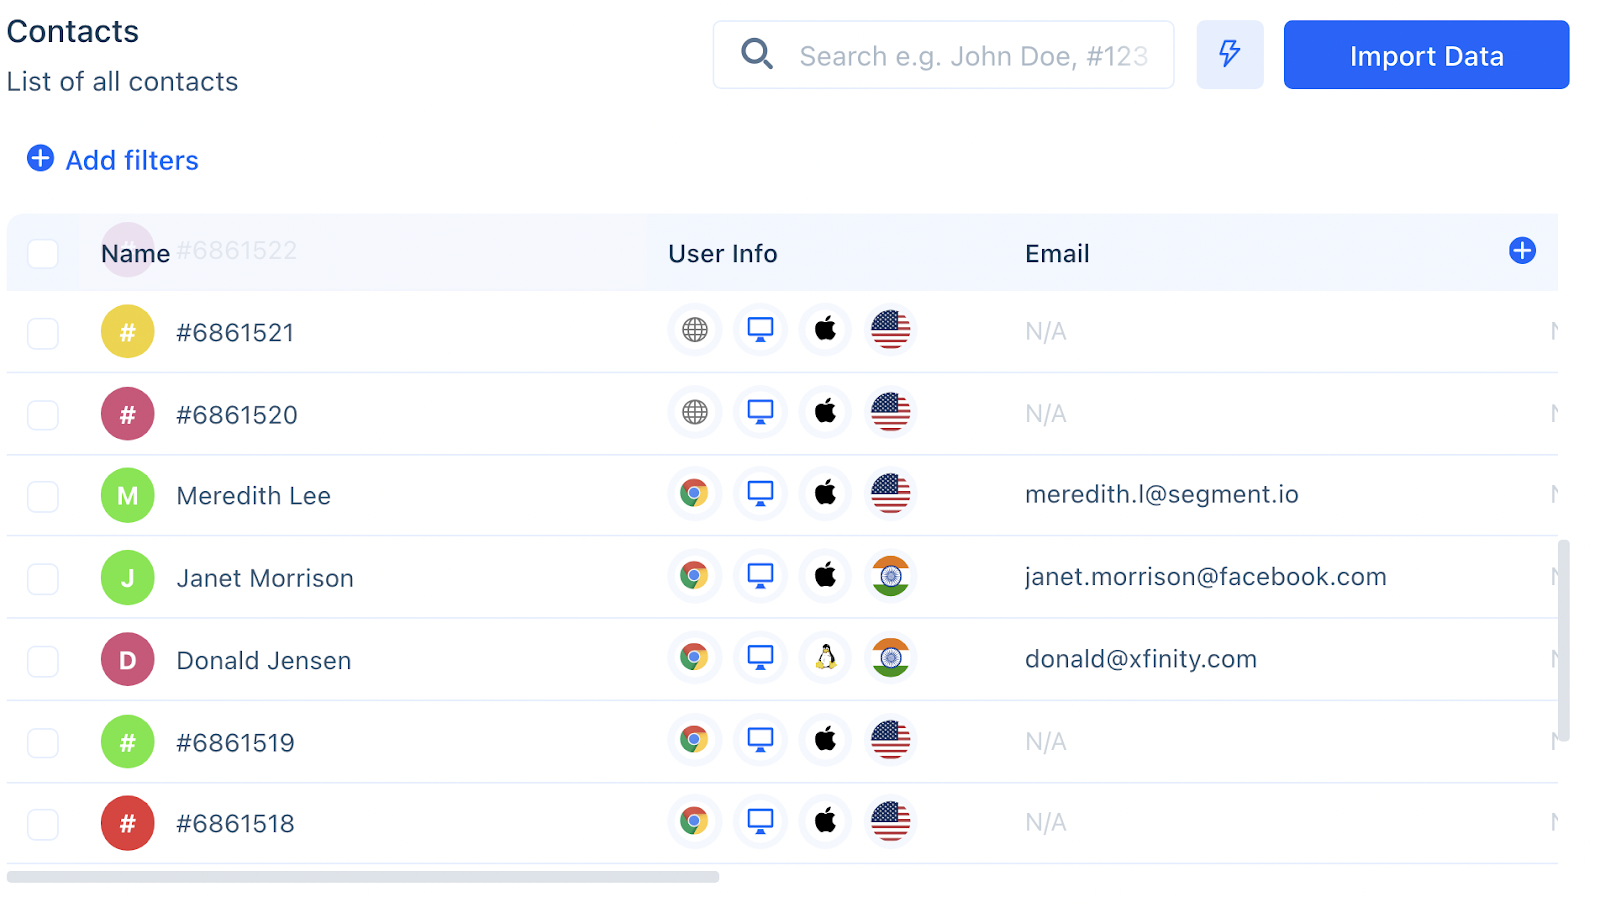
From the Contact List, view information about the contact’s:
- Name - the name or ID associated with the contact.
- User Info - the browser, device, operating system, and country the contact used to engage with Acquire.
- Phone Number
- Company Name
- Tags
- Region
- City
Deleting Contacts
To delete a contact, select one or more contacts and then click on the action button (lightning bolt). Be careful. Deleting contacts permanently deletes information including their details.
Importing Data
Click on 'Import Data' to import a CSV file of contacts from an external database. Your rows should read as follows:
- Name
- Phone
- Address
- City
Download a sample of this CSV by clicking on 'Import Data'.

Companies
For certain organizations, it may be useful to organize contacts by company. Acquire has the ability to recognize companies from a contact’s email address. Contacts may also be manually assigned to companies from their contact profiles. To create a new company, click on ‘Create Company’.
From the Company List, view:
- Logo
- Name
- Website
- City
- State
- Country
- Industry
Click on a company’s name to view additional company information and a list of their employees.
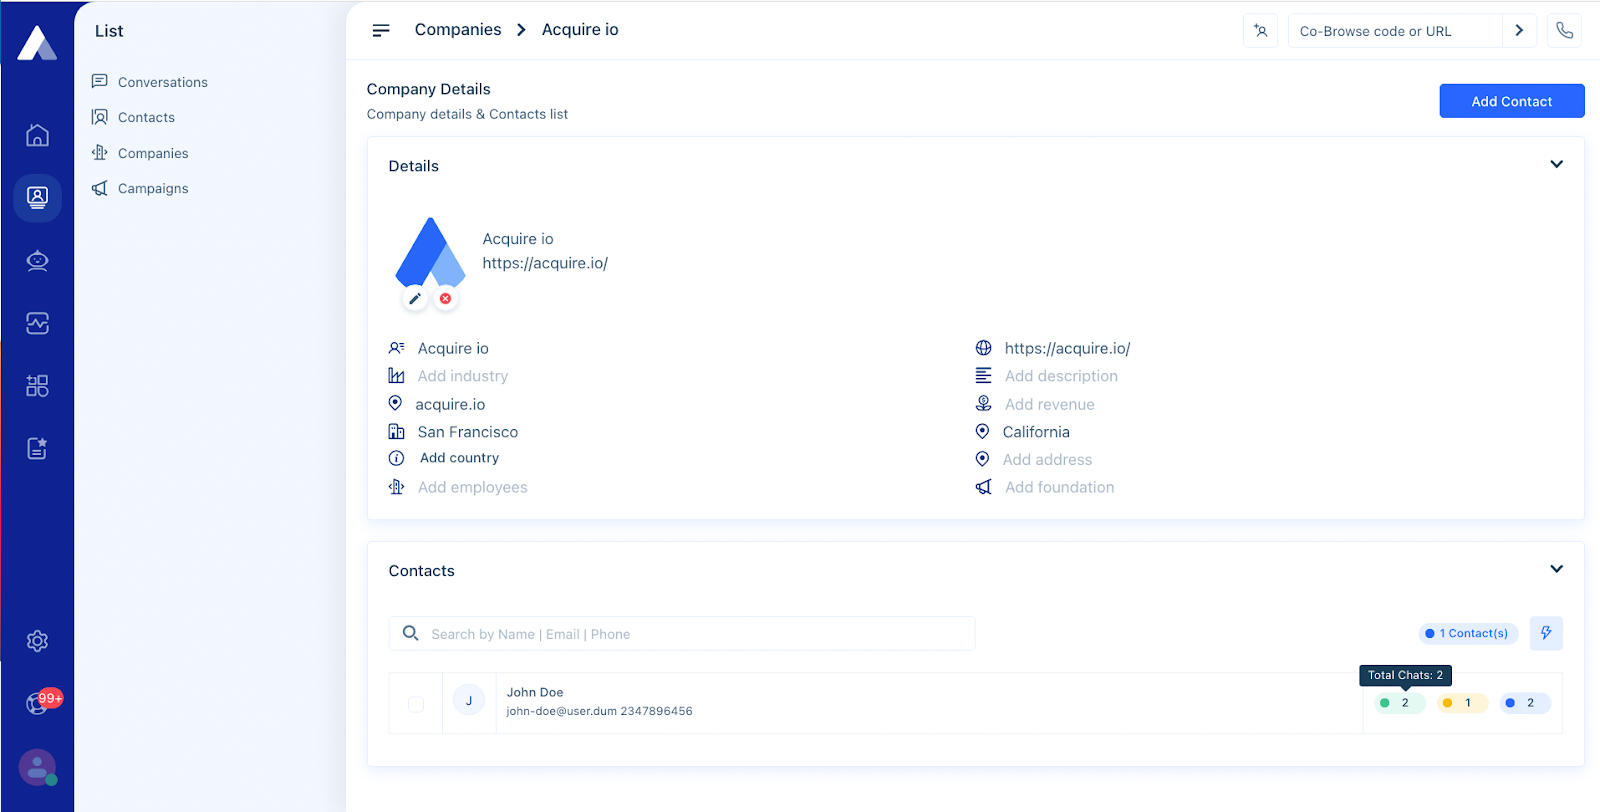
If you need to remove a contact from a company, select the contact, click on the action (lightning bolt) button, and select ‘Remove Contacts’.
Campaigns
Let groups of customers know about upcoming events with campaigns. Send message blasts to your contacts letting them know of upcoming promotions or outages.
Creating a Segment
To start using campaigns, create a segment of contacts you want to send the campaign message to. Segments are unique to each account, and you won’t be able to use another agent’s segments in your campaigns. Follow these steps to create segments for your account:
Step 1: To set up a segment, go to your Contact List.
Step 2: Use the ‘Add filters’ button to search for contacts. You may search by name, company, location, technology used, and custom fields.
Step 3: Once you’ve selected your filters, you’ll see a list of the contacts associated with that filter.
Step 4: Next to the filter, you’ll see an option to ‘Save Segment’.

Step 5: Once you ‘Save’ the segment, you may use that segment in your campaigns or in other places throughout the platform.
Sending a Campaign
After you’ve created a segment, go to the Contact List and click on Campaigns. Here you can add campaigns.
Click on the ‘Create Campaign’ button to start composing your campaign message, title, and description.
In ‘Select segment’, choose the contact segment you’d like to send the message to. You may send your message via SMS or email.
Under ‘Schedule Type’, you may also schedule a time to send the message: choose ‘Right Now’ or a custom time.
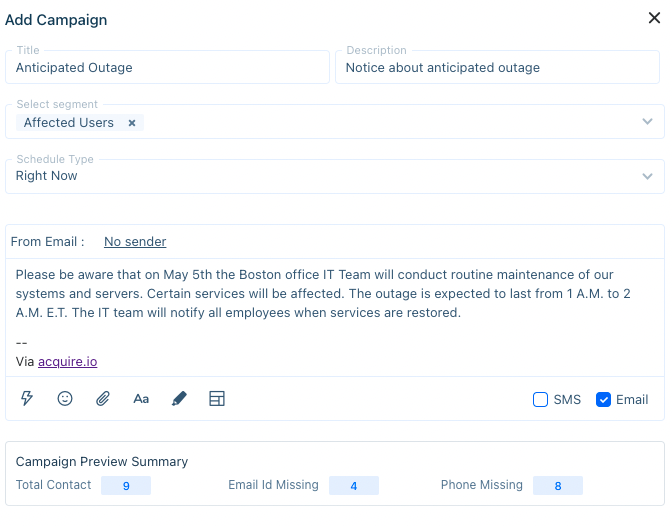
Once you’ve written your message, click on ‘Create’. You’ll be notified once your campaign is sent out.

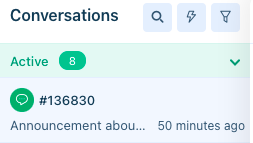
Once a contact responds to your campaign, it will show up as a conversation in Agent Home. You'll be able to converse with the contact just as you would during a normal conversation.
Viewing Campaign Data
Once the campaign is sent, you may view information about the campaign by going to List > Campaigns.
See information about the campaign such as:
- Title
- From Mail
- From Phone
- Type - whether it was an SMS or email campaign or both.
- Status - Pending, Complete, Failed, Scheduled, or Draft.
- Created On
- Created By - the agent who sent out the campaign.
Click on the campaign’s title, or click on the three dots (‘...’) under the
View information found in list view as well as:
- Segment
- Content
- Total contacts - the number of contacts that the campaign was sent to.
- Emails sent
- SMS sent
- Email ID Missing
- Phone Number missing
Use campaigns to inform customers about exciting updates or potential service outages.
Having trouble or have a suggestion? Reach out to support@acquire.io.
Was this article helpful?


