Widget
FAQ: Can I get visitor consent through the widget?
If your organization is in healthcare or a similar industry, you may be required to show proof of consent when you interact with visitors. With Acquire, you may select what kind of information your consent form displays and control when and how frequently it appears in the widget.

In this article:
- Creating a Custom Attributes to Capture Visitor Consent
- Creating a Pre-Chat Form to Record Consent
- Controlling the Frequency of the Form
Creating a Custom Attribute to Capture Visitor Consent
To get started, you’ll need to create a Custom Attribute to record your visitor’s consent. Go to Settings > Account Settings > Custom Attributes and click on ‘Create Attribute’.
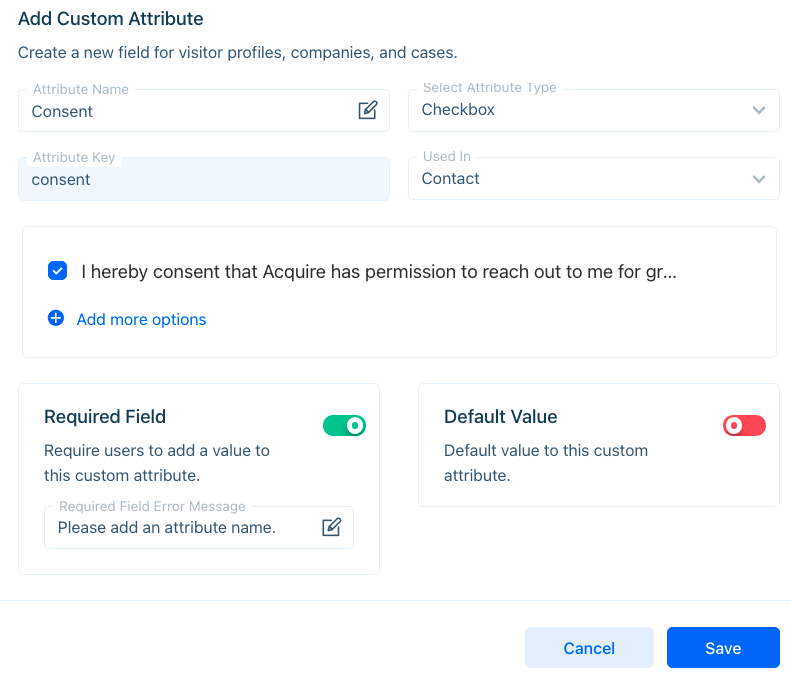
Fill in the following fields:
- Name your attribute ‘Consent’ or a similar name
- Most consent forms use a checkbox. In ‘Select Attribute Type’ choose ‘Checkbox’ from the drop-down menu. Three checkbox labels will appear.
- Do not change the attribute key. It is used as a variable for webhooks and other functions.
- In the ‘Used In’ field, assign the attribute to ‘Contact’.
- Delete two of the checkbox labels by clicking on the trash can icon. Then, write your consent message text in the remaining checkbox label. Consent forms differ widely, but you should explain what information you collect and how that benefits the visitor
- Enable the required field option by switching it from read to green (left to right) to make sure the visitor checks it.
- Since this is a required attribute, you likely do not need to assign a default value. If you choose to do so, you should write false in the field.

Once complete, your form should look similar to the above picture.
Creating a Pre-Chat Form to Record Consent
Now that you’ve created a custom attribute, you’ll want to put that attribute in a form. Go to Settings > Messenger Setup > Chat Widget > Chat Form.
- Under ‘Online Chat Form’, locate the Pre-Chat Form and click on ‘Add more’ to add more fields.
- Select your consent attribute from the drop-down.
- You’ll also probably want to select ‘name’, and ‘email’ or ‘phone number’.
- Use the three bars (‘≡’) to organize the labels in the order you want them to appear.

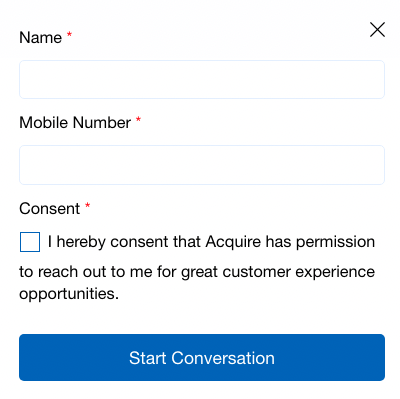
Your form should look something like this once complete.
The online form will appear when agents are online. To gather visitor responses when agents are offline, use the offline form.
Controlling the Frequency of the Form
You probably want to make sure that new visitors to your site fill out the form, but what about returning visitors? If you’d like to only ask new visitors for their consent, follow the directions below.
When using the consent form with a chatbot, go to Chatbots > Configurations and navigate to the ‘Skip Flow for Existing Details’ toggle. Enable it by switching it to green (right).

The bot won’t ask for a visitor’s details again. This setting also applies to non-bot interactions. If an agent connects with a visitor whose details are in the system, the chatform will not appear.
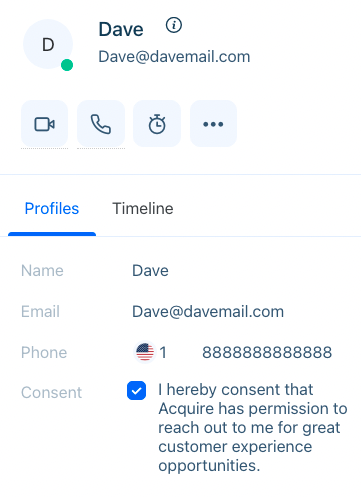
Agents may see the visitor’s details by viewing the visitor profile pane to the right of the conversation window.

Use consent forms to satisfy your mandatory and non-mandatory operating needs.
Having trouble? Reach out to us at support@acquire.io.
Was this article helpful?


