Settings
Setting Up a GoDaddy and Outlook Inbox
If you’ve set up your Domain through GoDaddy, and want to forward emails to Acquire, there may be some set up involved. But don’t worry. We’ll walk you through the steps to respond to emails in Acquire without having to switch between inboxes.
This guide is intended for GoDaddy users who have or want an Outlook inbox.
In this article:
- Setting Up an Outlook Inbox Through GoDaddy
- Linking Your GoDaddy Account to Acquire
- Forwarding Your Acquire Email Address to GoDaddy
- Verifying the Forwarding Address and DNS
- Testing the Inbox Configuration
What you’ll need:
- A GoDaddy Domain with Administrator Access
Setting Up an Outlook Inbox Through GoDaddy
When you purchase a Domain with GoDaddy, you also purchase an email. GoDaddy provides Microsoft 365 Email accounts with Outlook. If you do not have an email account, follow the steps below to set up your email account and connect it to Acquire.
Step 1: After logging in to the GoDaddy Home page, click on the drop-down next to your username and select ‘My Products’.
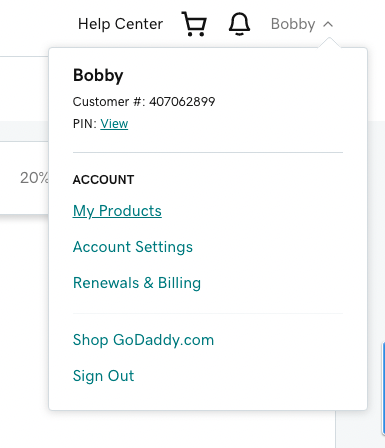
Step 2: Then scroll down to Email & Office. The domain you purchased through GoDaddy comes with an email plan.

Step 3: Click on ‘Set up’ next to the associated domain or ‘Manage All’ to manage all your domains. Note: If you experience issues at this step, such as a 400 error, try clearing your cookies and cached images and files, or using a different browser.
If you chose ‘Manage All’, you will then be asked to choose the domain for your new email. Choose the domain and press ‘Continue’.
Complete the form to create the new email account.
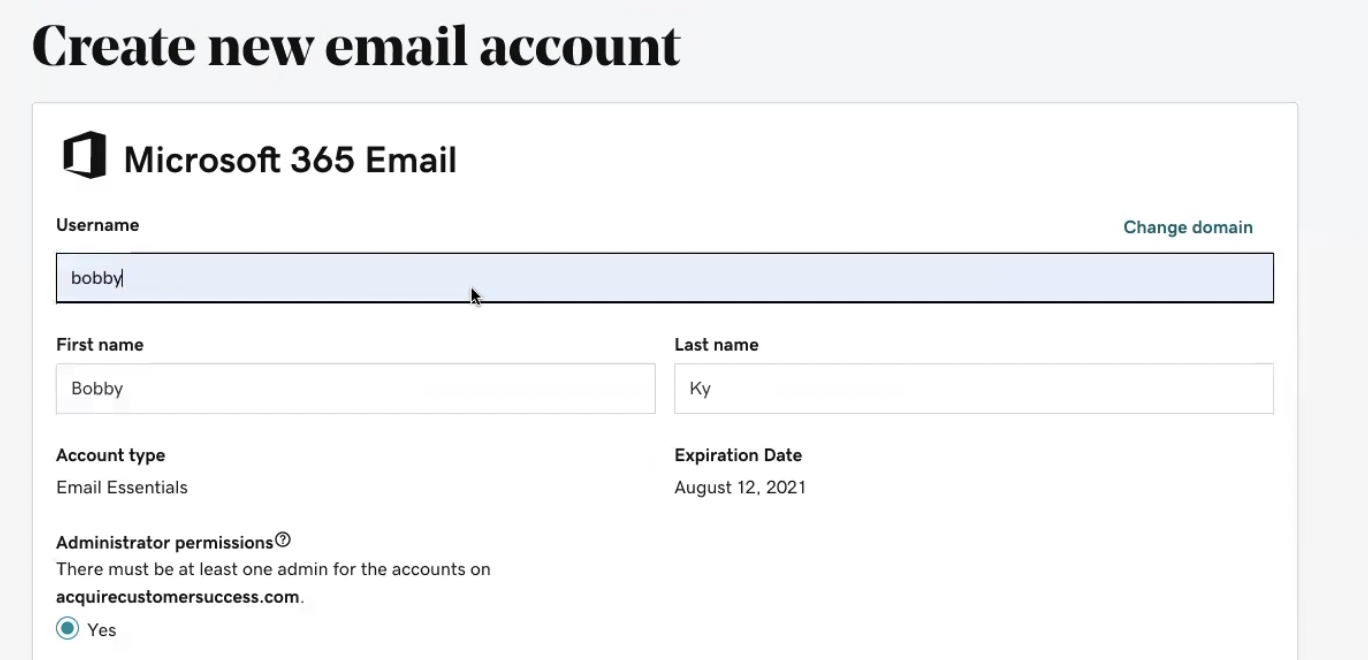
Step 4: Be sure there is at least one administrator. Click on ‘Create’.
It may take some time to set up your email. Please wait for a confirmation email from GoDaddy to continue.
Completing the Setup Checklist
Once your account is set up, you’ll be prompted to complete the setup checklist. Go through the checklist. You may choose to skip the steps, but we recommend that you send an email to test that your mail is delivered correctly.
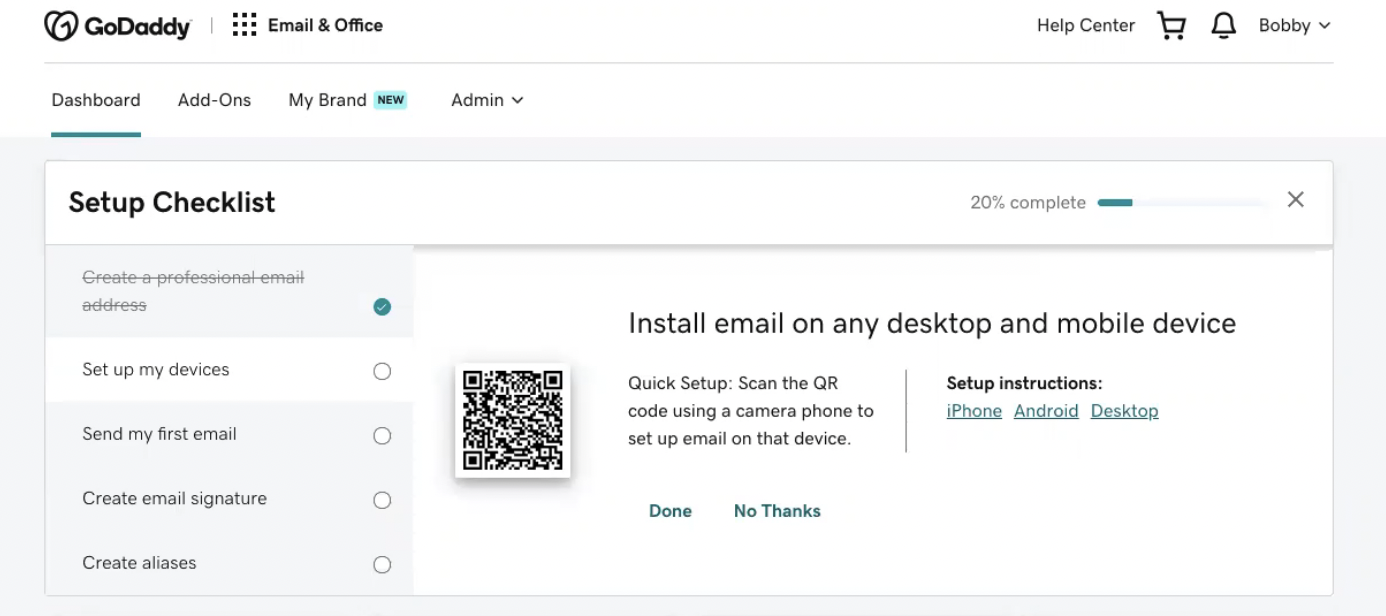
While completing the Setup Checklist, you may be asked to log in to your Office 365 account. Keep in mind that the credentials may differ from your GoDaddy credentials.
Once completed, your Dashboard should look something like this.
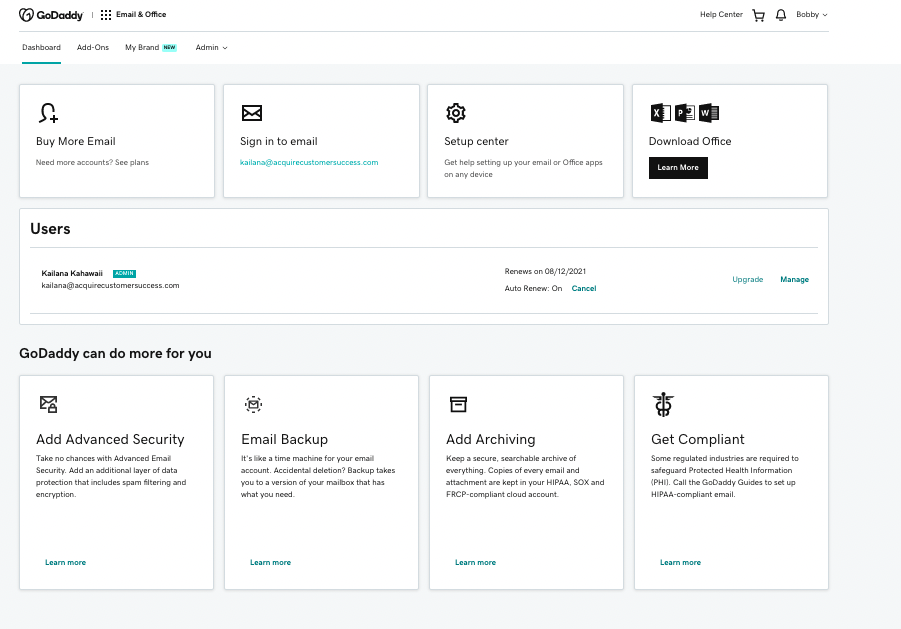
Navigate to Outlook from Office 365, either through GoDaddy or by pulling up the Office 365 Homepage and log in with the credentials you used when you set up the account in GoDaddy. Click on the Outlook icon on the left panel. This will take you to your Outlook inbox. A welcome message from GoDaddy should be in your inbox.
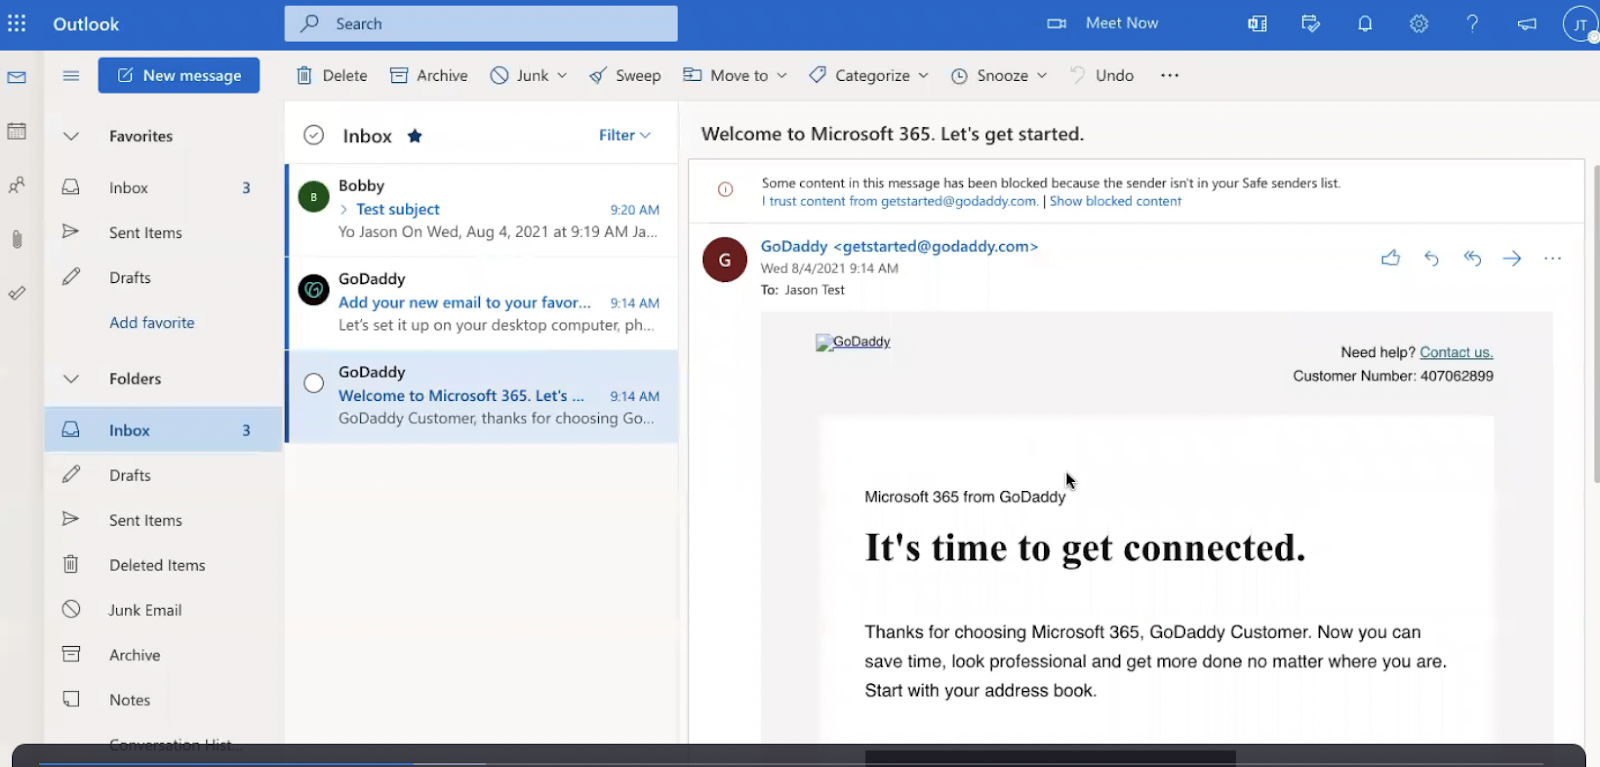
If you sent a test email, you’ll also see the email there.
Linking Your GoDaddy Account to Acquire
We will now link the GoDaddy and Outlook accounts to Acquire.
Step 1: After navigating back to the GoDaddy Dashboard page, click on the drop-down next to your username and select ‘My Products’.
Step 2: Scroll down to Email & Office and click on the drop-down button next to User Accounts. Copy the email address beneath ‘Microsoft 365 Email Essentials From GoDaddy’.
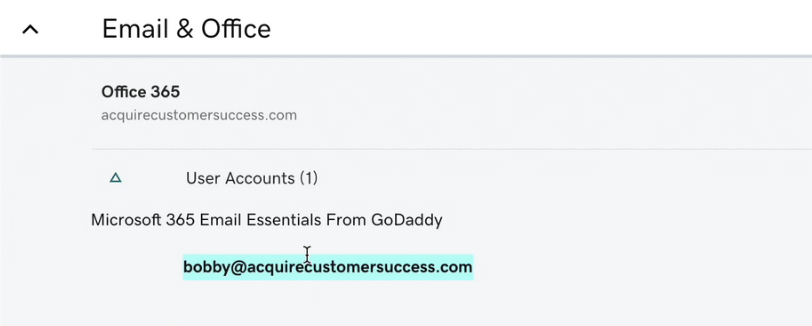
Step 3: Go to your Acquire instance and navigate to Settings > Installation and Setup > Email Setup. Click on ‘Connect Inbox’.

If you want to test this inbox out, ensure that you are in the same department as the one you assign the inbox to. You can always change these settings later.
Step 4: Name the new inbox, select the departments that will view the emails for this inbox, and then select ‘Other Email’. Then click ‘Next’.
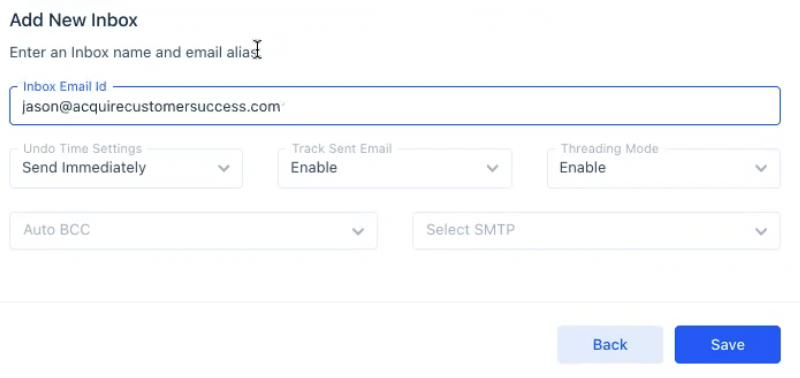
Paste the email in the ‘Inbox Email Id’ field. You may also optionally set:
- a delay for the email in ‘Undo Time Settings’.
- enable or disable track sent email
- enable or disable threading mode
- send a BBC to a specified email address. The BBC address should be an email address already connected to Acquire.
- an SMTP server should you have one.
Then, press ‘Save’.
Step 5: A pop up should appear with the forwarding address. Copy the forwarding address and click the ‘Send Verification Email’.

Keep this forwarding address handy. You’ll be using it in the next step.
Forwarding Your Acquire Email Address to Outlook Through GoDaddy
You should now have the forwarding address from Acquire.
Confirming Acquire’s Verification Email Was Sent
First, confirm that the Acquire verification email was sent to your Outlook inbox by logging into Outlook and checking your inbox. Keep in mind that the email may have been sent to your ‘Junk Email’ inbox.
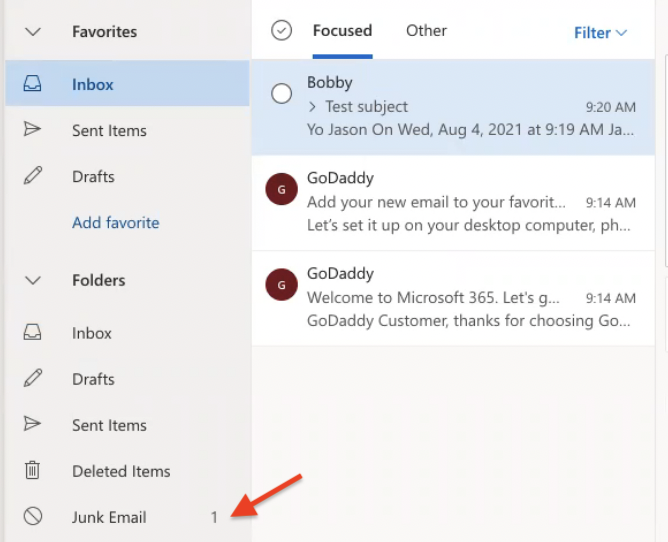
Don’t forget to also mark Acquire emails as ‘Not Junk’.
Setting Up Forwarding Through GoDaddy
We will now use GoDaddy to forward mail to your Outlook inbox. We recommend configuring forwarding through GoDaddy and not through Outlook.
Step 1: Go to your GoDaddy Email & Office Dashboard. You may access this Dashboard by logging in to GoDaddy and by clicking on the drop-down next to your username and selecting ‘Products’. Scroll down to Email & Office and click on ‘Manage’ next to the email address you set up.
The Email & Office Dashboard will appear. Click on ‘Forwarding’ to set up the forwarding address.
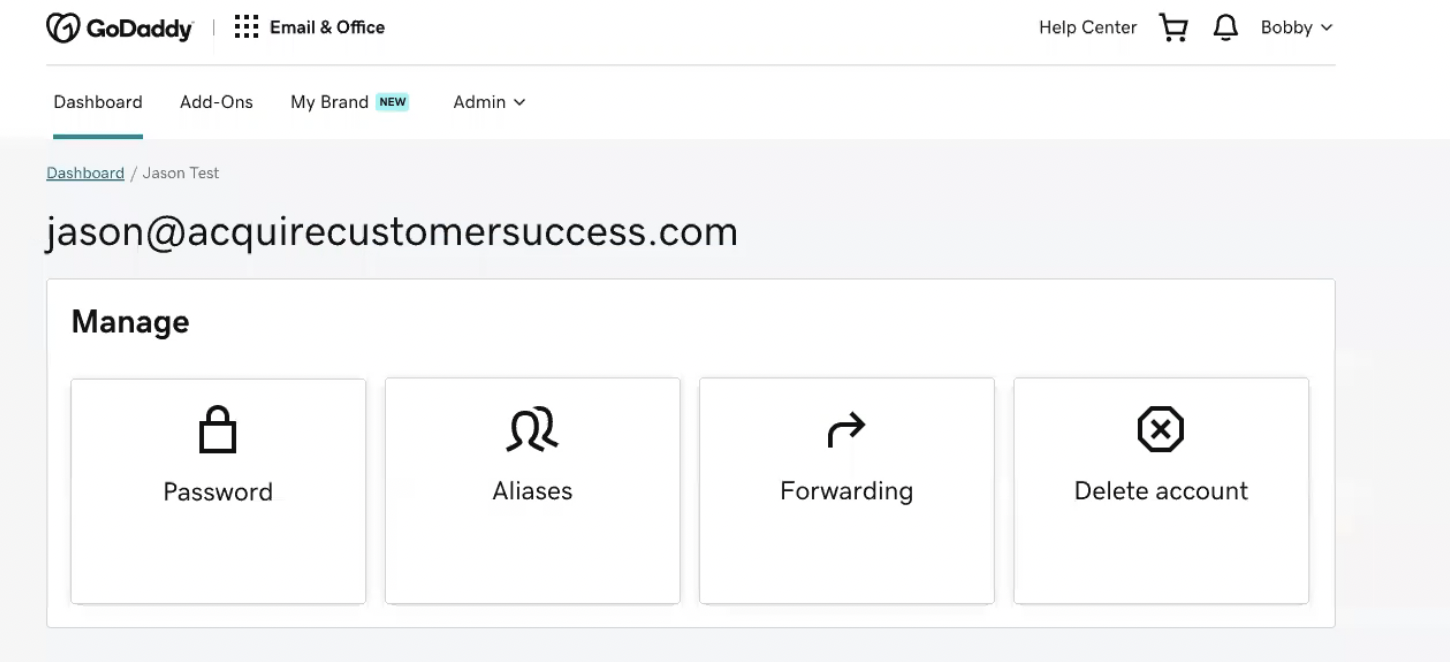
Step 2: Select the User account associated with the inbox. Then, paste the forwarding email address you received from Acquire.
Ensure that ‘Keep a copy of forwarded mail’ is checked so that emails are not lost in transit. Then, press ‘Save’.
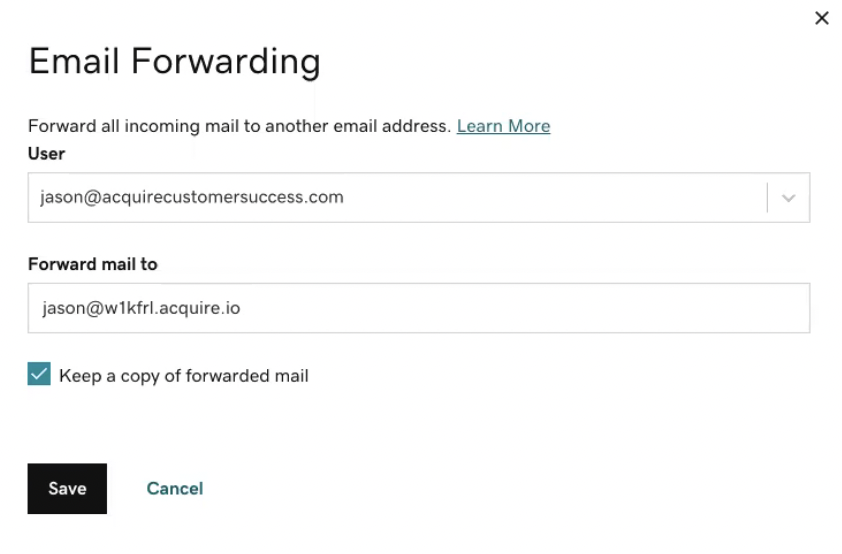
We'll now need to verify the forwarded address by going back to Acquire.
Verifying the Forwarding Address and DNS
We will now verify that mail is being forwarded to the correct inboxes and the DKIM records are in place.
Go back to Acquire and navigate to the Settings > Installation & Setup > Email Setup. Click on the three dots (‘...’) next to the email address you just configured. Then click on the drop-down menu next to the ‘Email not verified’ label. You may also see a ‘DKIM Missing’ warning. Select ‘Channel Info’.
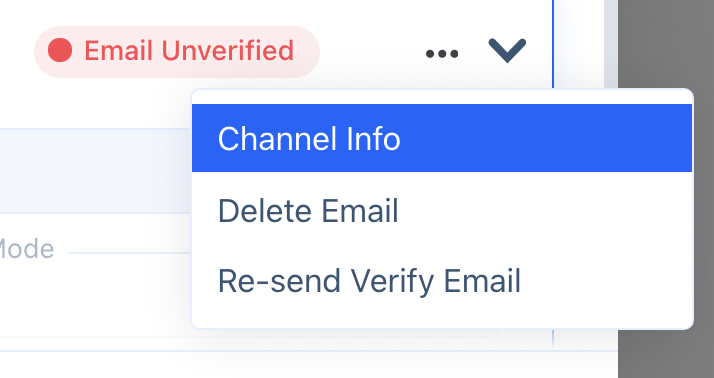
In channel info, you will see the two records for DKIM and Return-Path that should be added to your DNS.
From Return Path, copy:
- CNAME (only the subdomain, e.g., pm-bounces)
- Host (e.g., pm.mtasv.net.)
From DKIM, copy:
- Host (only the subdomain, e.g., 2021071406532pm._domainkey)
- Record
See the image below.

These records will be used once you log in to GoDaddy, so keep the window open or copy the information to a word document.
Adding DNS Records to GoDaddy
Log in to GoDaddy and go to your ‘Dashboard’.
Click on the drop-down menu next to your username and click on ‘My Products’.
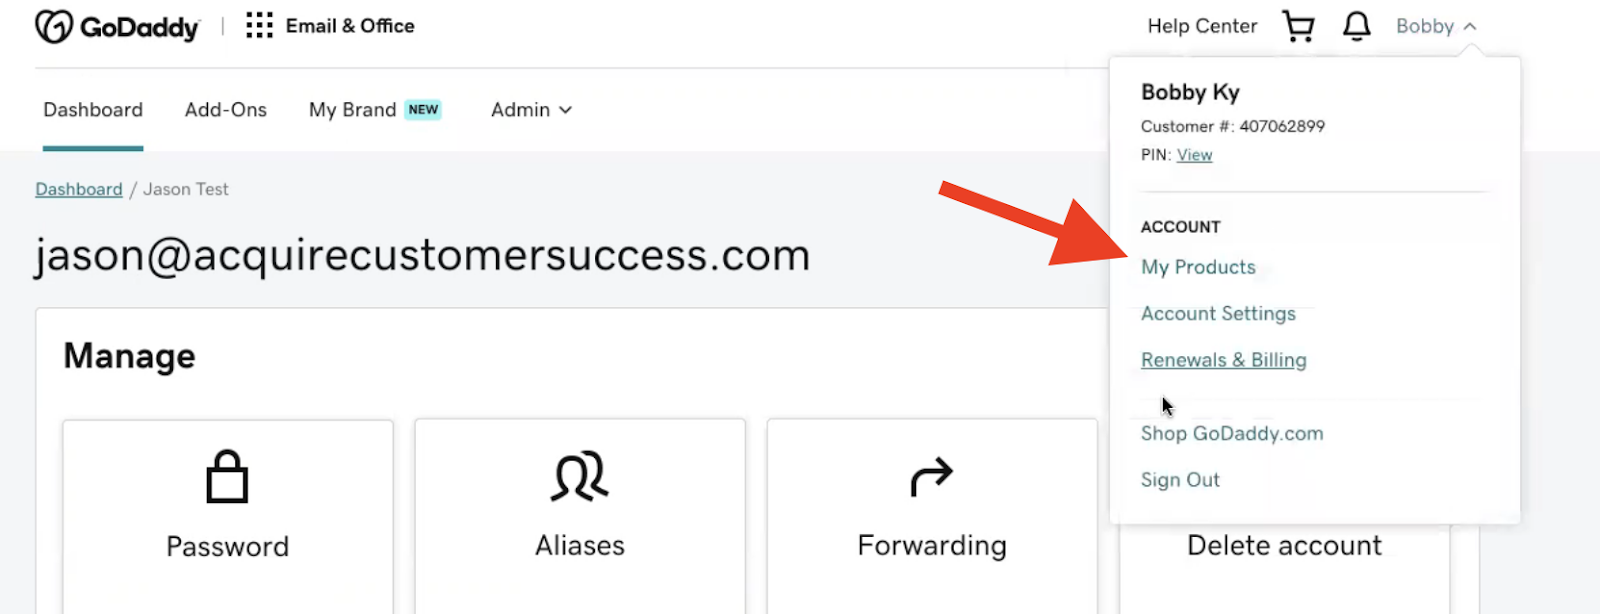
Go to the Domains section. You may need to scroll down. Click on the vertical ellipses (‘⋮’) and select ‘Manage DNS’.
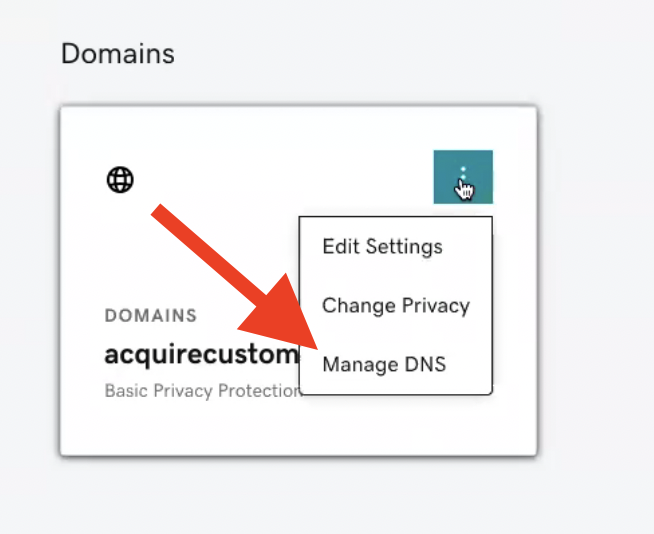
Click on ‘Add’ at the bottom of the records list.

Adding the CNAME Record
In the new menu, select ‘CNAME’ from the ‘Type’ drop-down menu.
Paste your Return Path Host. Your Host should be the text before the domain name. In this example, the Host is pm-bounces. We have removed everything except the subdomain from pm-bounces.acquirecustomersuccess.com.
The host should point to the Return Path Record. Ensure the period (‘.’) is at the end of the record. In this example, the Return Path Record is pm.mtasv.net.

It may not be necessary to change the default 1 Hour TTL (time to live). Learn more about TTL in the Resources section at the end of this article.
Press ‘Save’ to save the CNAME record.
Adding the Return-Path record
Press ‘Add’ to add the TXT record.
Select ‘TXT’ as the ‘Type’.
In 'Host', paste the DKIM Host from Acquire. It should be everything up to domainkey. For example, 2021071406532pm._domainkey. A period is not needed after domainkey.
In 'TXT Value', paste the entire DKIM record.

It may not be necessary to change the default 1 Hour TTL (time to live). Learn more about TTL in the Resources section at the end of this article.
Press ‘Save’ to save the TXT record.
You have now completed all the necessary steps to forward emails from your GoDaddy account into Acquire.
We recommend waiting half an hour to an hour for the setup process to propagate your emails before you begin testing the configuration.
Testing the Inbox Configuration
You should now be able to send emails to and from Acquire. Your emails should show up in both Acquire’s Dashboard and your Outlook inbox.
It may take a few minutes for the first emails to appear.
After 24 hours, if you have added the records and Acquire’s Domain Details and still have an Unverified Status next to your Channel Info in Acquire, reach out to support@acquire.io.
Resources
Was this article helpful?


