For Administrators
FAQ: How do I set up tags to organize conversations?
It’s always a good idea to organize the conversations that come into your Dashboard. The way you organize will be up to you and the needs of your organization. In this article, we step through a few of the ways customers have organized conversations through tags.
In this article:
- Creating Tags
- Organizing by Department
- Organizing by Escalation Level
- Filtering by Tag
Creating Tags
Before you can organize with tags, you need to create them. To create a tag, head to Settings > Conversation Settings > Tags. Click on ‘Create Tag’ to create a new tag. Tags may be assigned colors and may be active or disabled. Disabled tags can't be selected, but you can still look them up in Lists.
For the following suggestions, all tags should be on the ‘Contact’ type. You may optionally assign both ‘Case’ and ‘Contact’ if you desire.
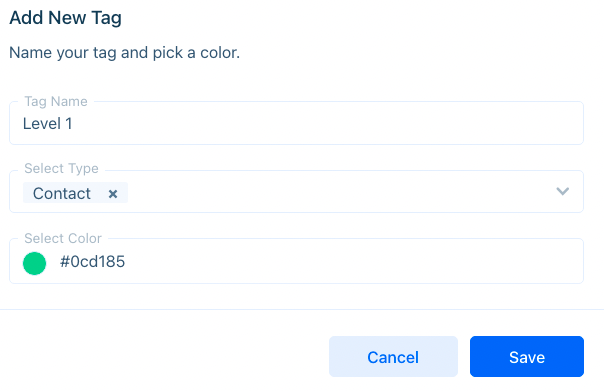
Press ‘Save’ to save the tag.
Organizing by Department
If you’ve set up routing to connect visitors with certain departments, you may want to create tags based on your organization’s departments. Let’s look at a simple Business Rules example to implement this functionality automatically.
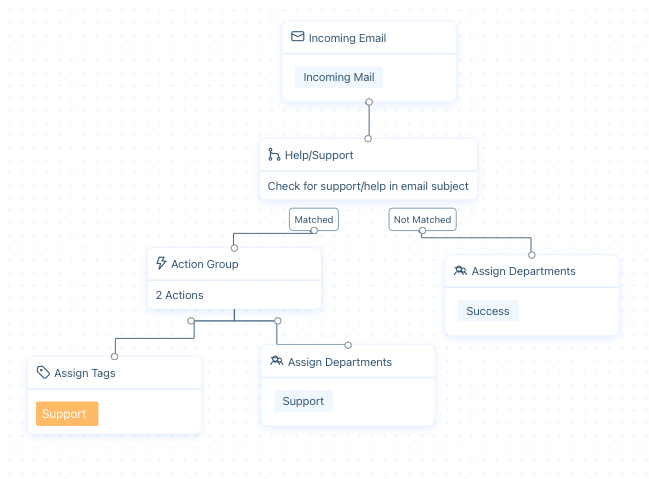
In this Business Rule, any email with the word ‘Support’ or ‘Help’ is routed to the Support Department and assigned a Support tag.

On the Dashboard, Support conversations may be viewed with the Support tag.
Organizing by Escalation Level
Especially relevant to support teams, contacts may also be organized by escalation level. This may require manual input from agents, or a chatbot may perform this tagging automatically. Read through the two examples below and determine which is best for your use case.
In both cases, you’ll need to create a few tags according to the escalation level your organization uses. Ensure that the tags are assigned to both ‘Contact’ and ‘Case’.
In this example, four tags were created in order of severity.
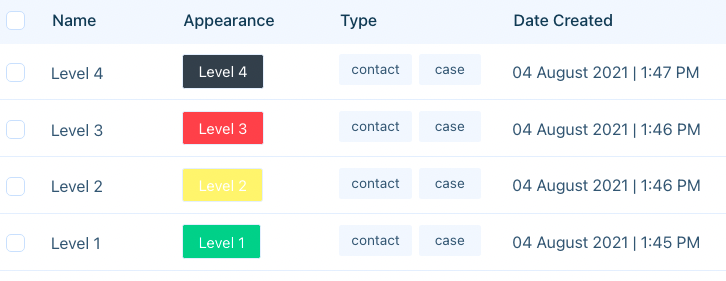
Choose a naming convention that makes sense for your organization. Visitors will not be able to see tags they’re assigned to, so use naming conventions that help agents contextualize the situation.
Organizing Escalation by Agent
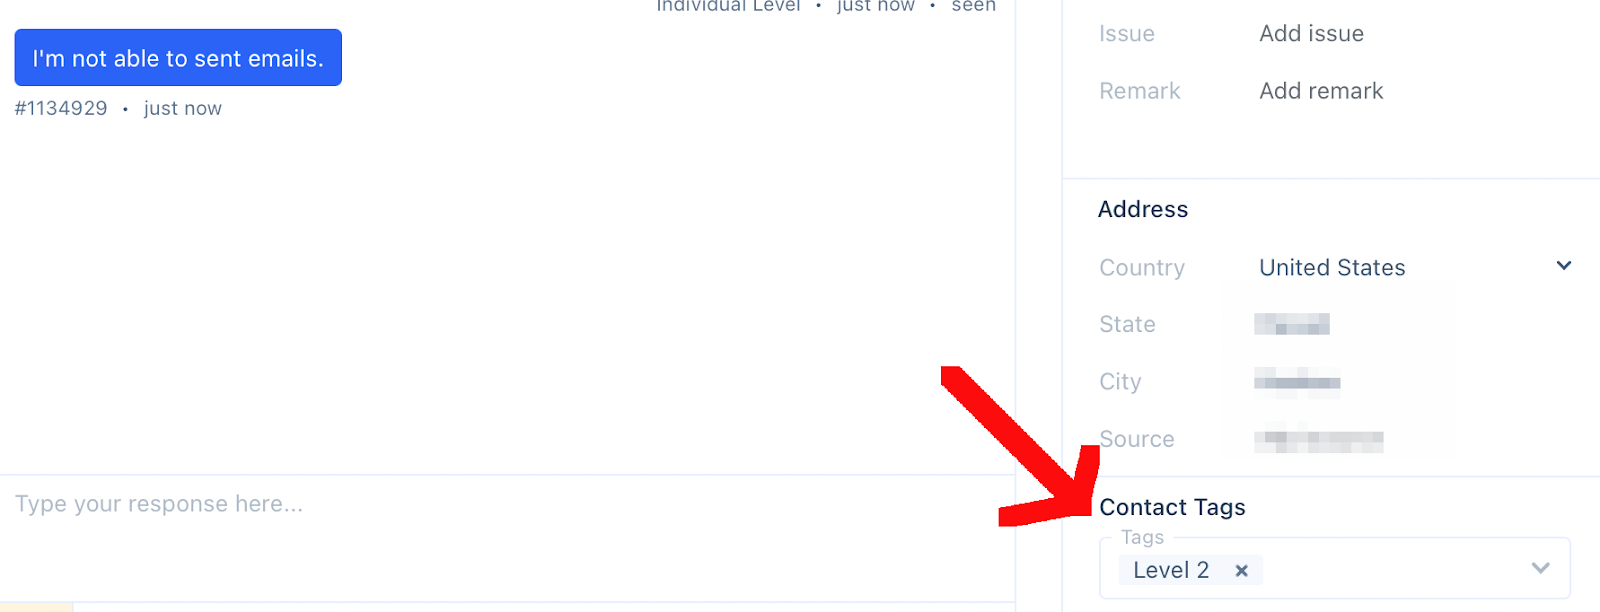
Once the tags are created, the agent may assign the contacts manually by using the visitor profile to the right of the conversation window.
Organizing Escalation by Bot
You may also use the bot to assign escalation tags to a customer’s inquiries. There are many ways to build a Conversational Bot or Sequence Bot to respond to customer inquiries.
Let’s start with a Sequence Bot. In general, asking visitors to assign themselves an escalation level isn’t always helpful to your organization. You may want to ask visitors questions that help the bot assign an escalation level to them.
In this support example, the visitor answers a series of questions and the sequence bot assigns the appropriate tag to the situation.
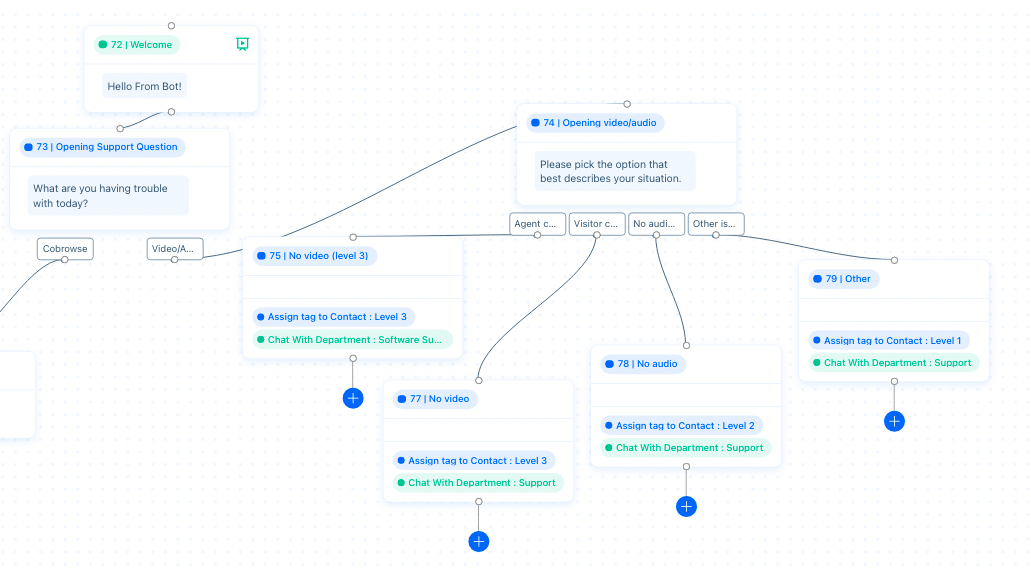
In this Sequence Bot, visitors choose between Cobrowse and Video/Audio issues.They are then asked to describe the situation they’re facing.
Use bubble options to filter visitor response and assign the appropriate tag.
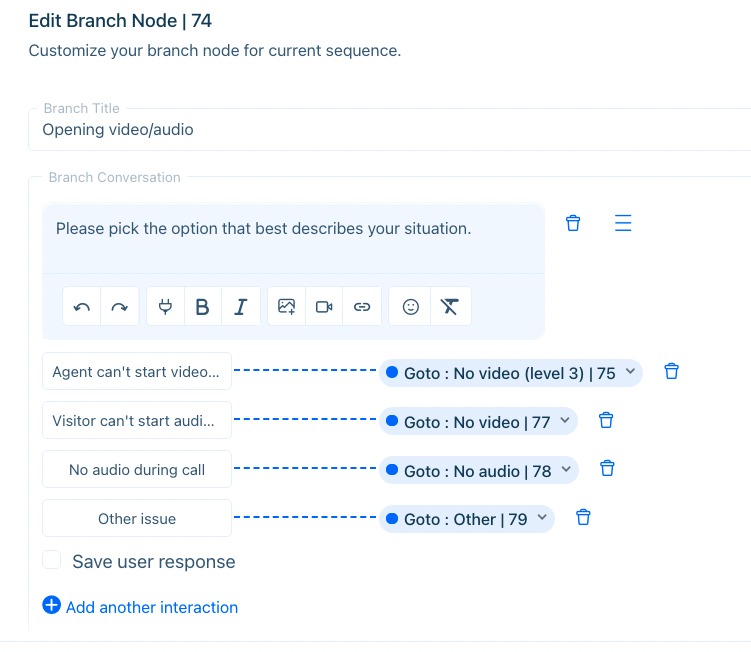
In this example, visitors choose a Bubble Action that best describes their situation. An ‘Other’ option is also used to capture visitor issues not related to those described.
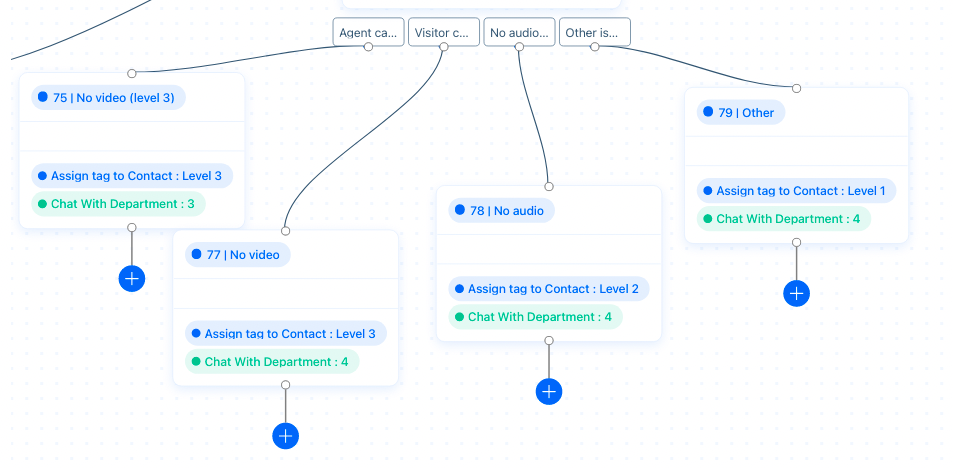
Once the visitor chooses an option, they’ll be routed to the department specified. A tag will also be assigned to them.
Filtering by Tags
Go to the Contact List and click on ‘Add filters’. Select ‘Tag’ from the drop-down list, and select the appropriate tag(s). You’ll be able to see a list of all contacts associated with the tag.

Use tags to efficiently pull up escalated cases and keep your Dashboard organized.
Having trouble? Reach out to support@acquire.io.
Was this article helpful?


