Chatbots
IBM Watson New
We're taking a deeper look at some of our integrations, including this one. In the meantime, some of the functionality described here may not work as expected. Thank you for your patience.
Watson is IBM’s cognitive computing technology that understands both structured and unstructured data, has the ability to create hypotheses, learns from collaborations, and interacts with humans in a natural way. IBM Watson provides trained responses that include text, images, and more.
This tutorial will show you how to set up IBM Watson and integrate Watson with your Acquire Chatbot. Only one Watson Assistant may be integrated at a time. If you’ve already set up a Watson assistant, start at the Obtaining the API Key and URL.
In this article:
- Setting Up Watson Assistant
- Obtaining the API Key and URL
- Using IBM Watson in Acquire
Setting Up Watson Assistant
First, you must start a Watson service instance.
Step 1: Login for a free IBM Cloud account.
Step 2: Create a new Watson Assistant in the IBM Cloud catalog.
Step 3: The Watson service instance will be created in the “Default” resource group.If you wish to change the resource group, change it at this stage as it cannot be changed later. However, this group is sufficient for the purposes of your Acquire Chatbot integration.
If you're creating an instance for production use, which is more robust, you can learn more about resource groups in IBM’s docs.
Step 4: You may be asked to choose an appropriate region/location to deploy your instance in.
Step 5: Click ‘Create’.
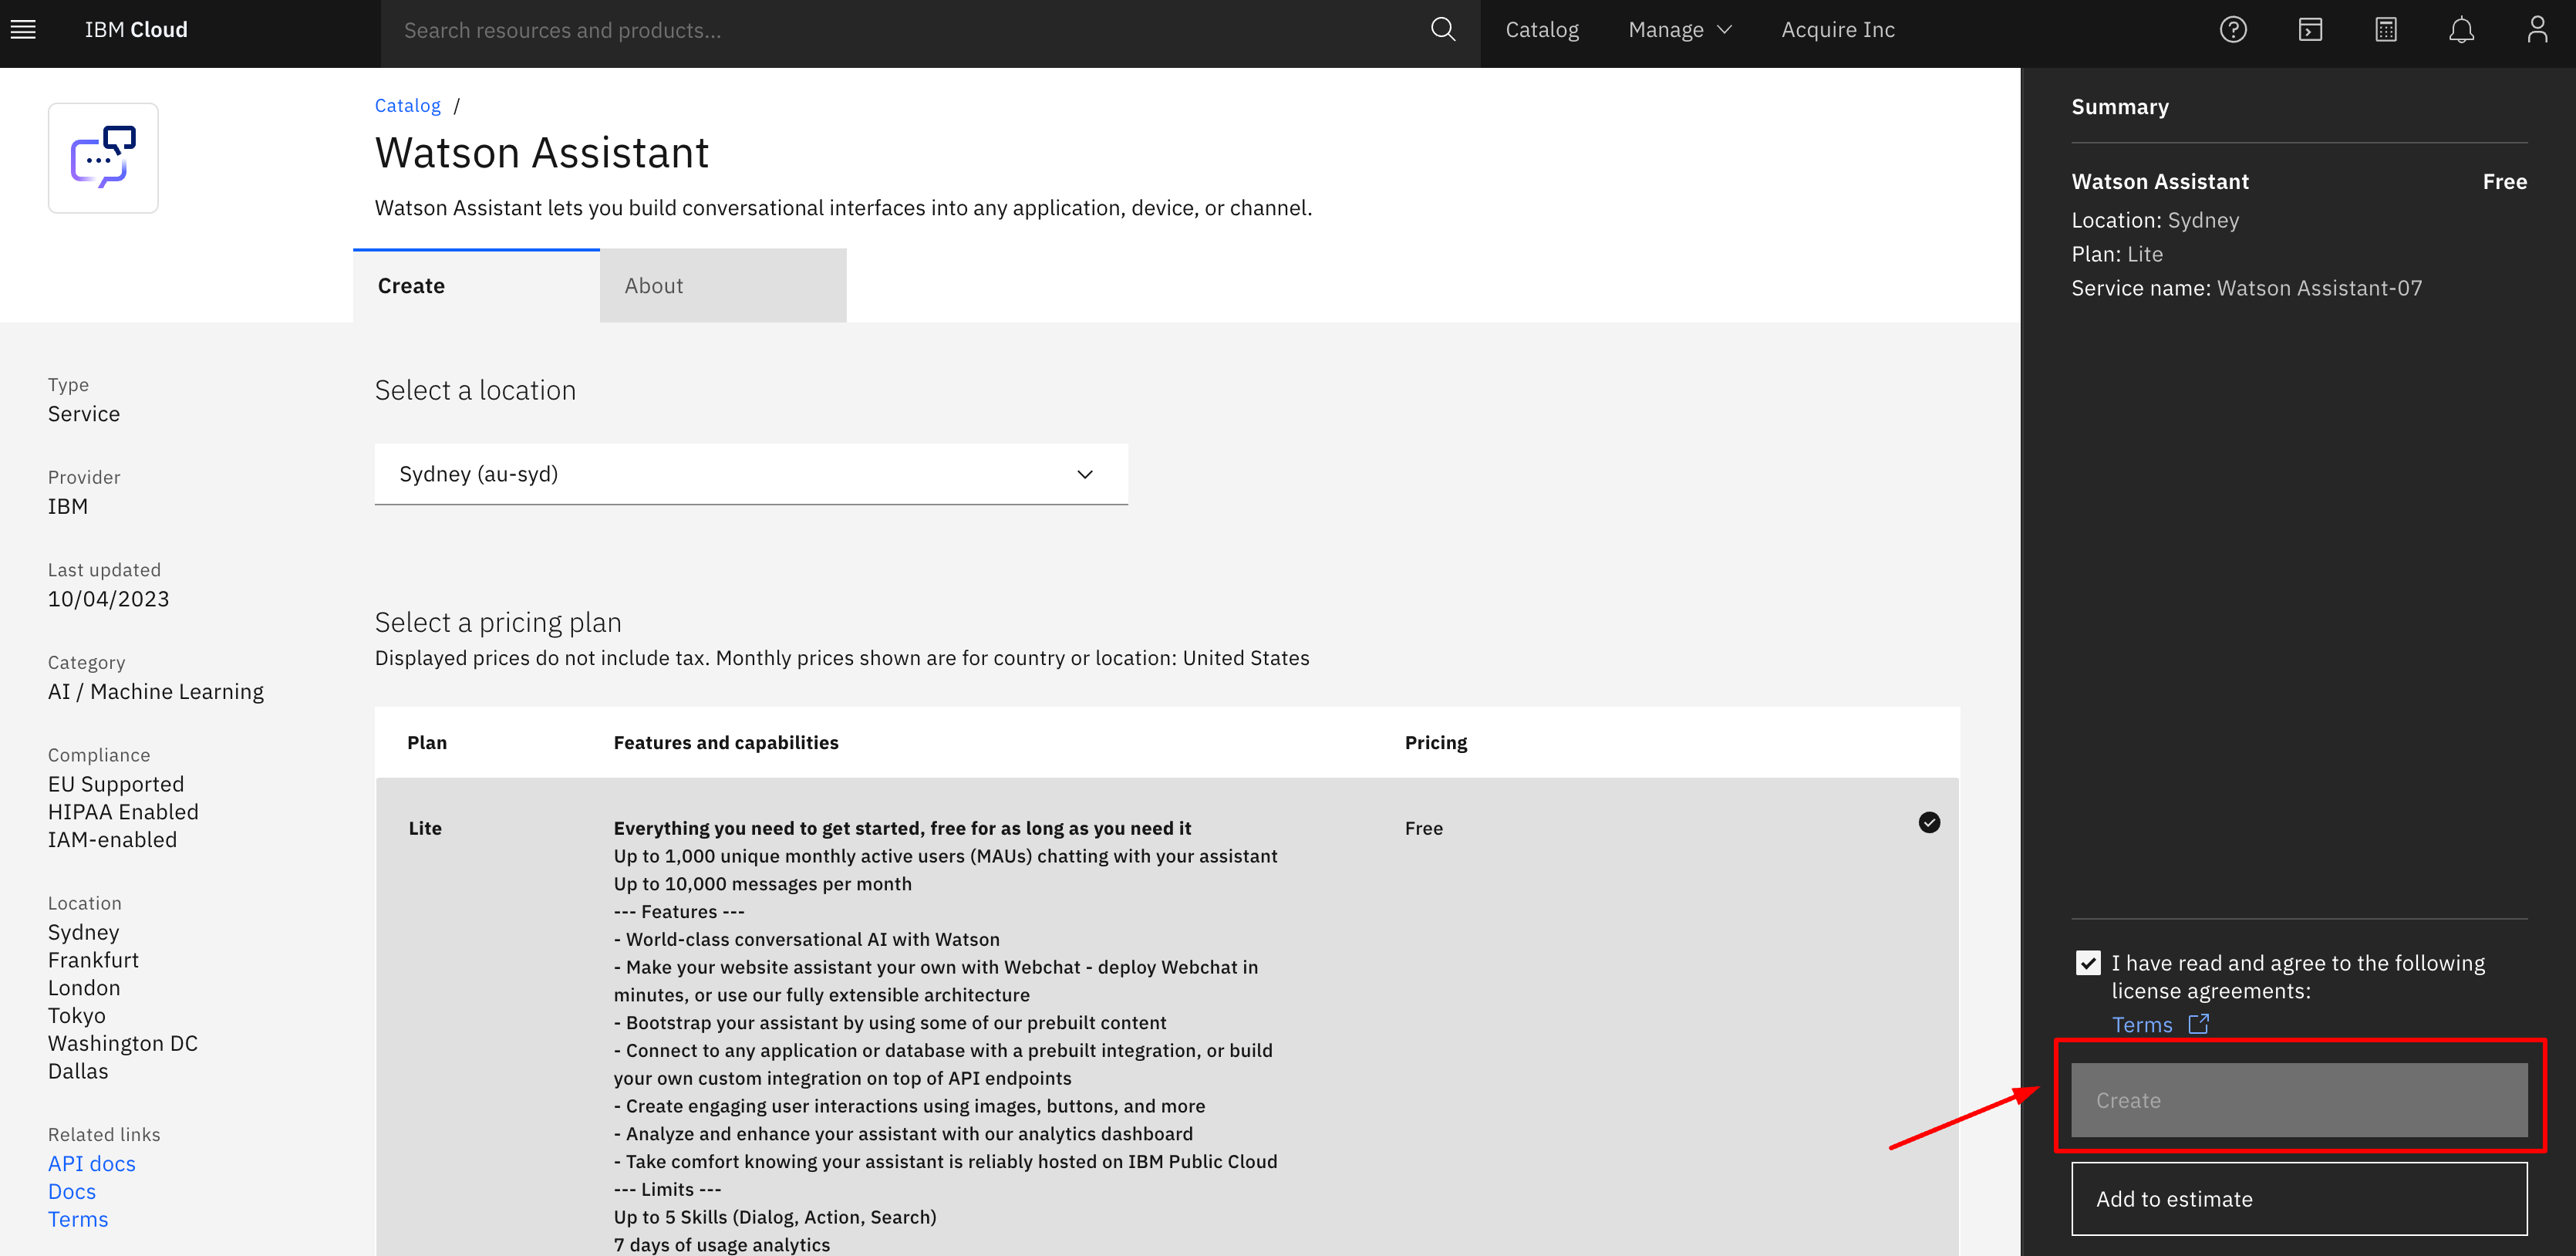
You'll now create a Watson Assistant. Assistants are what IBM calls chatbots.
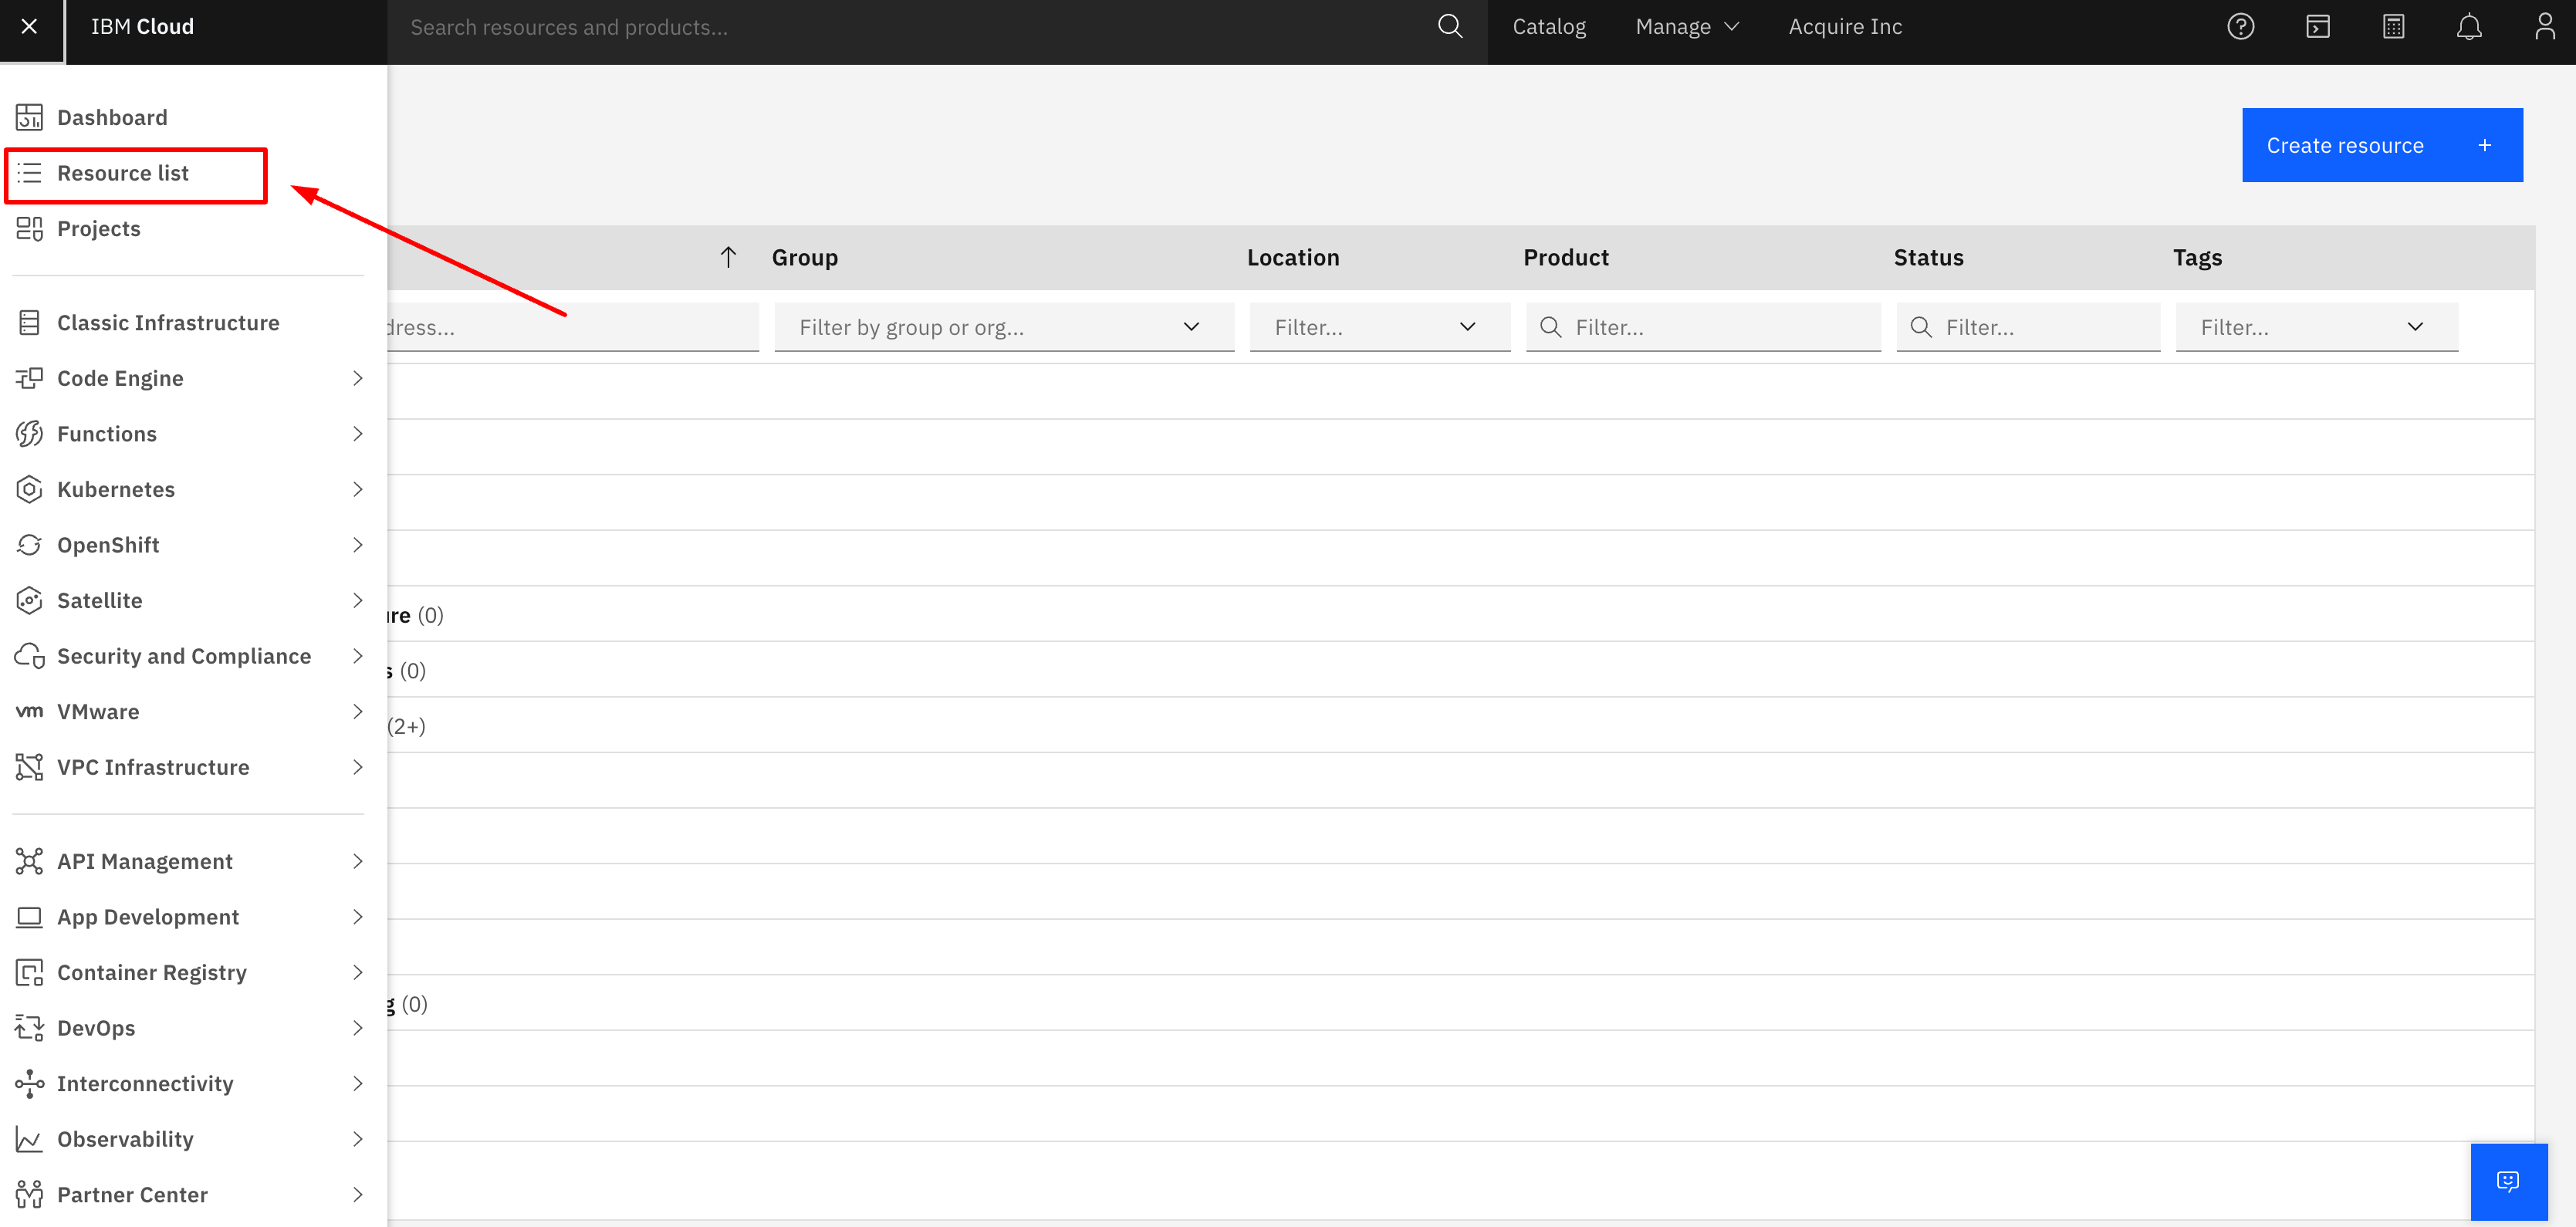
Step 1. Got to the 'Resource List’.
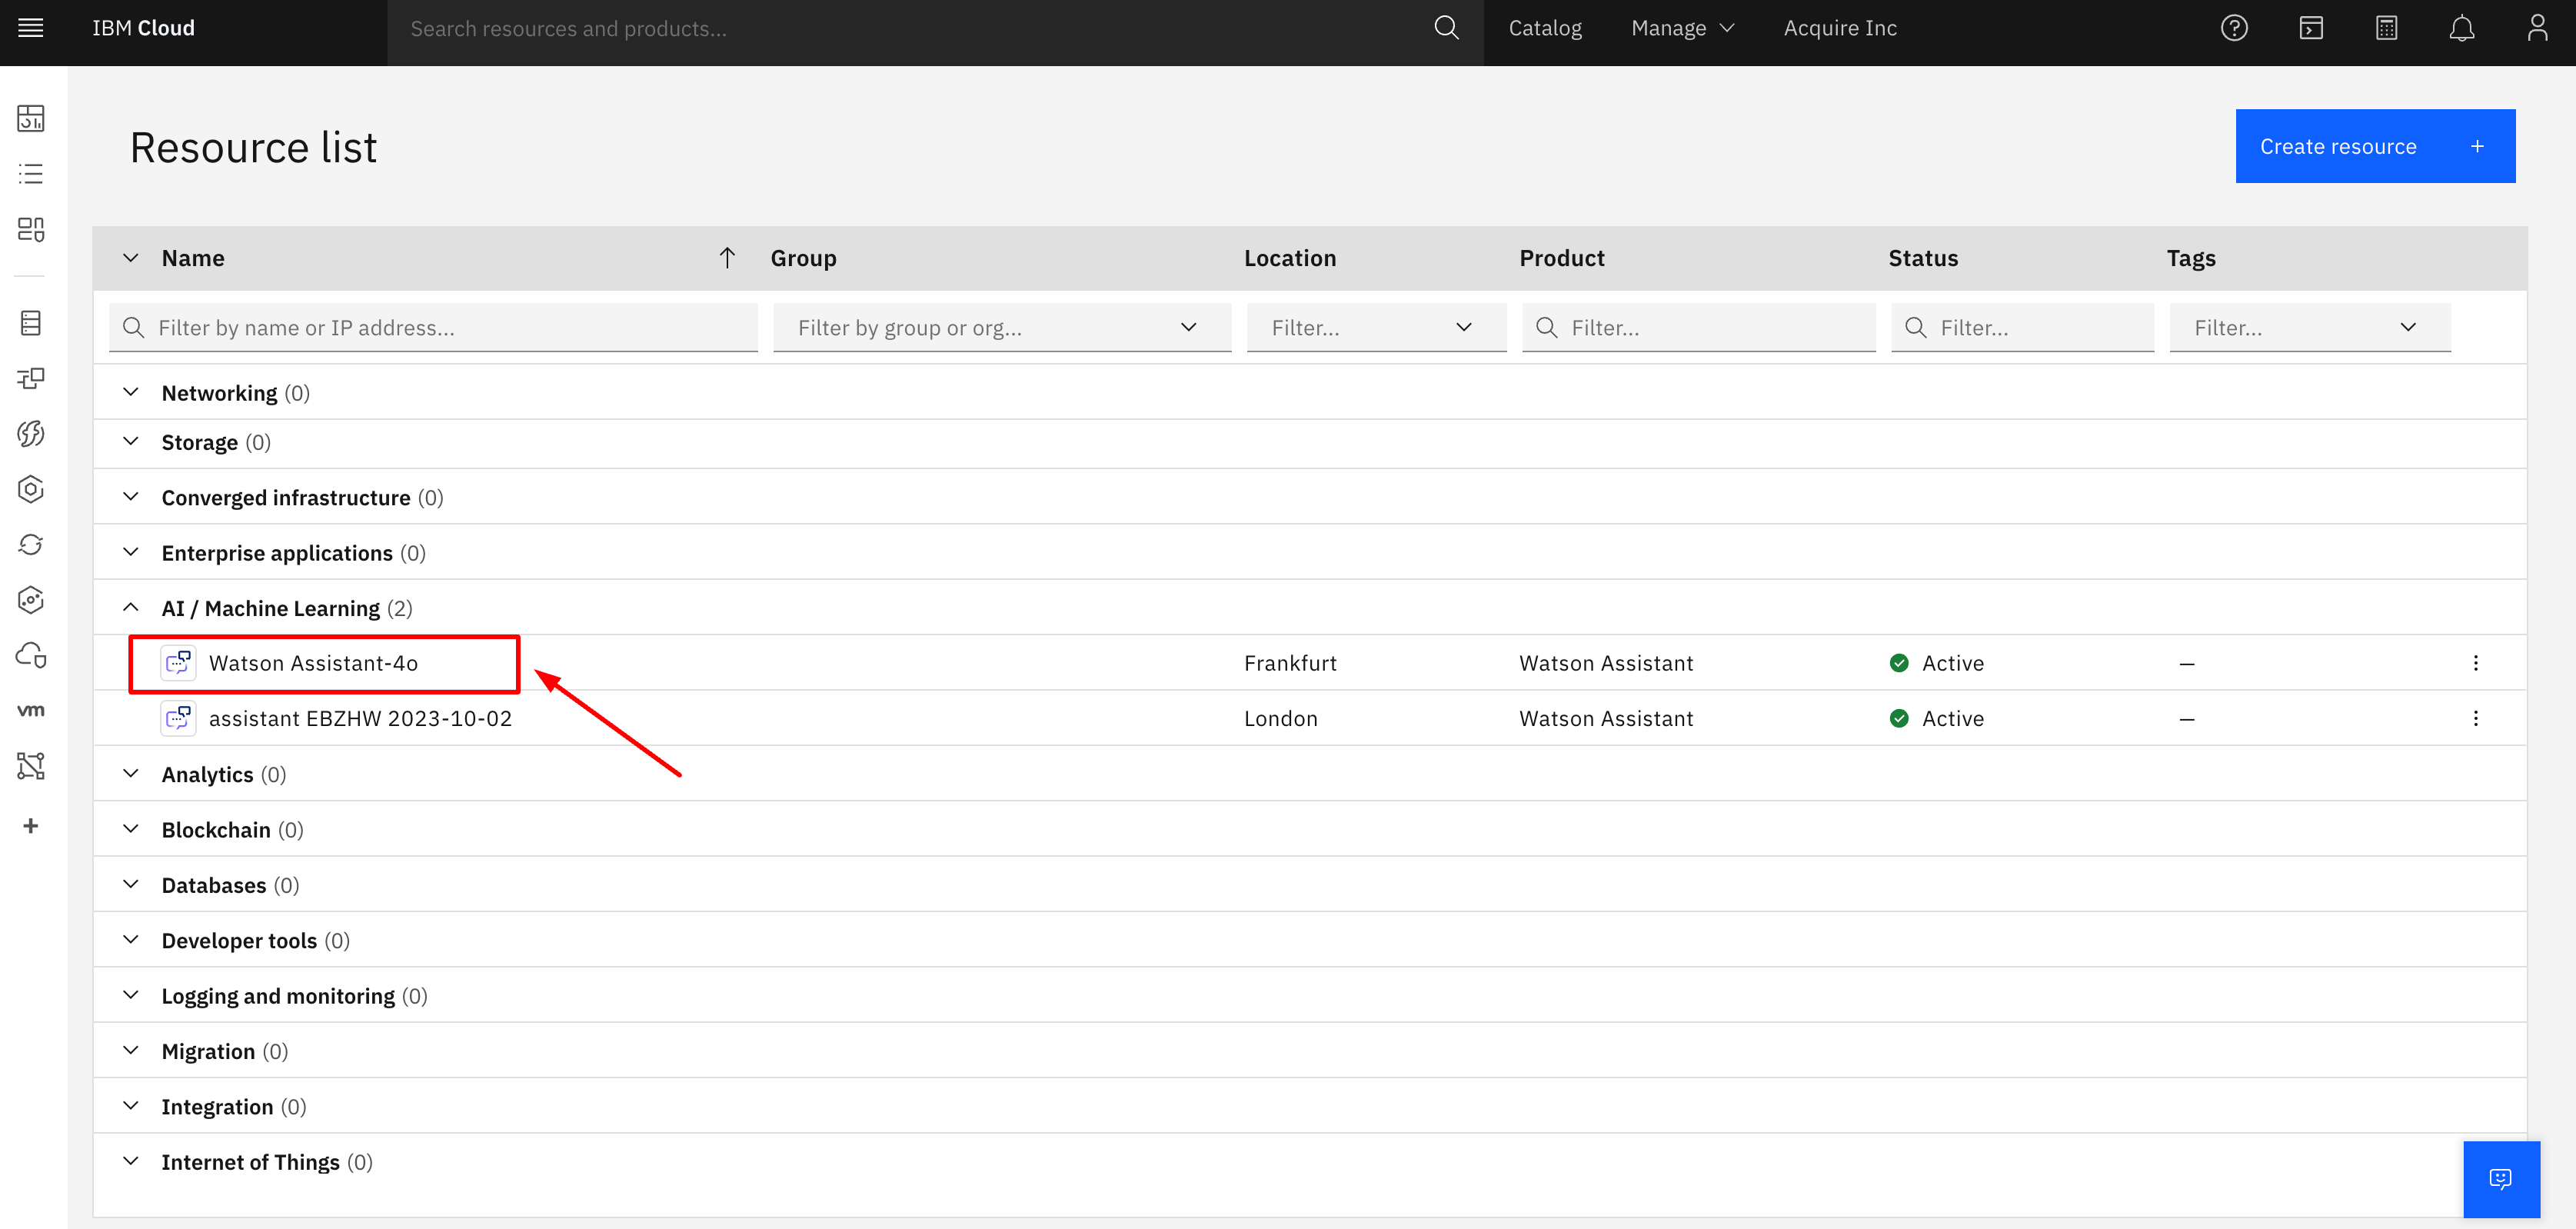
Step 2. Open the previously created Watson Assistant.
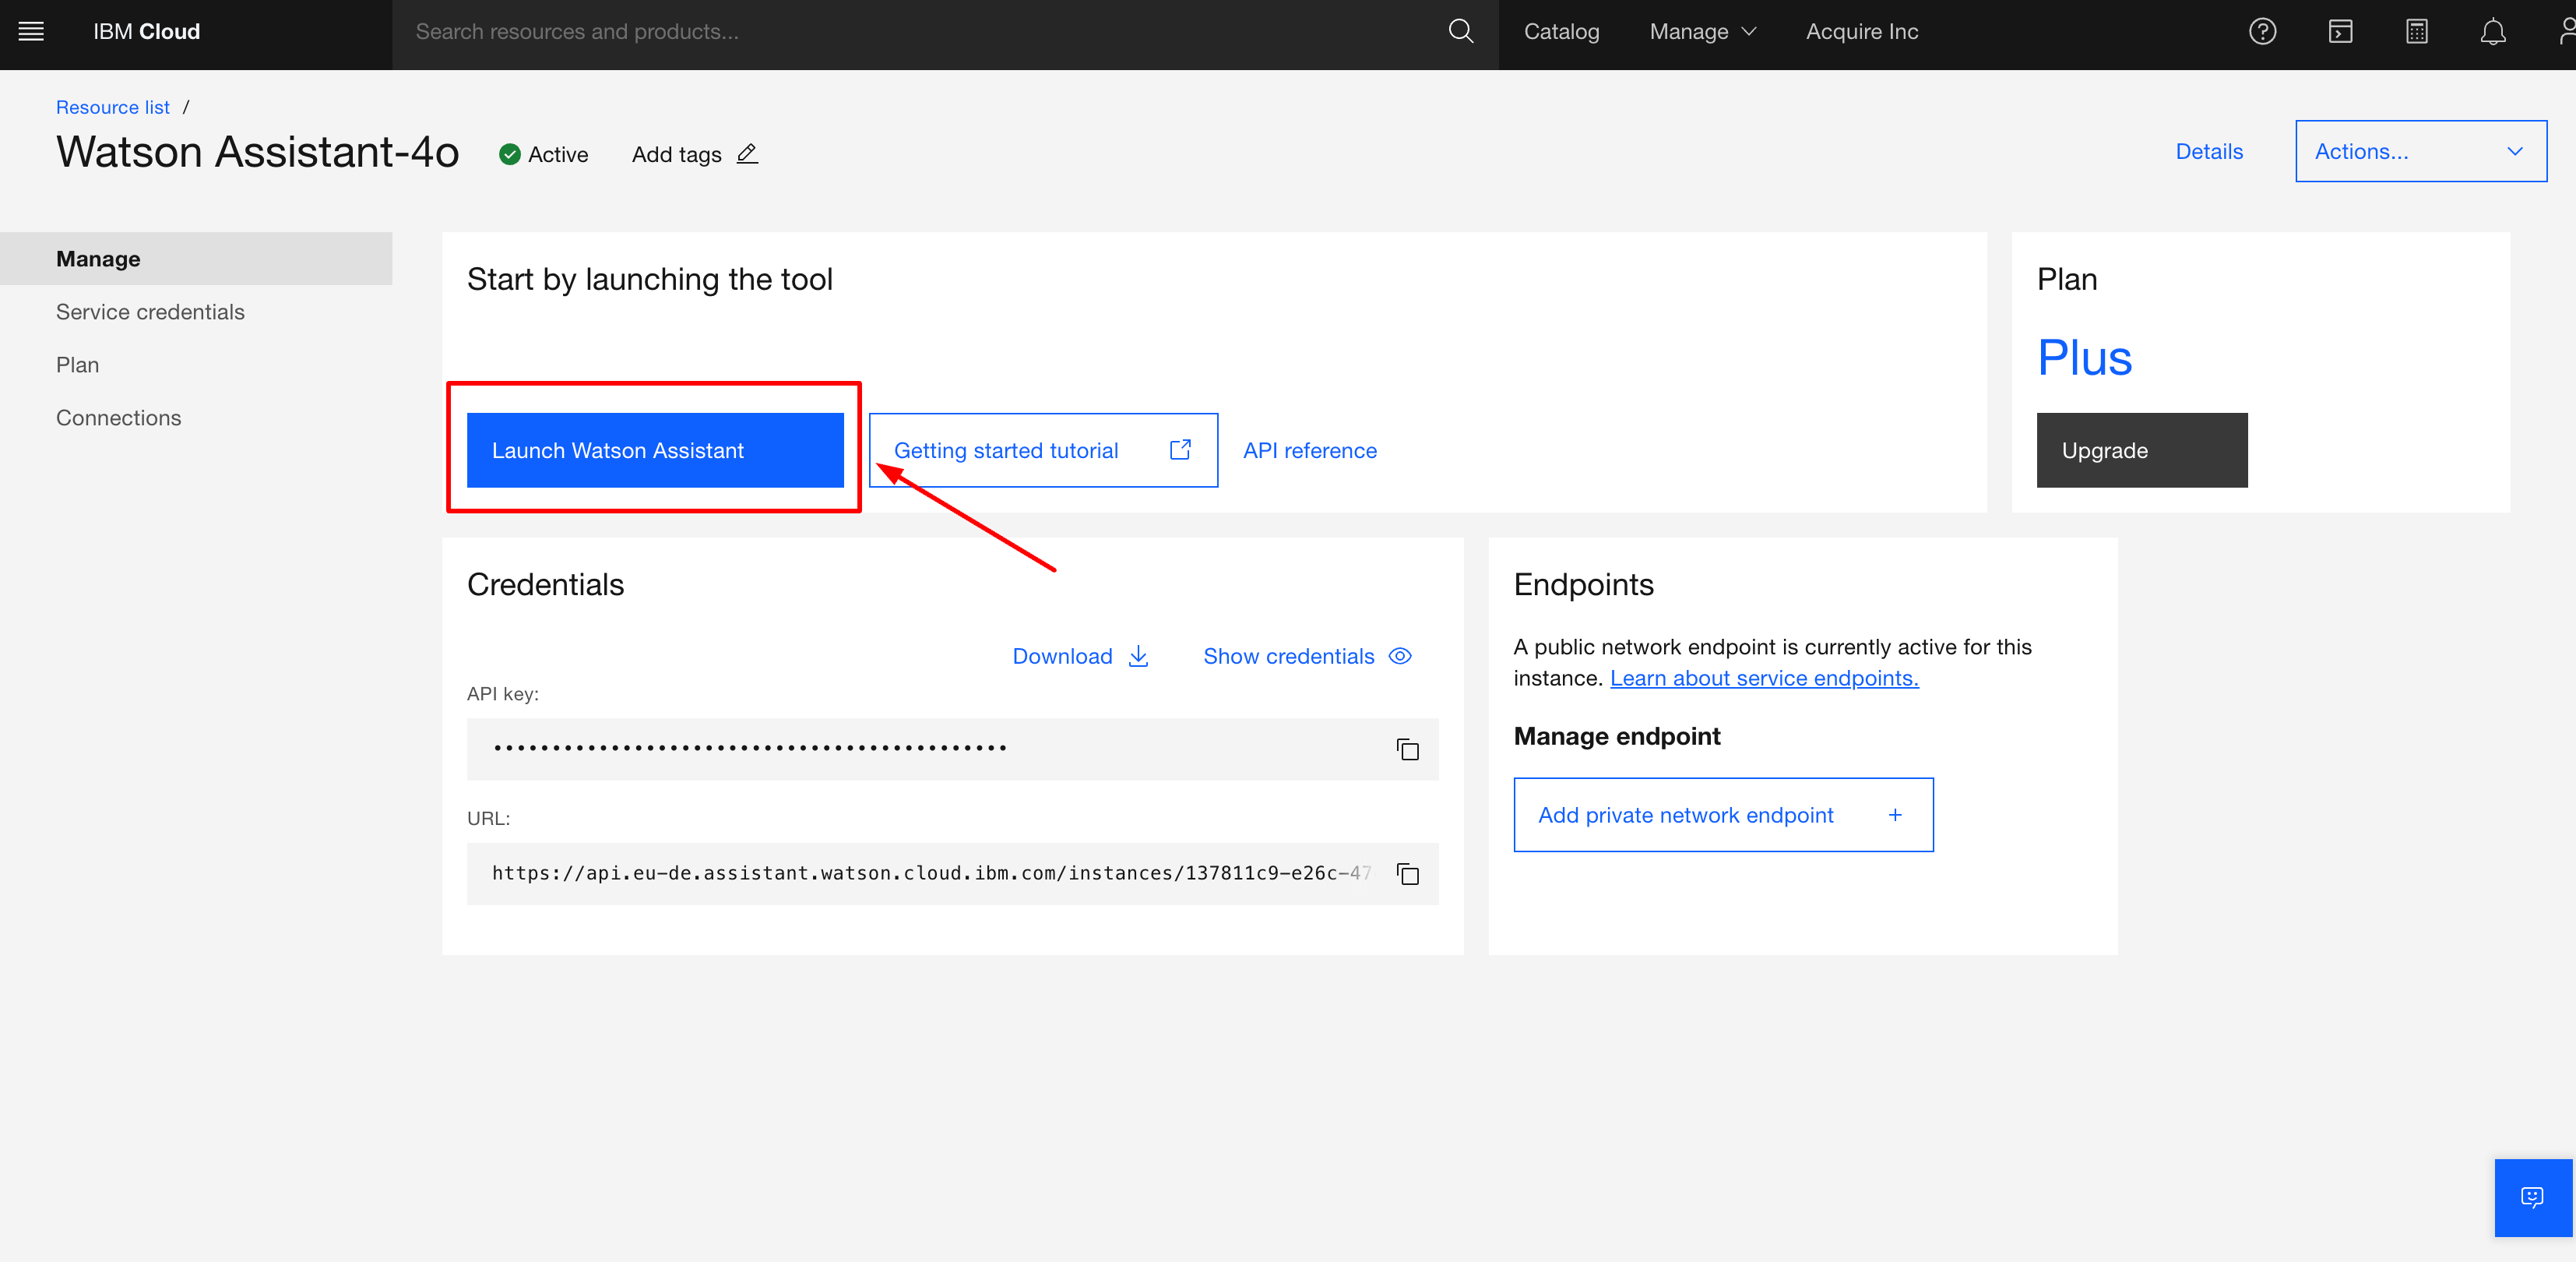
After selecting the Watson Assistant service instance, the Watson Assistant dashboard will appear. You will now be able to manage the Watson Assistant.
Click 'Launch Watson Assistant'. If you're prompted to log in, provide your IBM Cloud credentials. Once launched it will redirect to the Watson Assistant home page.
Step 3. Next step is to add Actions to the Watson Assistant. Click 'Actions' in the sidebar . There you can create actions for the assistant. Like a human personal assistant, the assistant you build helps your customers complete tasks and answer questions. You build your assistant by defining actions. To learn more about Actions, check out Actions Documentation.
You’ve now created an IBM Watson bot that will respond to visitor greetings. Before integrating this bot with Acquire, you’ll need to obtain your account credentials.
Obtaining the API Key and URL
To find your IBM account’s API key and URL, navigate to the IBM Cloud Dashboard and click on Resource List. Open AI / Machine Learning
and click on your assistant.
You will be redirected to the IBM Watson Service Page. Copy the ‘API key’ and ‘URL’.
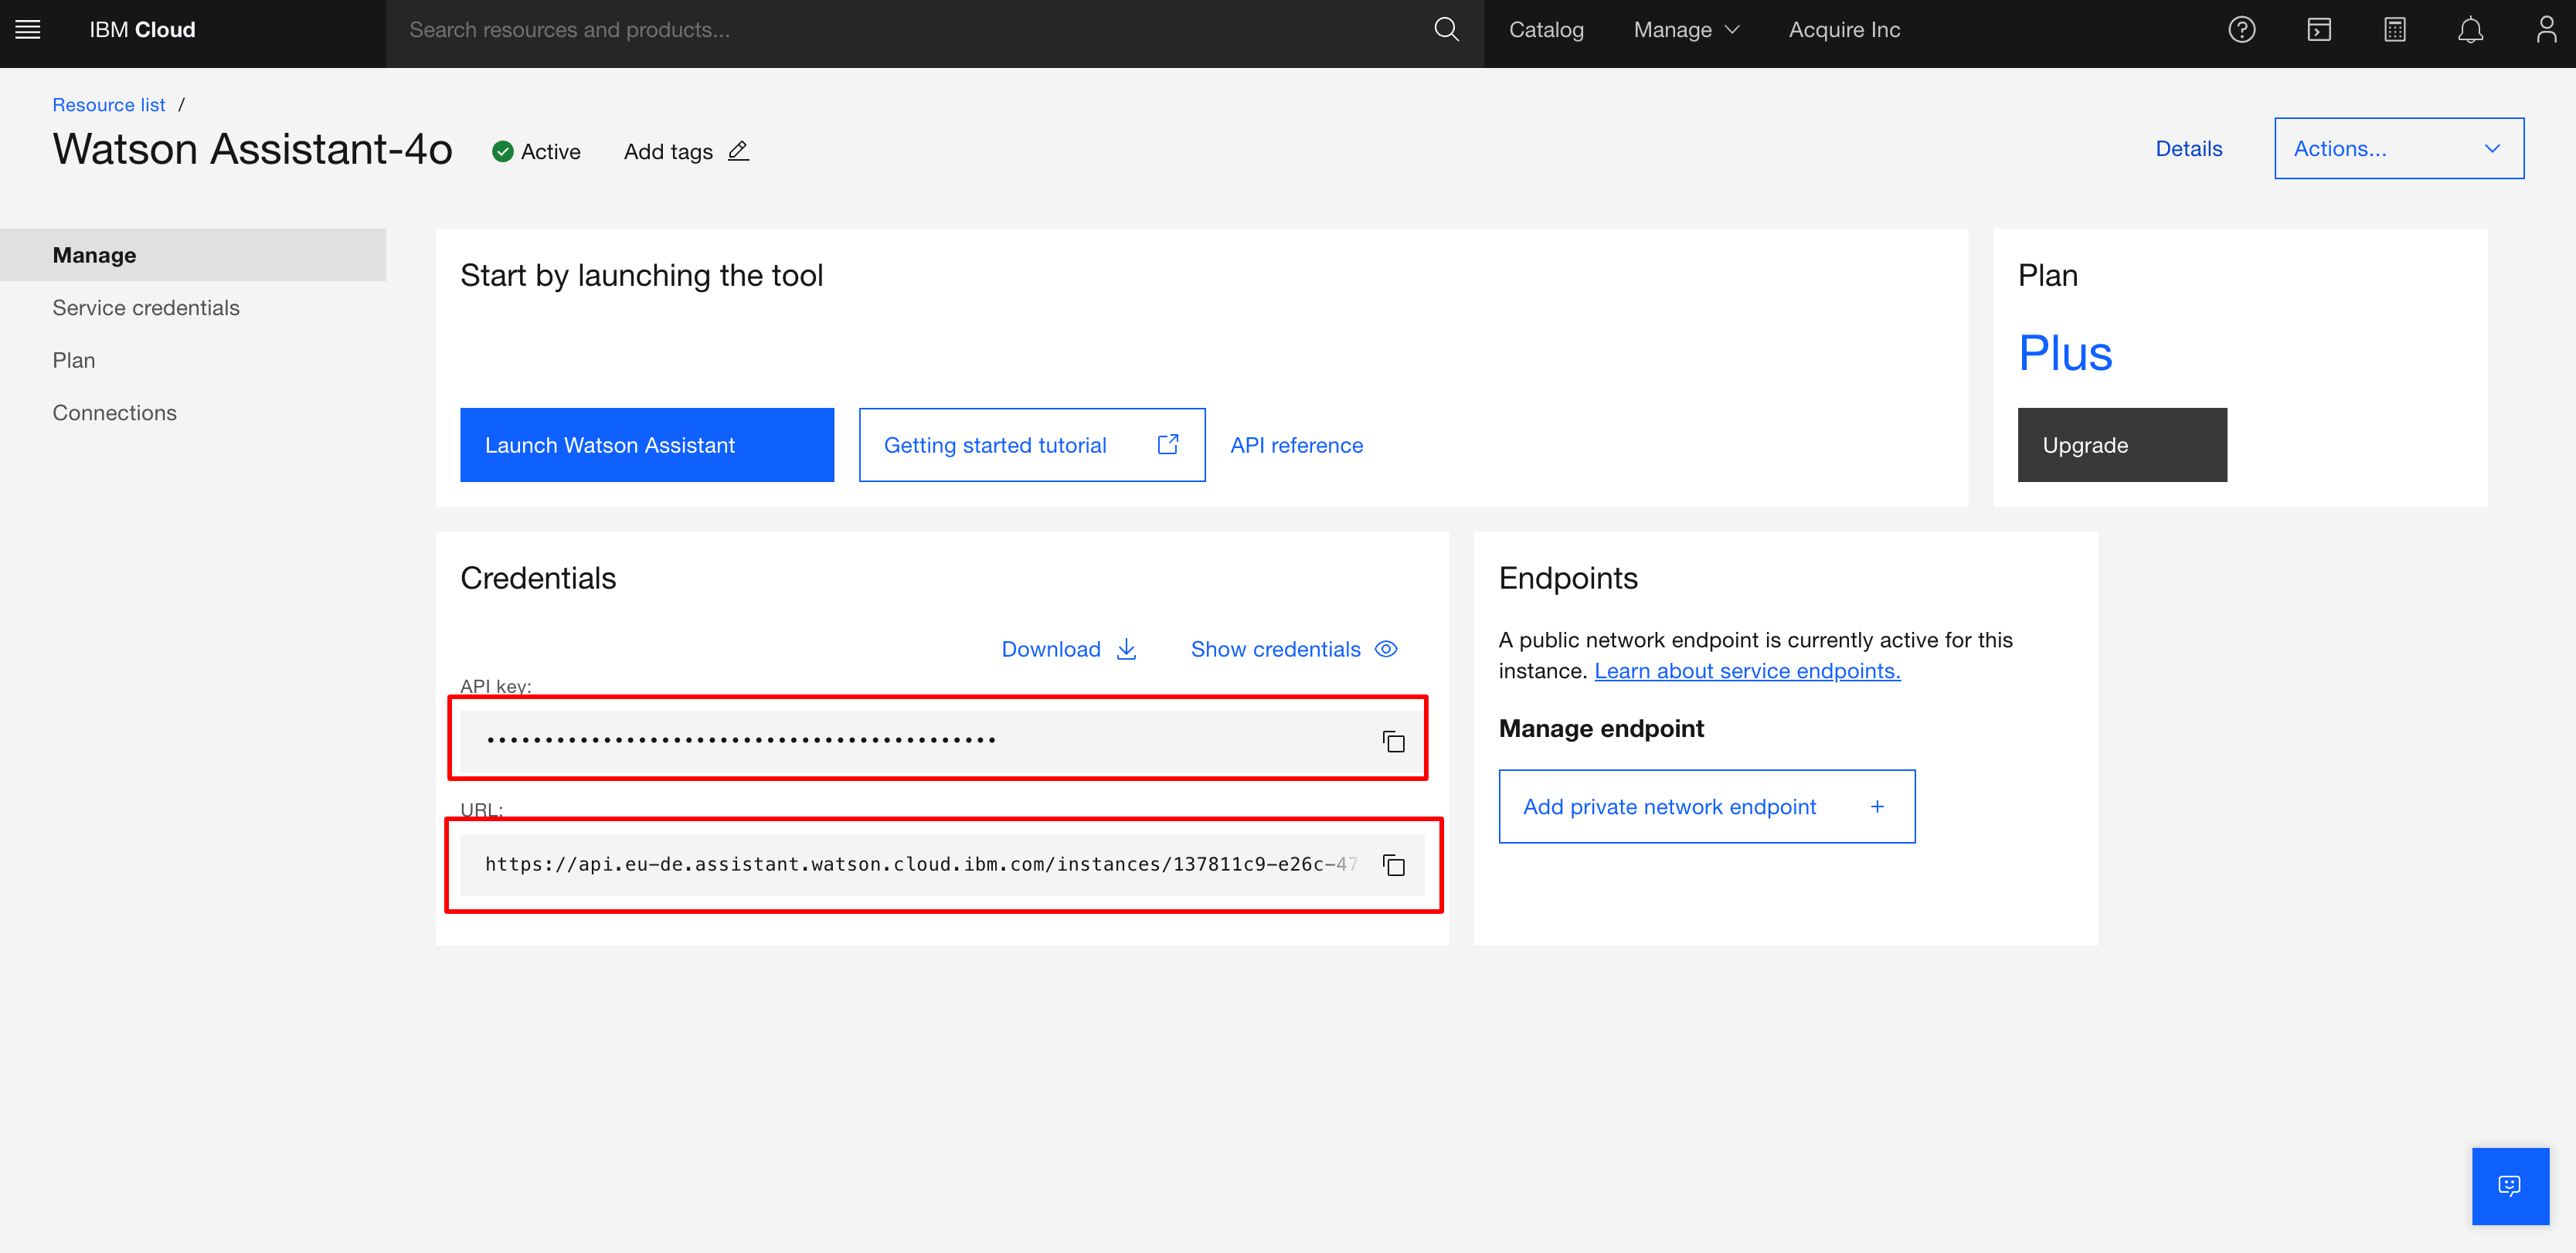
[Note: If your URL includes watsonplatform.net, you will be shown a notice to update the URL in your IBM Watson platform. Kindly update and follow the instructions given there. If your URL does not include watsonplatform.net, you are good to go! ]
Create Your IBM Watson Assistant
step 1: Begin by incorporating your command into the IBM Assistant.
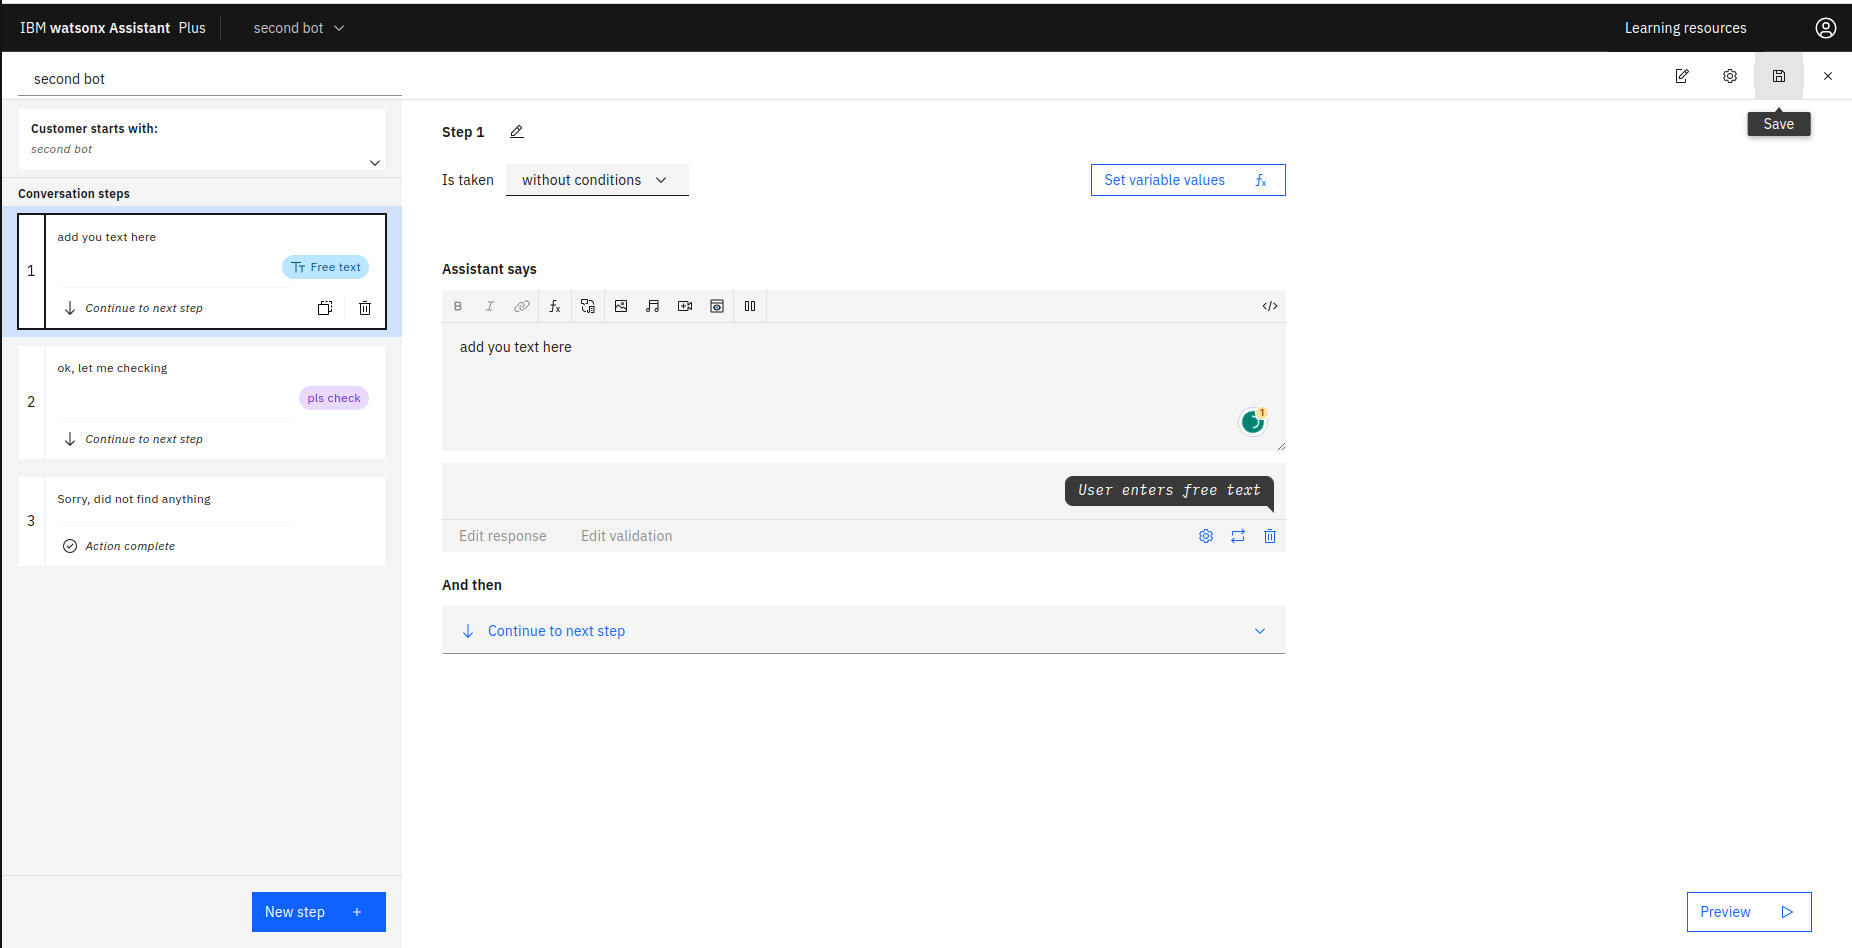
step 2: Proceed to initiate the publication process.
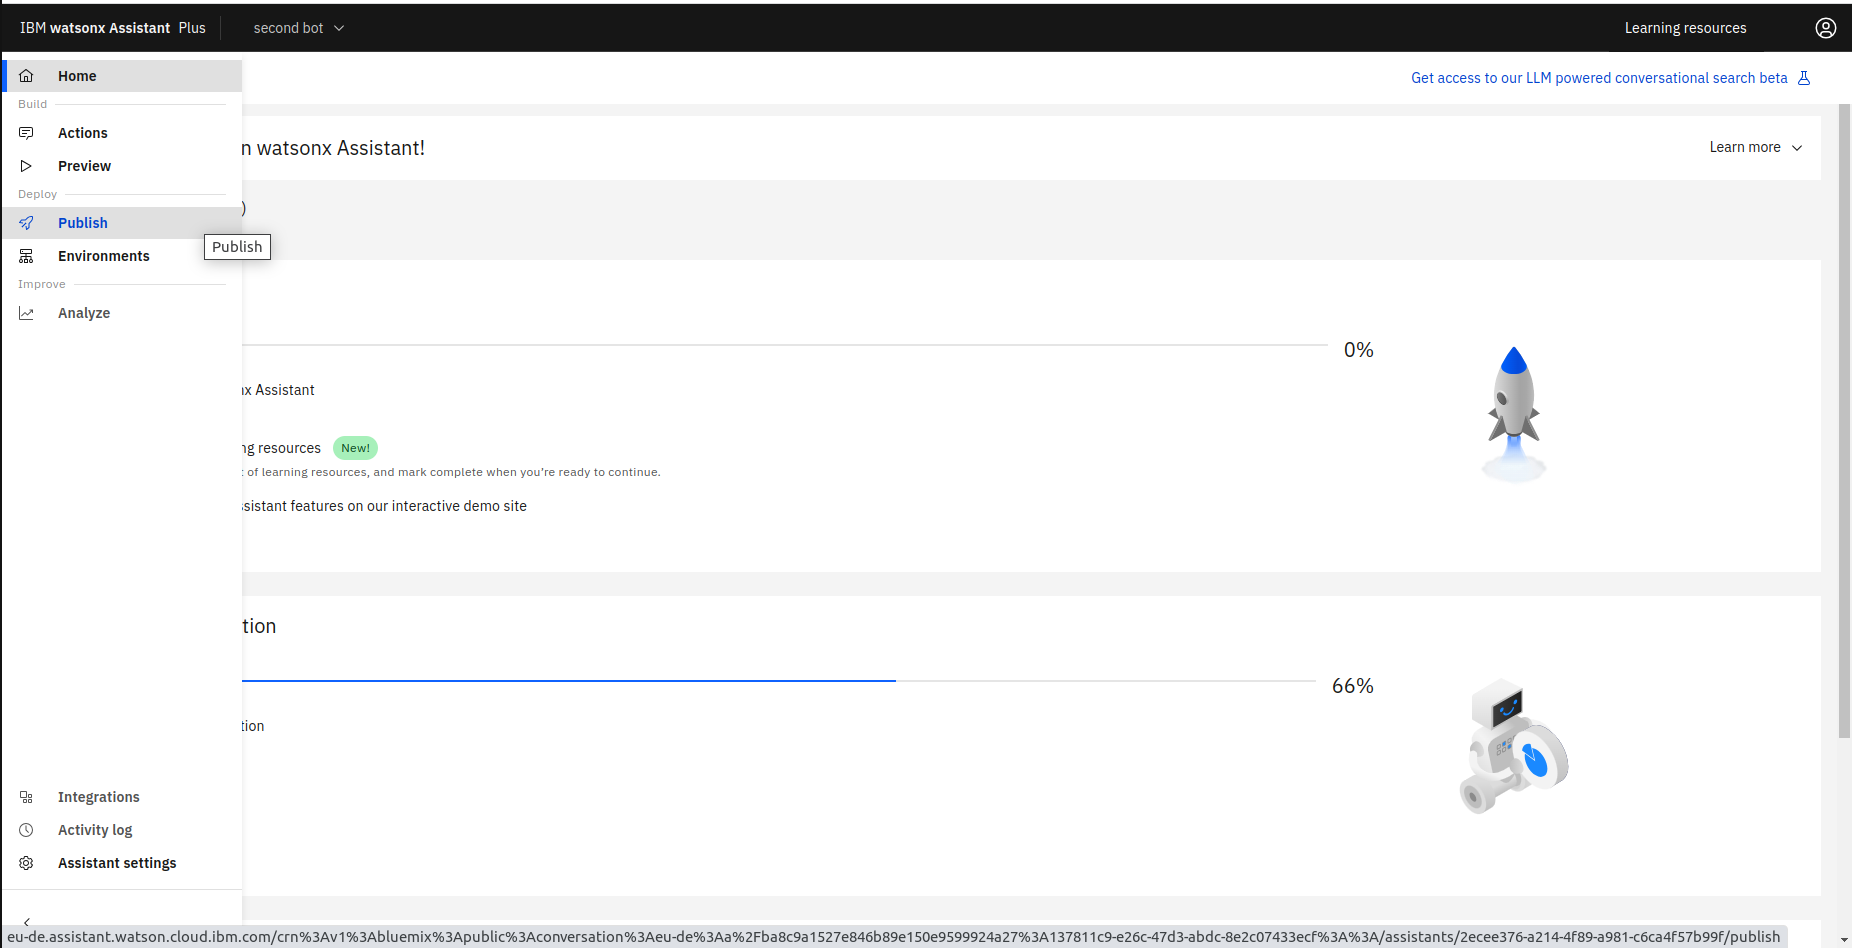
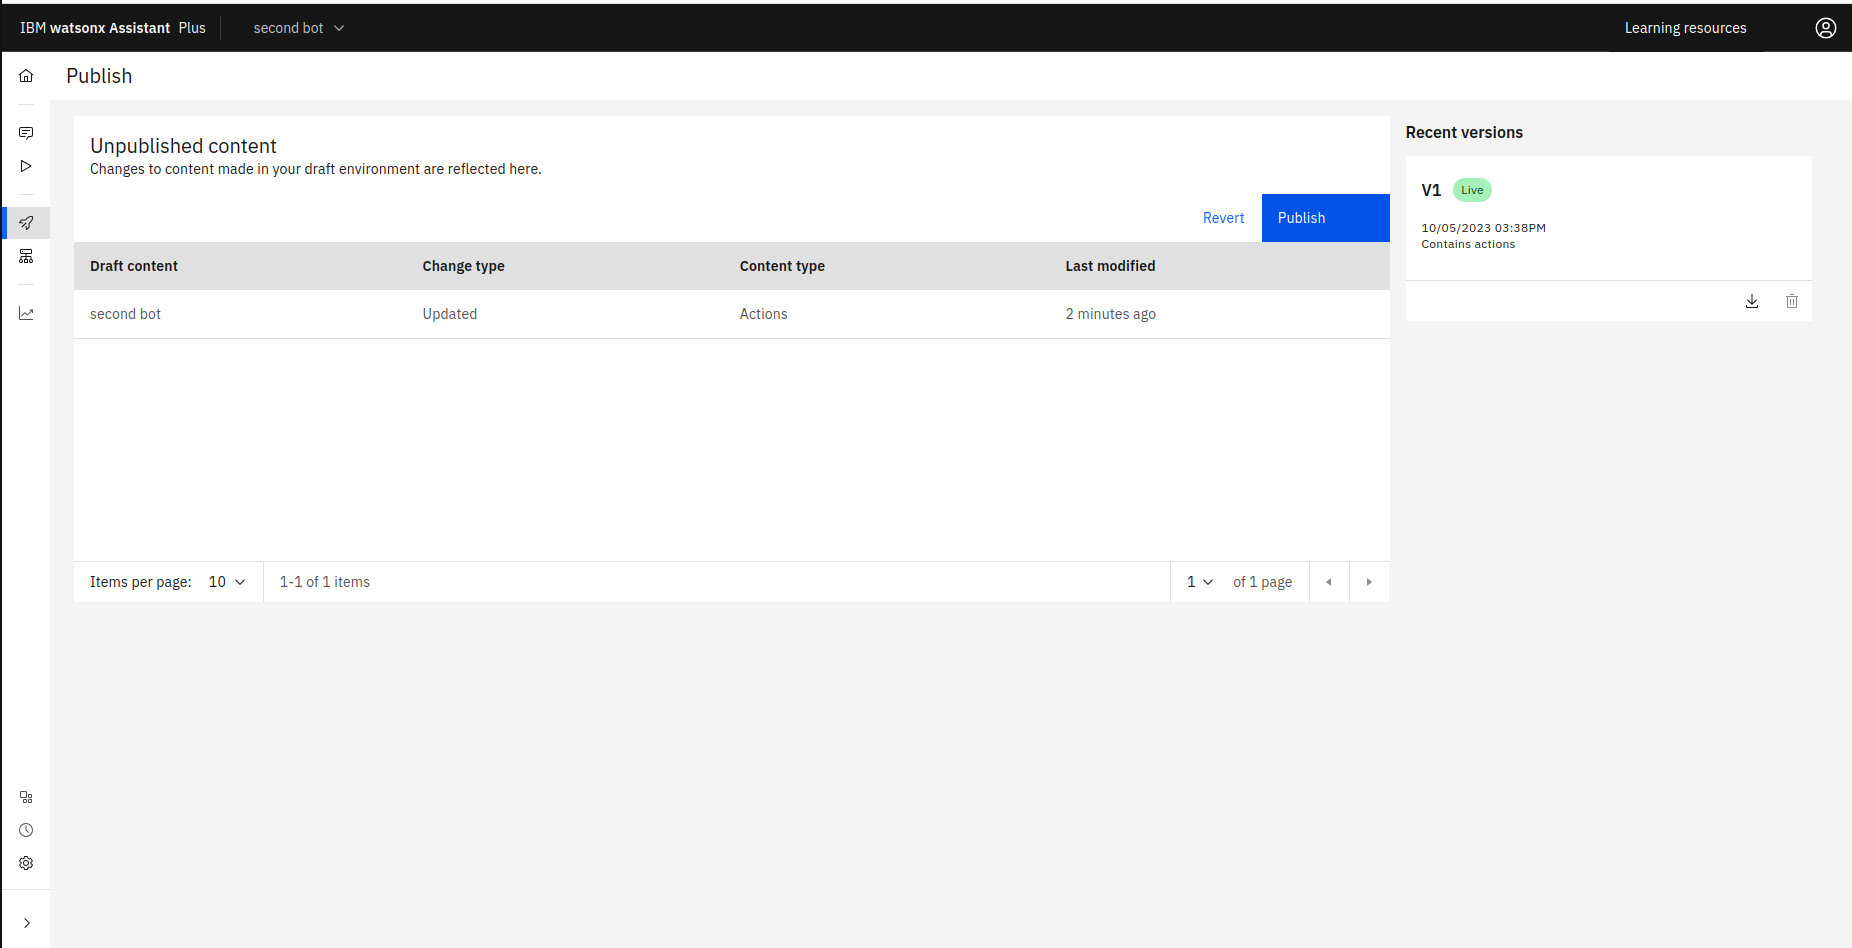
step 3: After publication, retrieve the Live Environment ID and proceed to insert it into the "assistant-id" field of the Acquire system.
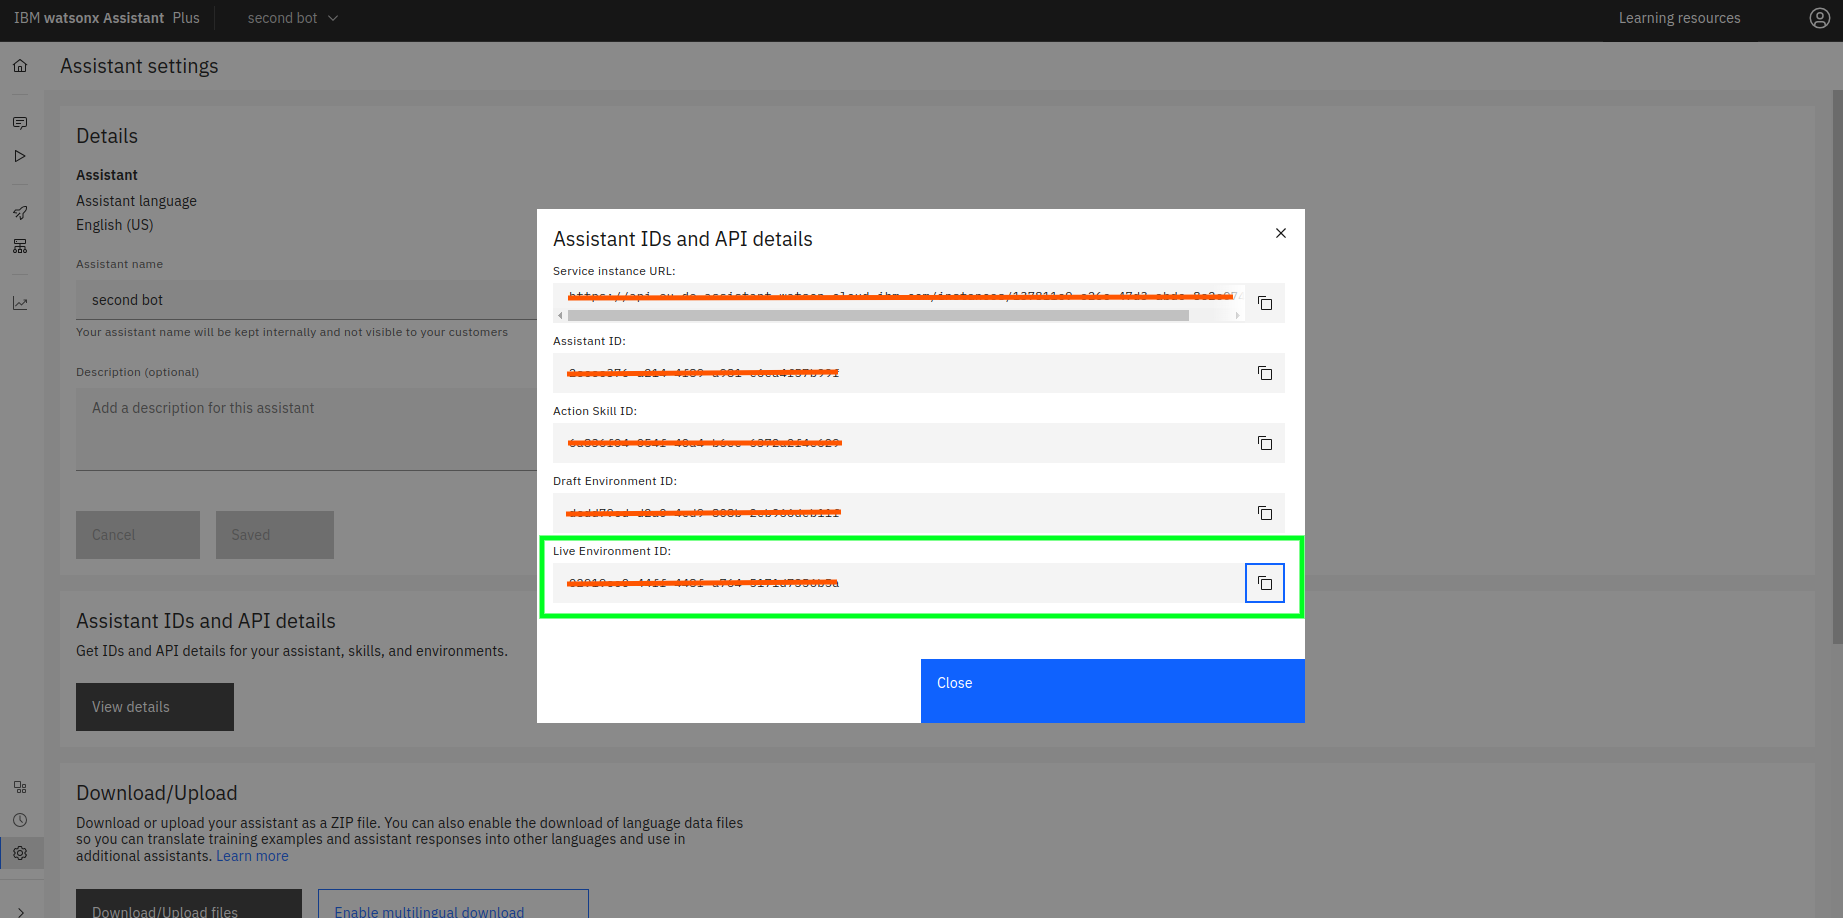
To find your Assistant ID, click on 'Launch Watson Assistant'. It will redirect to the Watson Assistant console page.
Then click 'Assistant Settings' in sidebar.
Find the Assistant IDs & API Details section. Click on 'View details'. Copy the Live Environment ID as shown.
You’re all set! The IBM Watson chatbot is now ready to be integrated with your Acquire account.
Installing IBM Watson in Acquire
Once you have your IBM Watson credentials, go to the Acquire App Store > Chatbots and click on the IBM Watson tile.
Click ‘Install’.
Click ‘Authorize Access’ to authorize the integration.
You’ll be redirected to the Settings tab. In the ‘Client API Key’ field, input your IBM account API key. In the URL, enter your account URL.
In ‘Assistant ID’, enter your Assistant ID.
Then, hit ‘Save’.
Using IBM Watson in Acquire
Next, you can use a Business Rule to engage your chatbot with visitors.
But first, you may want to test out your new bot. To set up a simple Business Rule, go to Settings > Workflows > Business Rules. Click on ‘New Rule’ and choose ‘Chat’ as your ‘Channel’ and ‘On New Conversation’ as your ‘Trigger Type’. Then press ‘Create’.
Create a new branch, and choose ‘Assign Bot’. From the bot drop-down menu, select ‘IBM Watson’.
Your Business Rule should look like the image below.
‘Save’ the Business Rule and use the toggle button to activate it (right, green). Be sure to check that no other Business Rules are overriding it.
Go to your Dashboard, and click on ‘Go to Chat Simulate Page’.
Once there, engage the bot in a conversation by clicking on the launcher and beginning a new conversation. The bot should respond with the text you’ve entered.
To learn more about IBM Watson’s Assistant, check out IBM’s documentation.
Video Ref - https://www.loom.com/share/bdd55c6737b7495dabd8537519339101
Having trouble? Reach out to support@acquire.io.
Was this article helpful?


