Knowledge Base
FAQ: How do I customize the Knowledge Base?
Curate an on-brand experience for your visitors by customizing your Knowledge Base. In addition to adding a custom domain, you may also change its appearance.
In this article:
- Using the Editing Toolbar
- Customizing the Assets
- Customizing the CSS
Using the Editing Toolbar
Click on the Knowledge Base you’d like to edit and then click on the three dots (‘...’) next to the Knowledge Base and select ‘Edit Theme Settings’.
You’ll be brought to the preview page where you may edit the elements by clicking on them.
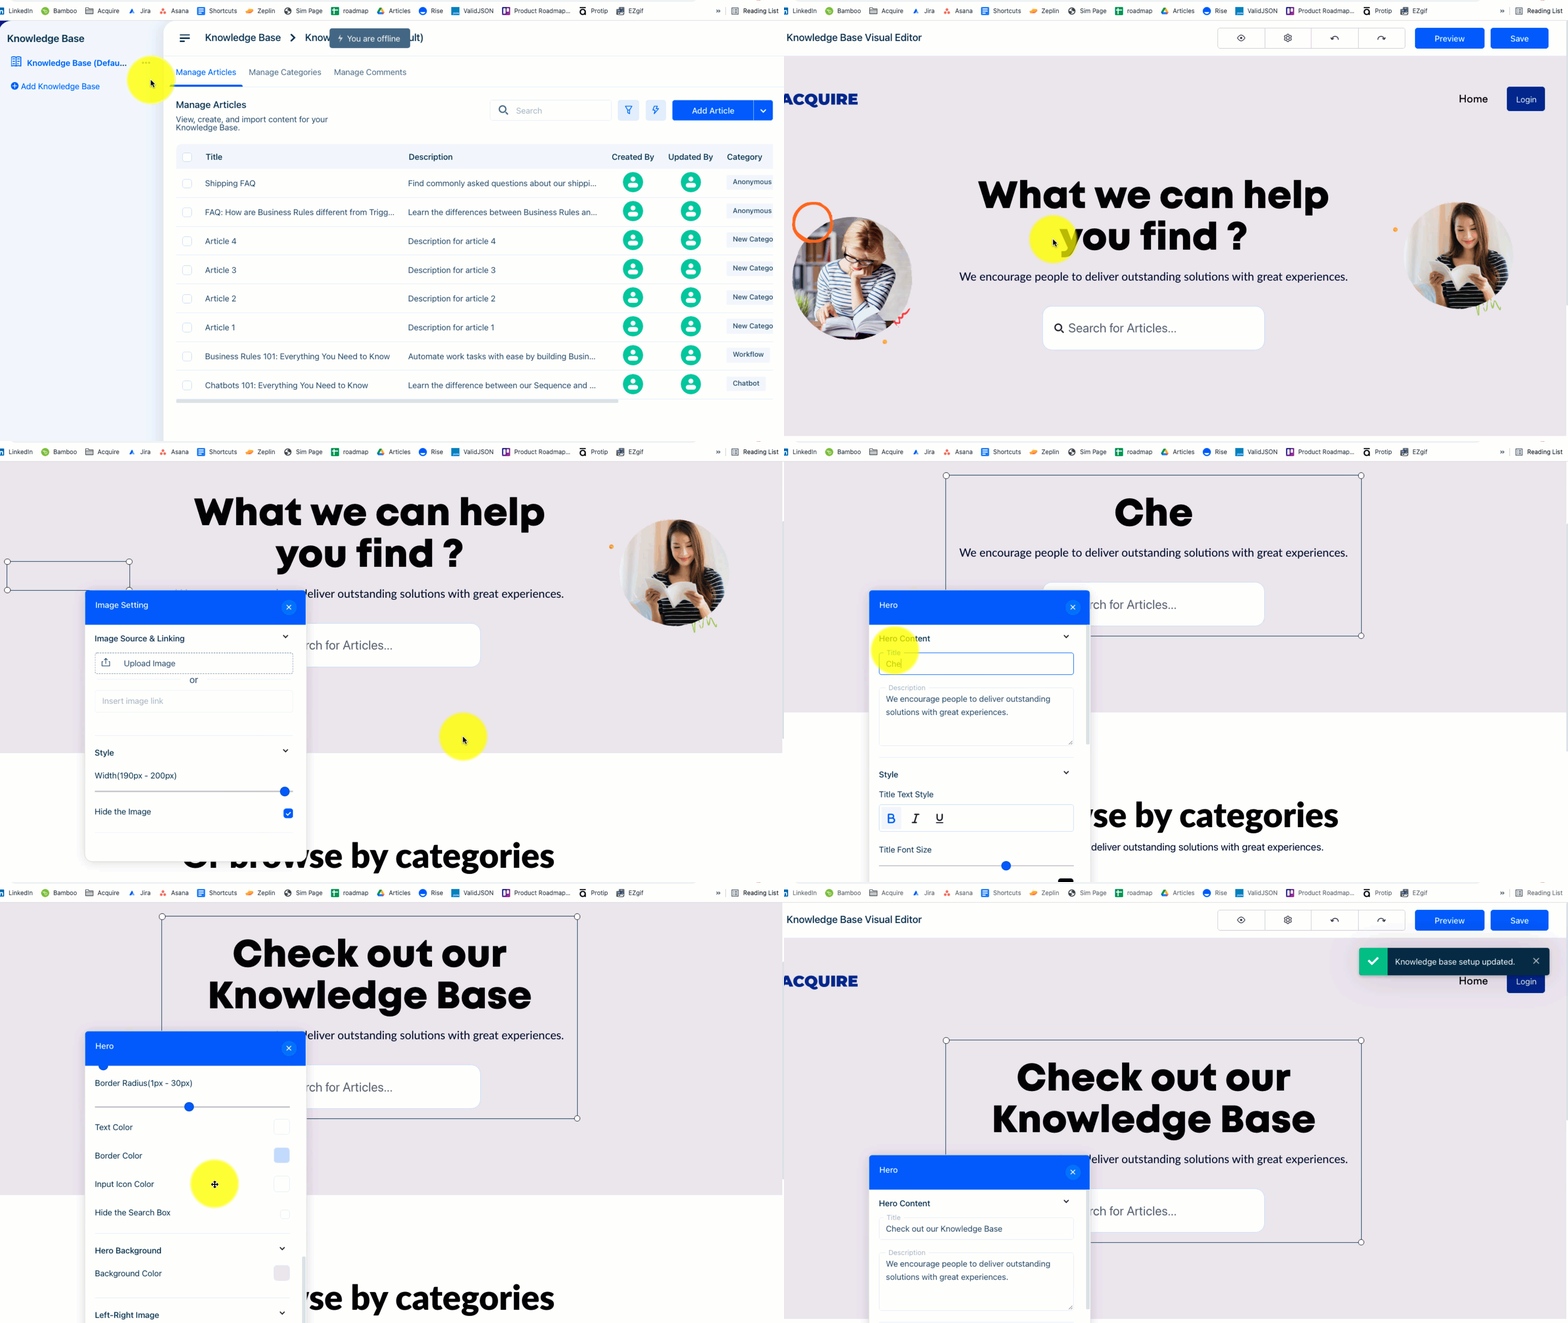
Click on the assets you'd like to edit.
At the top of the preview page you’ll find the editing toolbar.

Use the eye icon to view a live preview of the site
Click on the gear to open the Advanced Settings menu to change the CSS or theme
Use the front or back arrows to revert changes
Customizing the Assets
Logo and Favicon
Favicons are the logos that appear in front of the website title on most browsers. A favicon is essential for branding.
To change the favicon logo on the Acquire Support page, go to the Acquire logo in the upper left corner.
Double click on the Acquire logo to open the Logo and Favicon menu. You may upload a new logo and favicon image. Keep these dimensions in mind:
- The Logo width may be between 40px - 200px.
- The Favicon should be a 16 x 16px square.
Navigation Menu
Add up to five navigation links across the top of your Knowledge Base. Click near the Home link in the top-right corner of the Knowledge Base to open the Navigation setup menu.
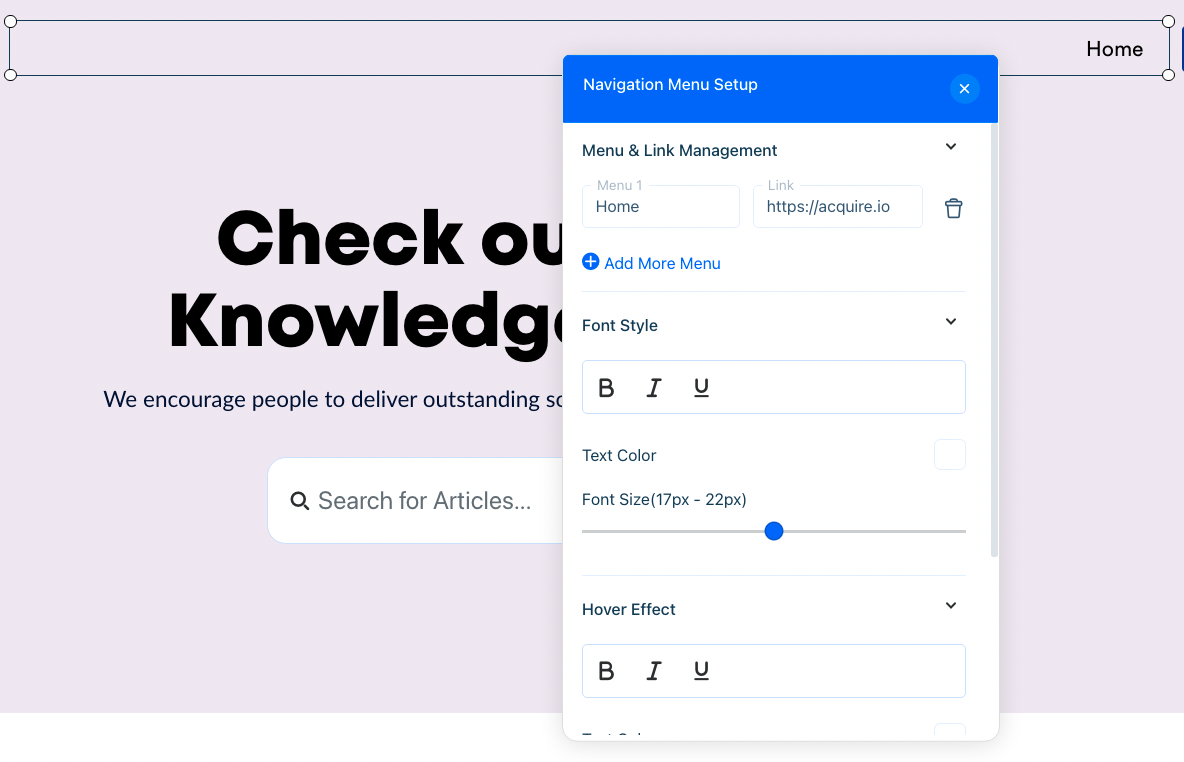
- Add menu items and links
- Change the font style
- Change the font size (12 px - 22px)
- Add a hover effect
Left and Right Images - Upload the images or hide them by clicking on the ‘Hide the Image’ checkbox. Once hidden, you’ll be able to add the images back by opening the Hero Content menu and selecting left and right image.
- Image width may be between 100px - 200px.
Hero Content
The hero content refers to the center text above the search bar.
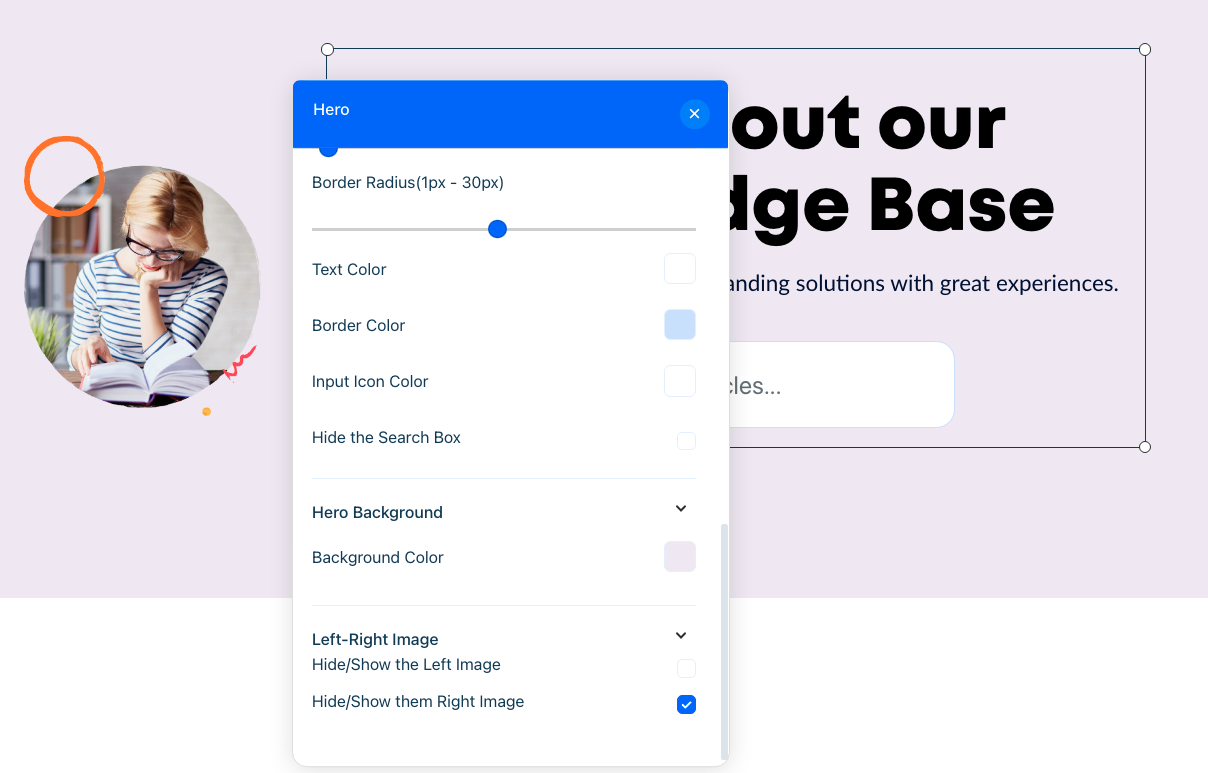
You may edit:
- The title - Defaults to ‘What can we help you find?’
- The description - Defaults to ‘We encourage people to deliver outstanding solutions with great experiences.’
- Title font size, color, and style
- Description font size, color, and style
- The visibility of the search box (show or hide)
- The Input Icon Color (the magnifying glass in the search box)
- Search box placeholder text
- The thickness of the search box border
- The border radius of the search box (rounded or angular corners)
- The background color for the asset - defaults to light violet
Category Hero
Click in the ‘Or browse by categories’ text to open up the Category Hero menu.
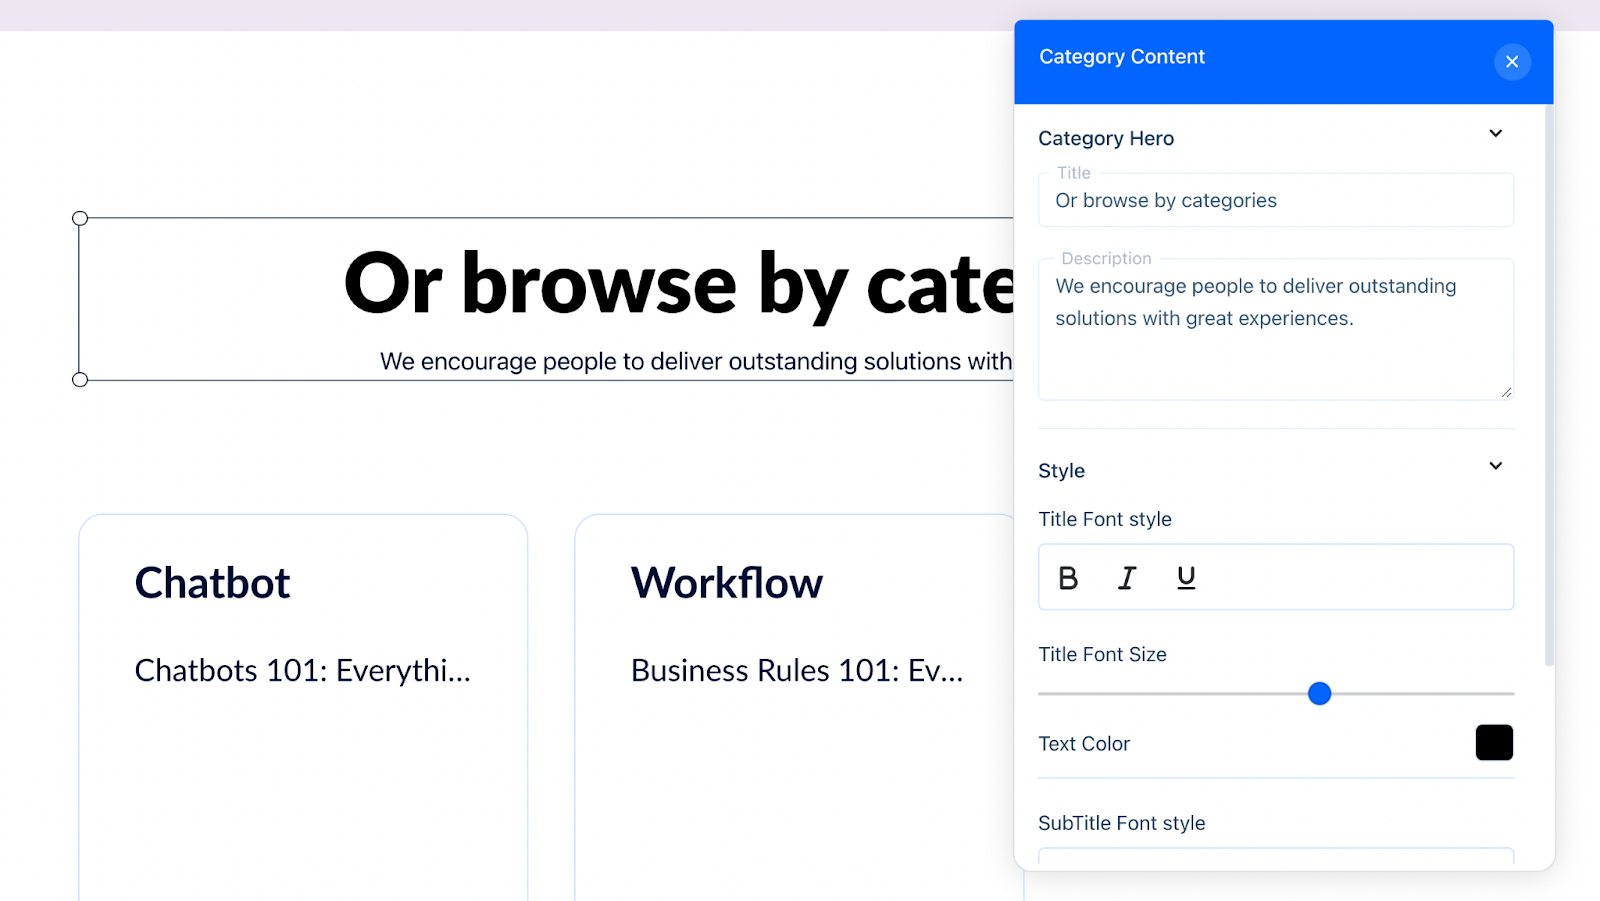
Change:
- The Title - Defaults to ‘Or browse by categories’
- The Description - Defaults to We encourage people to deliver outstanding solutions with great experiences.
- Title font size, color, and style
- Description font size, color, and style
Category List Box
Click near the categories to bring up the category list box.
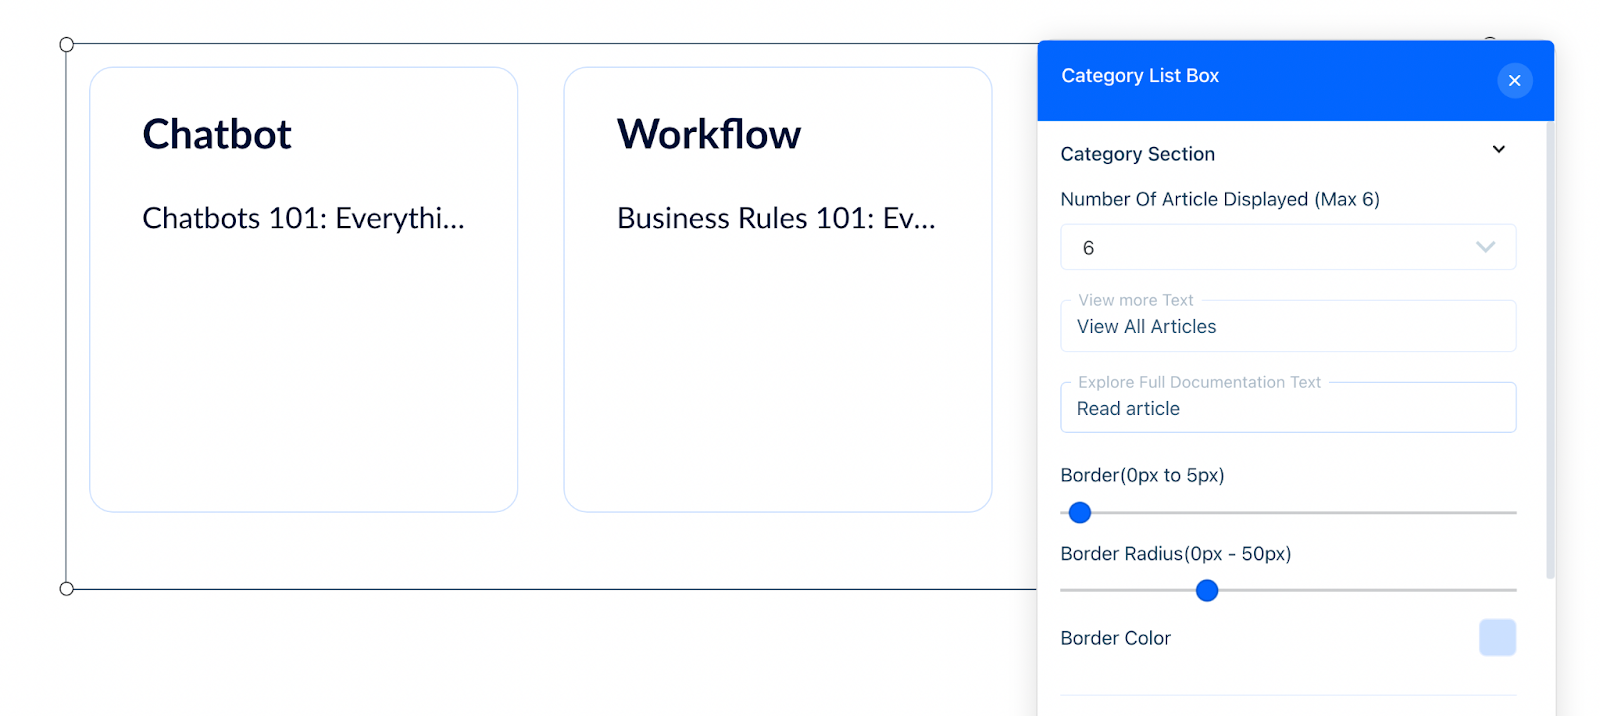
You may change:
- The number of articles displayed (max 6)
- Text to view more text - Defaults to ‘View All Articles’
- Text to explore full documentation - Defaults to ‘Read article’
- Border color and thickness for the categories
- Link style, hover, and color
Footer
Footers are useful for providing links to social media and other parts of your site for easy navigation.
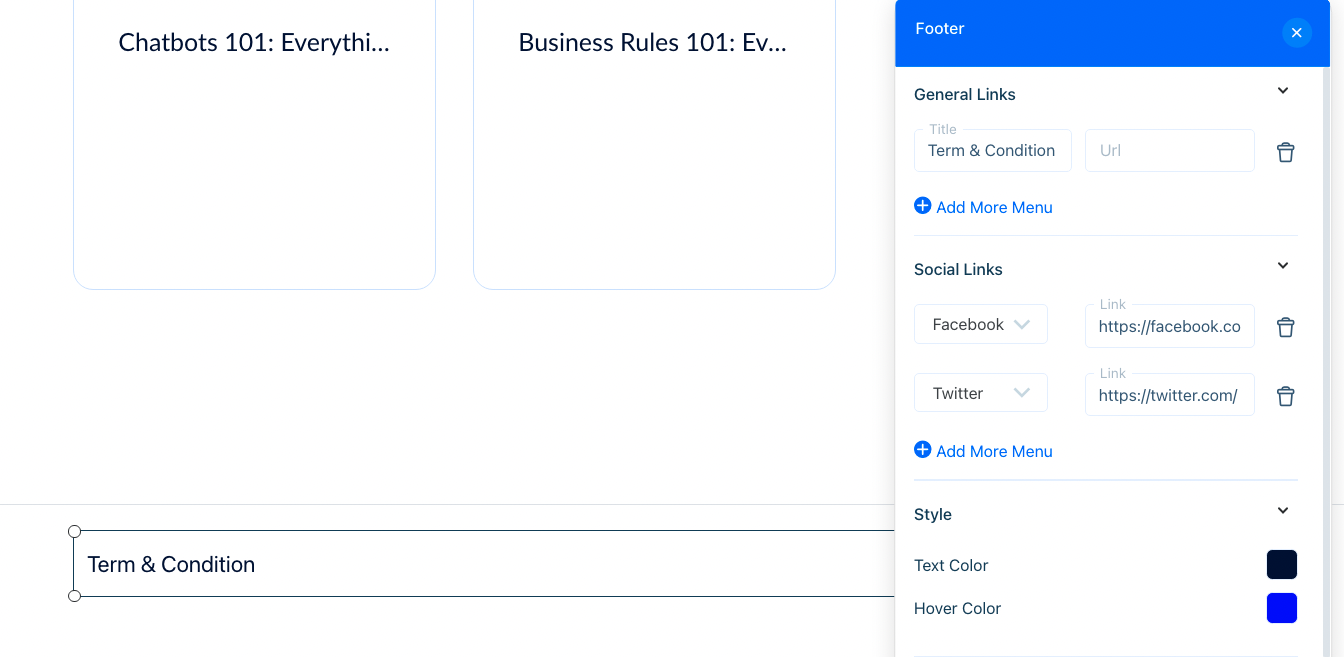
Click near the bottom of the page to edit the footer.
- Add up to four links
- Add up to four social media buttons (Twitter, LinkedIn, Facebook, and Instagram)
- Change the text color and hover color
Customizing CSS
Need advanced customization? Click on the gear icon at the top of the page to open up the Advanced Settings menu.
Use the inspect tools (in a Google Chrome browser) to find elements you’d like to change.
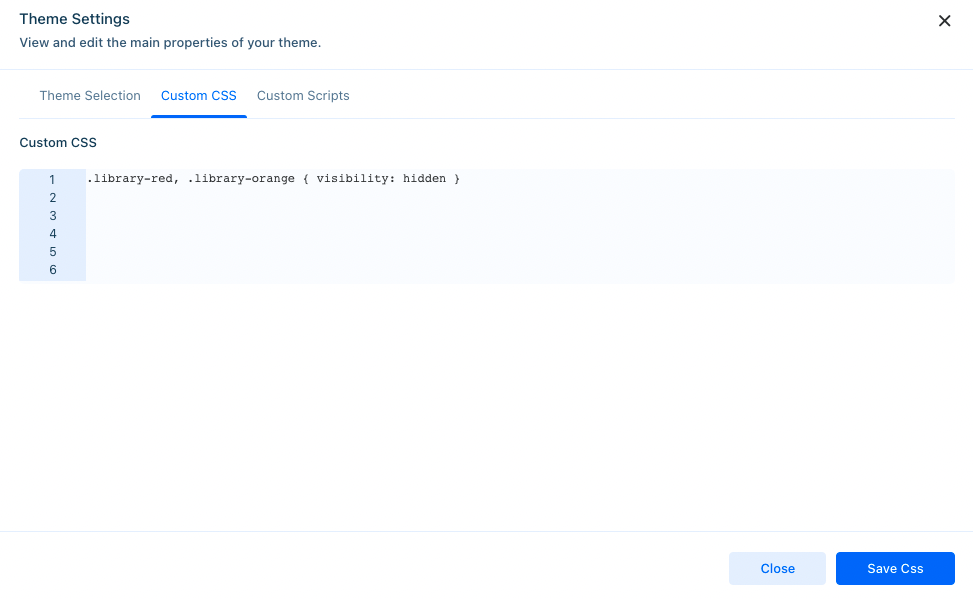
You may change the theme, the CSS, or add scripts to the header. Once you've completed your changes, click on 'Save CSS'.
Viewing Your Changes
To see your changes, ‘Save’ your changes, and then click on the eye icon in the top right toolbar.
Certain browsers may have issues displaying our floating assets. To avoid this, please add the following code to the Custom CSS input field:
.library-red, .library-orange { visibility: hidden }
Having trouble? Reach out to support@acquire.io
Was this article helpful?


